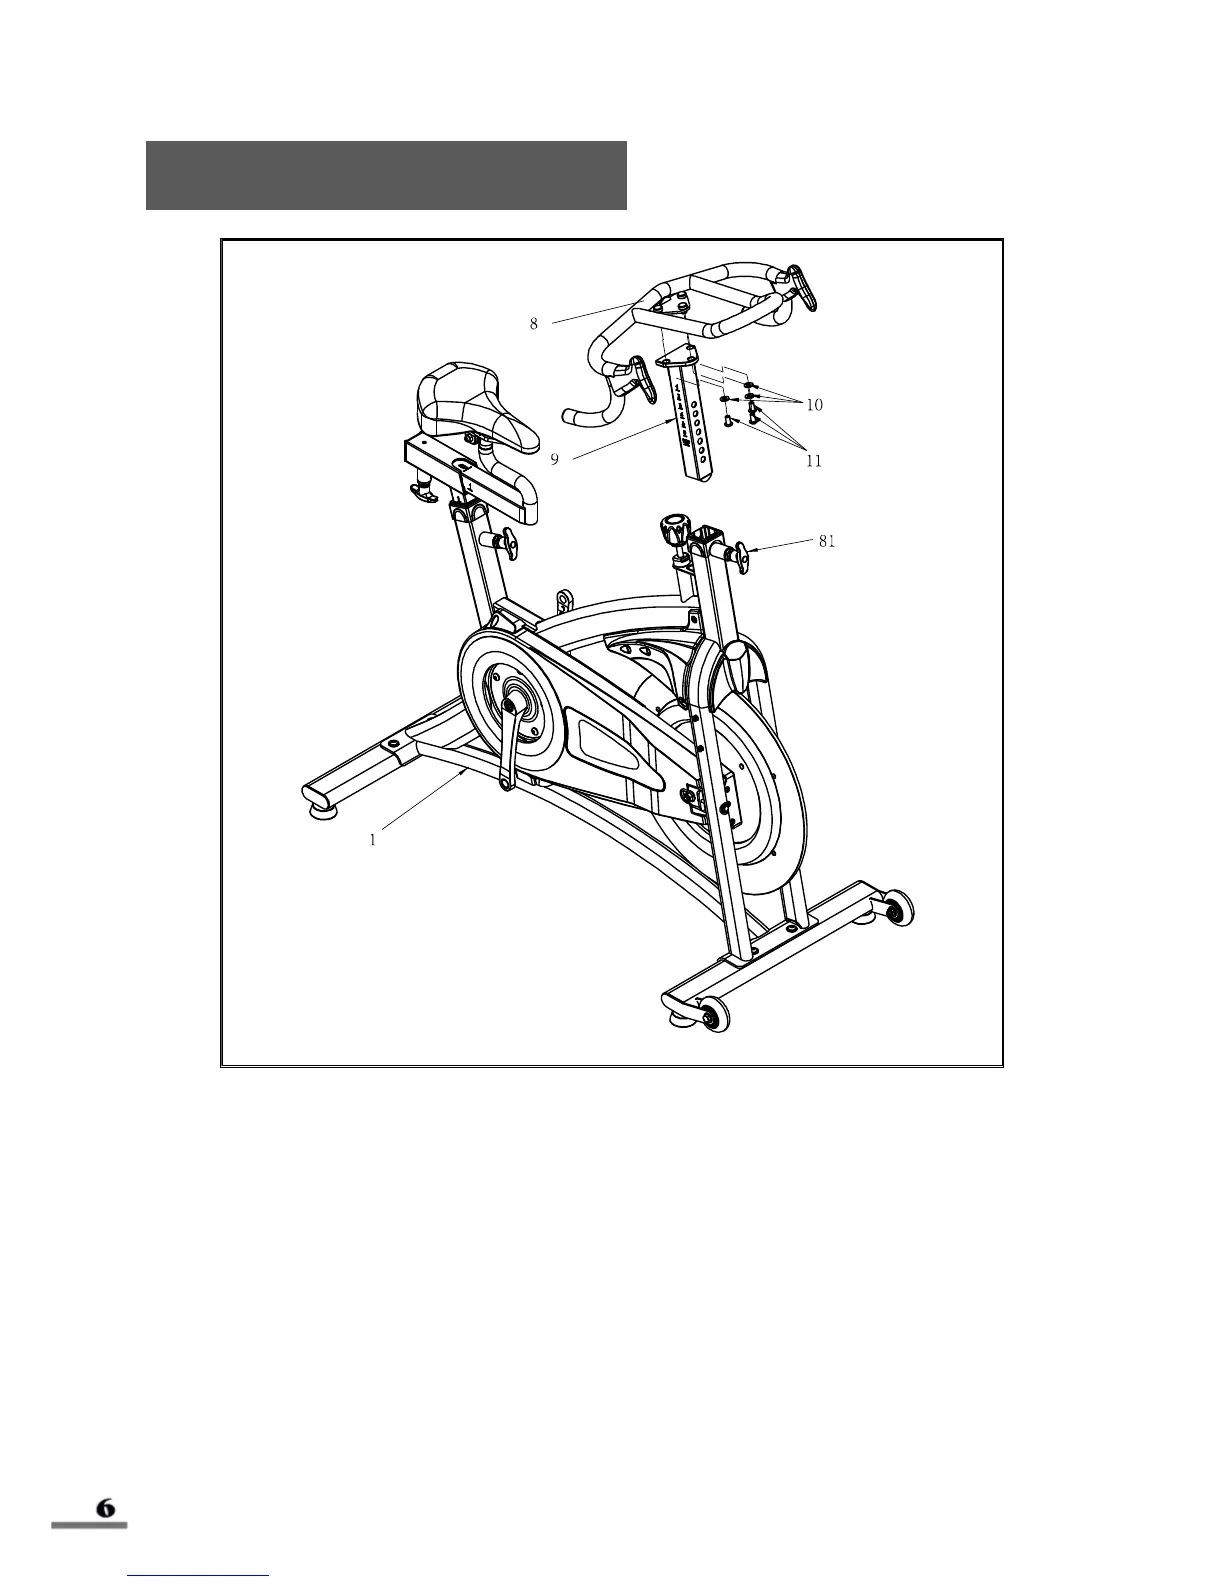
Insert the Handlebar Post (No. 9) into the front tube of the Main Frame (No. 1). Use
the Handlebar Adjustment Knob (No. 81) to adjust the handlebar to the desired
height and secure the handlebar in position.
NOTE: In order to move the Handlebar (No. 8) up and down, you must first loosen
the Handlebar Adjustment Knob (No. 81) then tighten it once you’ve located the
desired height.
Attach the Handlebar (No. 8) onto the Handlebar Post (No. 9) using 3 Hex-Socket
Screws (No. 11) and 3 Flat Washers (No. 10), tighten and secure with L Hex
Wrench (No. B). Use the Handlebar Adjustment Knob (No. 81) to adjust the
handlebar to the desired height.