ASUS WS C621E SAGE
2-1
Chapter 2
Basic Installation
2
2.1 Building your PC system
The diagrams in this section are for reference only. The motherboard layout may vary with
models, but the installation steps are the same for all models.
Chapter 2: Basic Installation
• EnsurethatyouinstallthecorrectCPUdesignedforLGA3647socketonly.
• Uponpurchaseofthemotherboard,ensurethatthePnPcapisonthesocketand
thesocketcontactsarenotbent.ContactyourretailerimmediatelyifthePnPcap
ismissing,orifyouseeanydamagetothePnPcap/socketcontacts/motherboard
components.ASUSwillshoulderthecostofrepaironlyifthedamageisshipment/
transit-related.
• Theproductwarrantydoesnotcoverdamagetothesocketcontactsresultingfrom
incorrectCPUinstallation/removal,ormisplacement/loss/incorrectremovalofthePnP
cap.
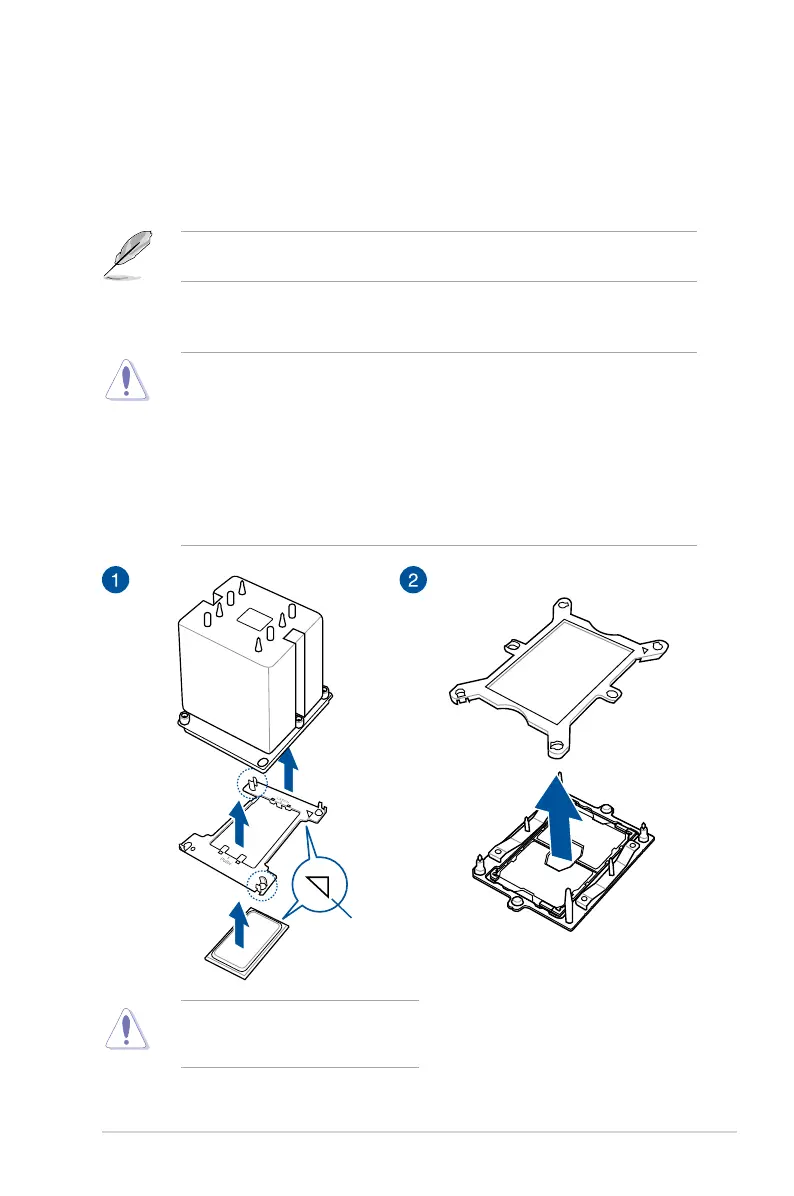
2.1.1 CPU and heatsink installation
Triangle mark
ApplytheThermalInterfaceMaterialto
theCPUheatsinkandCPUbeforeyou
installtheheatsinkandfan,ifnecessary.
 Loading...