2-16
Chapter 2: Basic Installation
Chapter 2
2.2 BIOS update utility
USB BIOS Flashback
USBBIOSFlashbackallowsyoutoeasilyupdatetheBIOSwithoutenteringtheexisting
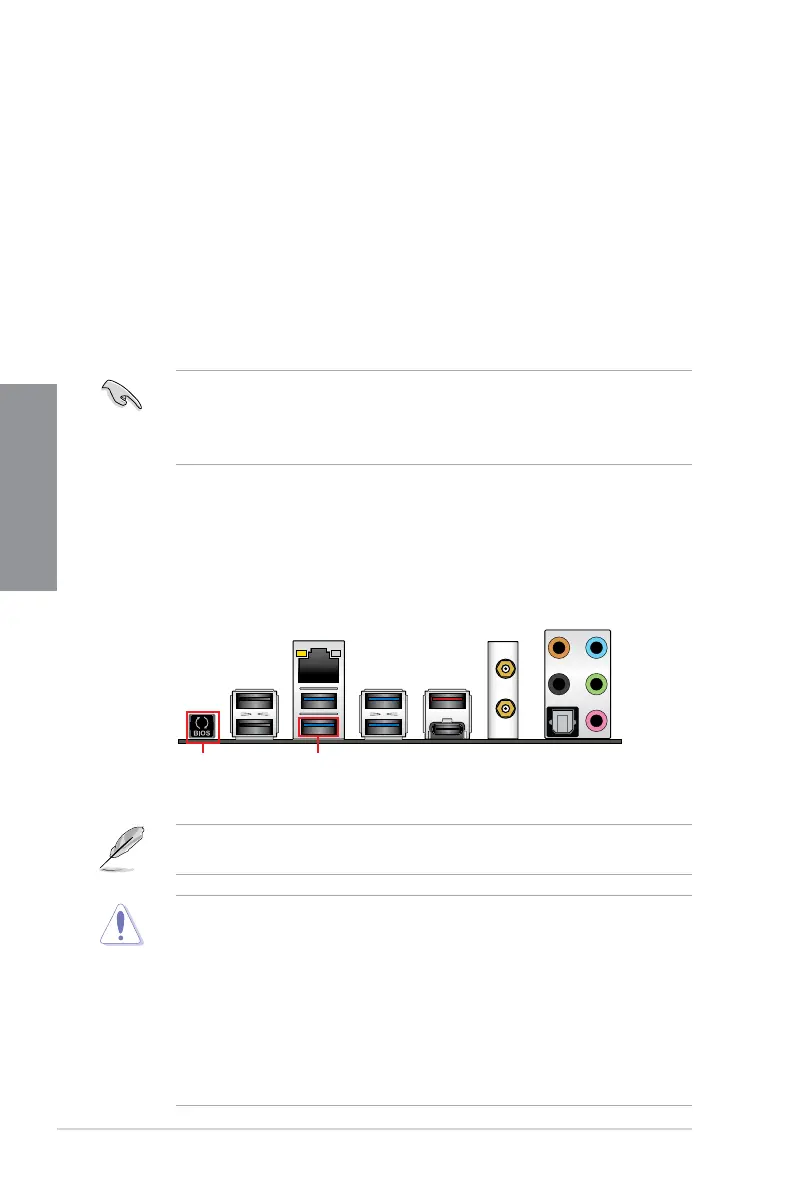
BIOS or operating system. Simply insert a USB storage device to the USB port (the USB port
hole marked in green on the I/O shield) then press the USB BIOS Flashback button for three
seconds to automatically update the BIOS.
To use USB BIOS Flashback:
1. Place the bundled support DVD to the optical drive and install the USB BIOS
FlashbackWizard.Followtheonscreeninstructionstocompletetheinstallation.
2. Insert the USB storage device to the USB Flashback port.
• WerecommendyoutouseaUSB2.0storagedevicetosavethelatestBIOSversion
for better compatibility and stability.
• Refertosection2.3.1 Rear I/O connection for the location of the USB port that
supports USB BIOS Flashback.
3. LaunchtheUSBBIOSFlashbackWizardtoautomaticallydownloadthelatestBIOS
version.
4. Shut down your computer.
5. Press the BIOS Flashback button for three seconds until the Flashback LED blinks
three times, indicating that the BIOS Flashback function is enabled.
• Donotunplugportabledisk,powersystem,orpresstheCLR_CMOSbuttonwhile
BIOS update is ongoing, otherwise update will be interrupted. In case of interruption,
please follow the steps again.
• Ifthelightashesforvesecondsandturnsintoasolidlight,thismeansthat
the BIOS Flashback is not operating properly. This may be caused by improper
installationoftheUSBstoragedeviceandlename/leformaterror.Ifthisscenario
happens, please restart the system to turn off the light.
• UpdatingBIOSmayhaverisks.IftheBIOSprogramisdamagedduringtheprocess
and results to the system’s failure to boot up, please contact your local ASUS Service
Center.
For more BIOS update utilities in BIOS setup, refer to the section 3.11 Updating BIOS in
Chapter 3.
6. Waituntilthelightgoesout,indicatingthattheBIOSupdatingprocessiscompleted.
USB BIOS Flashback portBIOS Flashback button