47
14. Replacement of consumable supplies and component parts
(3) Thermo-sensor unit
Fig. 14-6
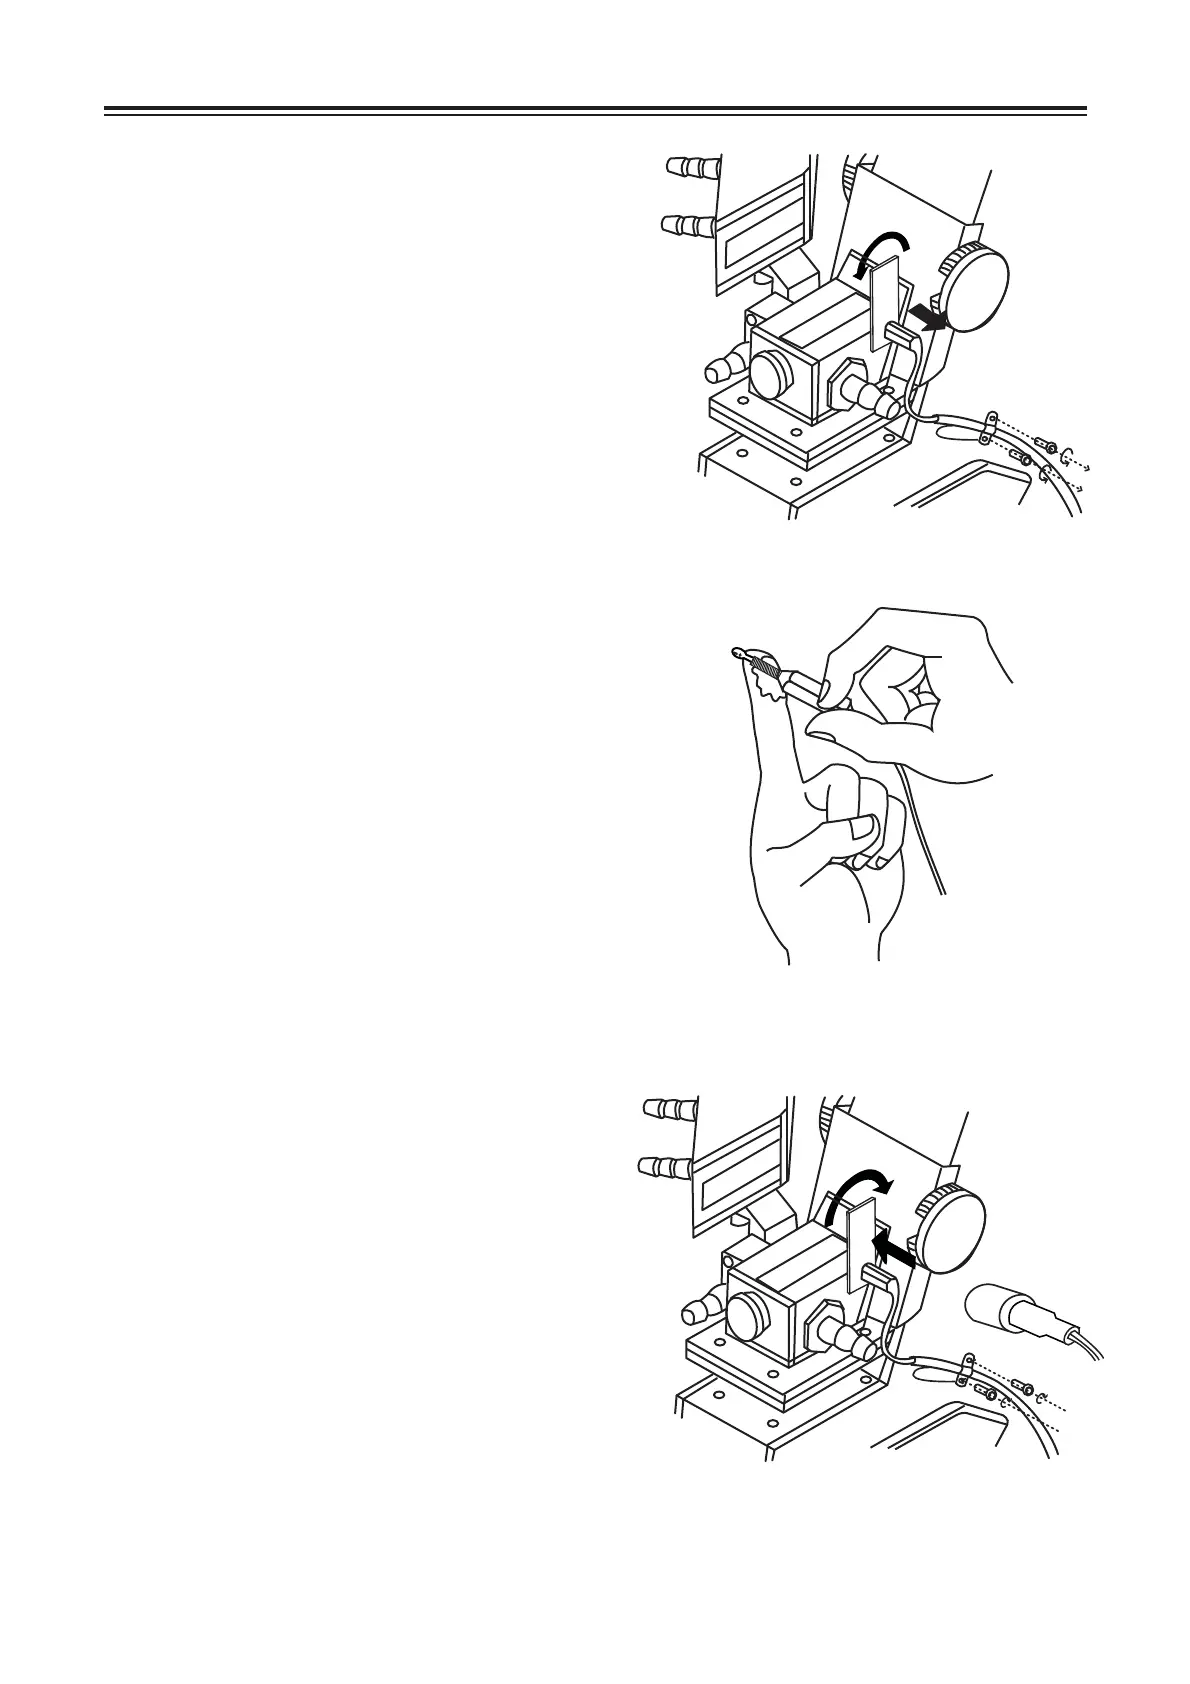
Fig. 14-8
Disconnect the connector from the digital
thermometer.
Remove two Philips (+) screws from the
cable clamp with a Philips screwdriver
(Fig. 14-6).
Open the secondary prism and turn the
metal base of the thermo-sensor unit
counterclockwise (with the 5mm wrench
supplied with the thermo-sensor unit) to
remove it (Fig. 14-6). Then, remove the
thermo-sensor unit from the main prism .
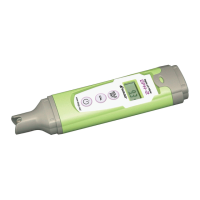
Apply liquid sealant (which is supplied
with the thermo-sensor unit) onto the
threaded part of the thermo-sensor unit
(Fig. 14-7).
a)
b)
c)
d)
Insert the head of the thermo-sensor
unit, and the screw it into the tapped hole
by turning the metal base clockwise with
the 5mm wrench (which is supplied with
the thermo-sensor unit) until it is tightly
fastened (Fig. 14-8).
Attach the cable clamp together with the
cable to the main body as they were
before, and then, fasten them with the two
Philips screws.
Ensure to replace the ground cable on the
left side of the cable clamp (Fig. 14-8).
Insert the cable connector into the
thermometer. And then, turn on the
power switch to see if the thermo-sensor
unit works properly while looking at the
indication of the digital thermometer. If
there is something abnormal in the
temperature indication, check all the
connections and settings.
e)
f)
g)
Fig. 14-7