31 32
6 GUI instruction
6.1 LCD display screen introduction
User can view the information of the inverter operation on the LCD touch screen,
as well as setting the operating parameters. In order to facilitate the operation, a
menu is provided below.
Table 6-1 ATESS HPS50 LCD Menu
After powering on the LCD,it will enter the home page. Then you can begin to read
the information and set the parameters.
Inverter communication state, station number and system time is displayed at the
top of each page of the LCD.
Each page has five commonly used function keys: "run data" “historical
information” "system settings" “Home” at the below of the page. The five
commonly used keys corresponding sub-menu are under the button, and it will be
marked green after selected.
6.2 LCD operation
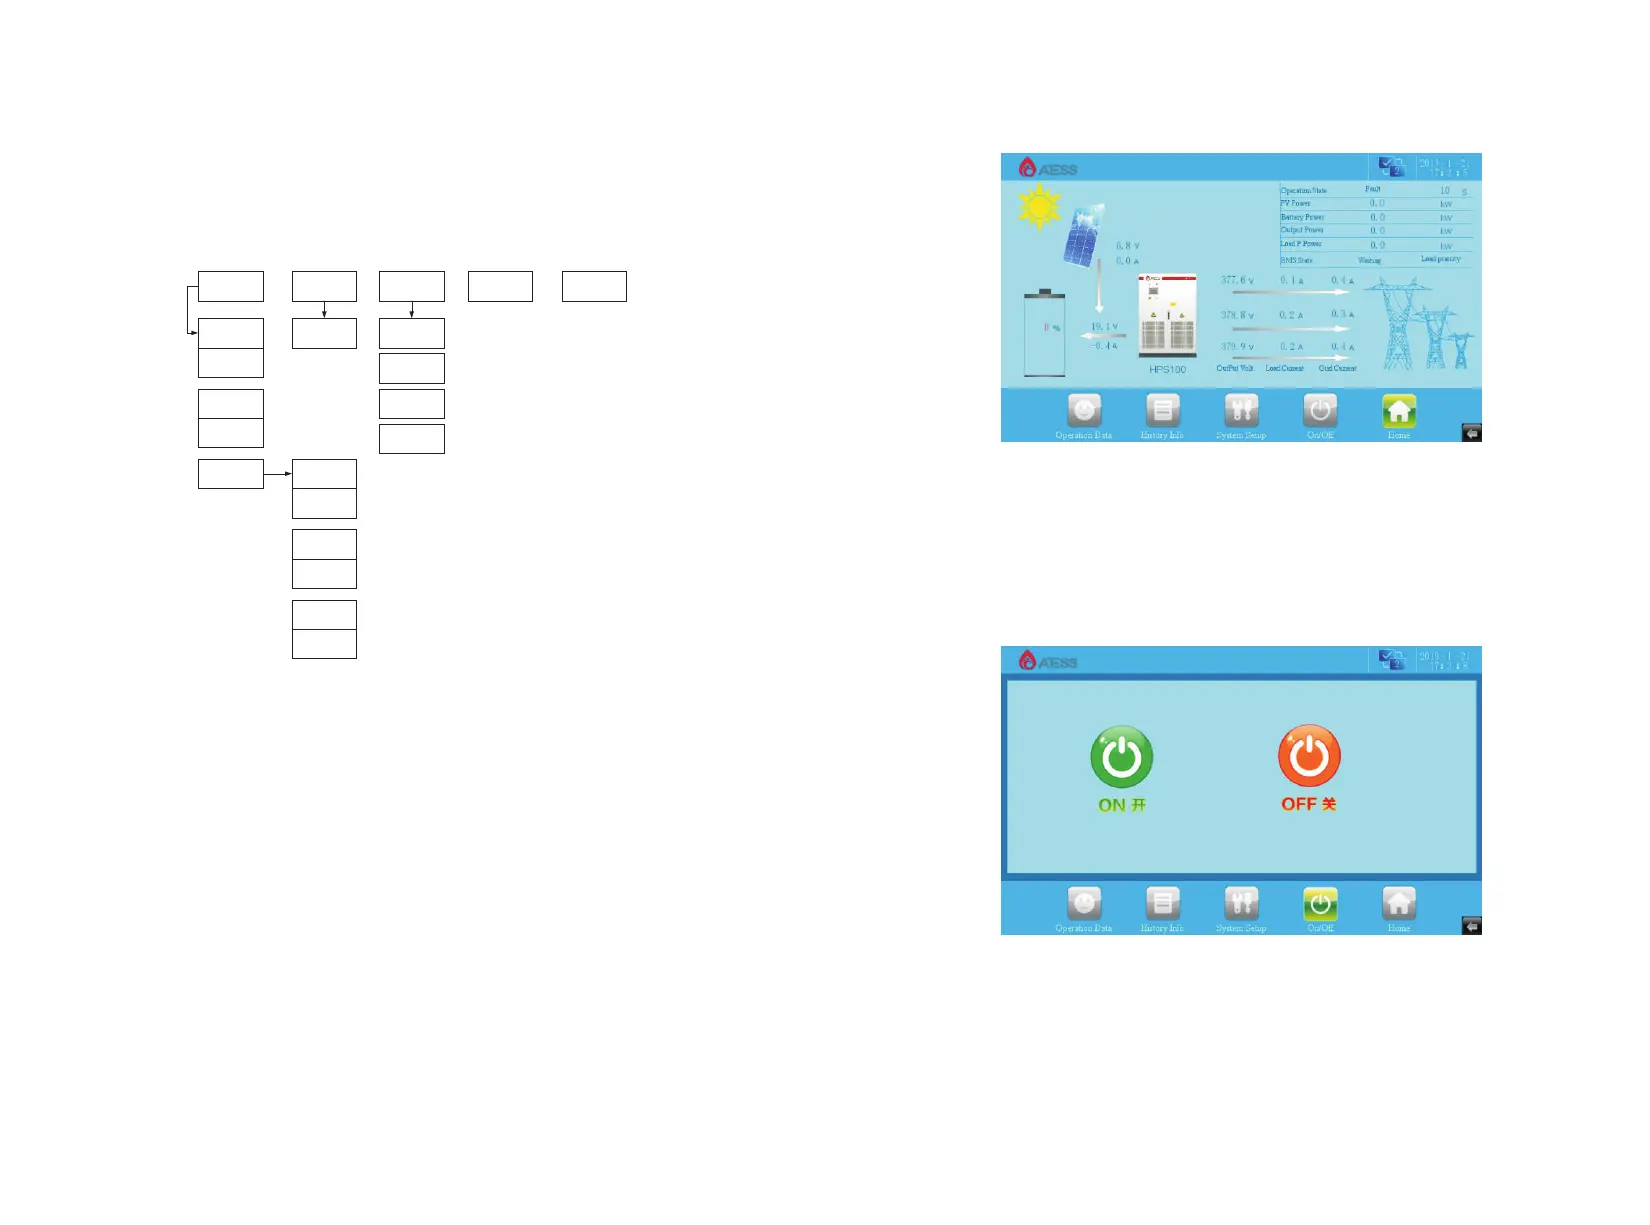
6.2.1 Home page
When powered or Clicking “Home” button in any interface will enter into the Home
page.
The operating status of the inverter output power, safety standard, model, input
and output voltage, current information can be viewed in the page. Pressing the
following key can switch to other pages.
6.2.2 ON/OFF interface
Clicking “ON/OFF” button in any interface will enter into this interface.
There are “ON” and“OFF” button which is used to turn on and turn off the inverter.
6.2.3 System setting
Clicking “System setting” button in any interface will enter into this interface.
Submenu: language settings, time settings, inverter information, maintenance.
Pressing the left button can enter into the corresponding submenu interface. The
default one is language setting interface.
Home
Operation
Data
History Info On/OffSystem Setup
Time setting
Operation
Data_1
General fault Language
Maintenance
Factory Setting
Operation
Data_2
Charge Power
Chart
Disharge Power
Chart
Energy Chart
Charge Month
Generation
Disharge Month
Generation
Charge Year
Generation
Disharge Year
Generation
Charge 20Years
Generation
Disharge
20Years
Generation
HPS30