19
20
4.4 Tools and spare parts required for whole machine installation
Tools and spare parts required for installation is as follows:
• Hoisting crane, forklift or fork lift truck (with the capacity for bearing the weight of
the inverter)
• Torque wrench
• Screwdriver
• Wire stripper
• Terminal crimping machine
• Heat dryer
• Megger and multimeter
4.5 Mechanical installation
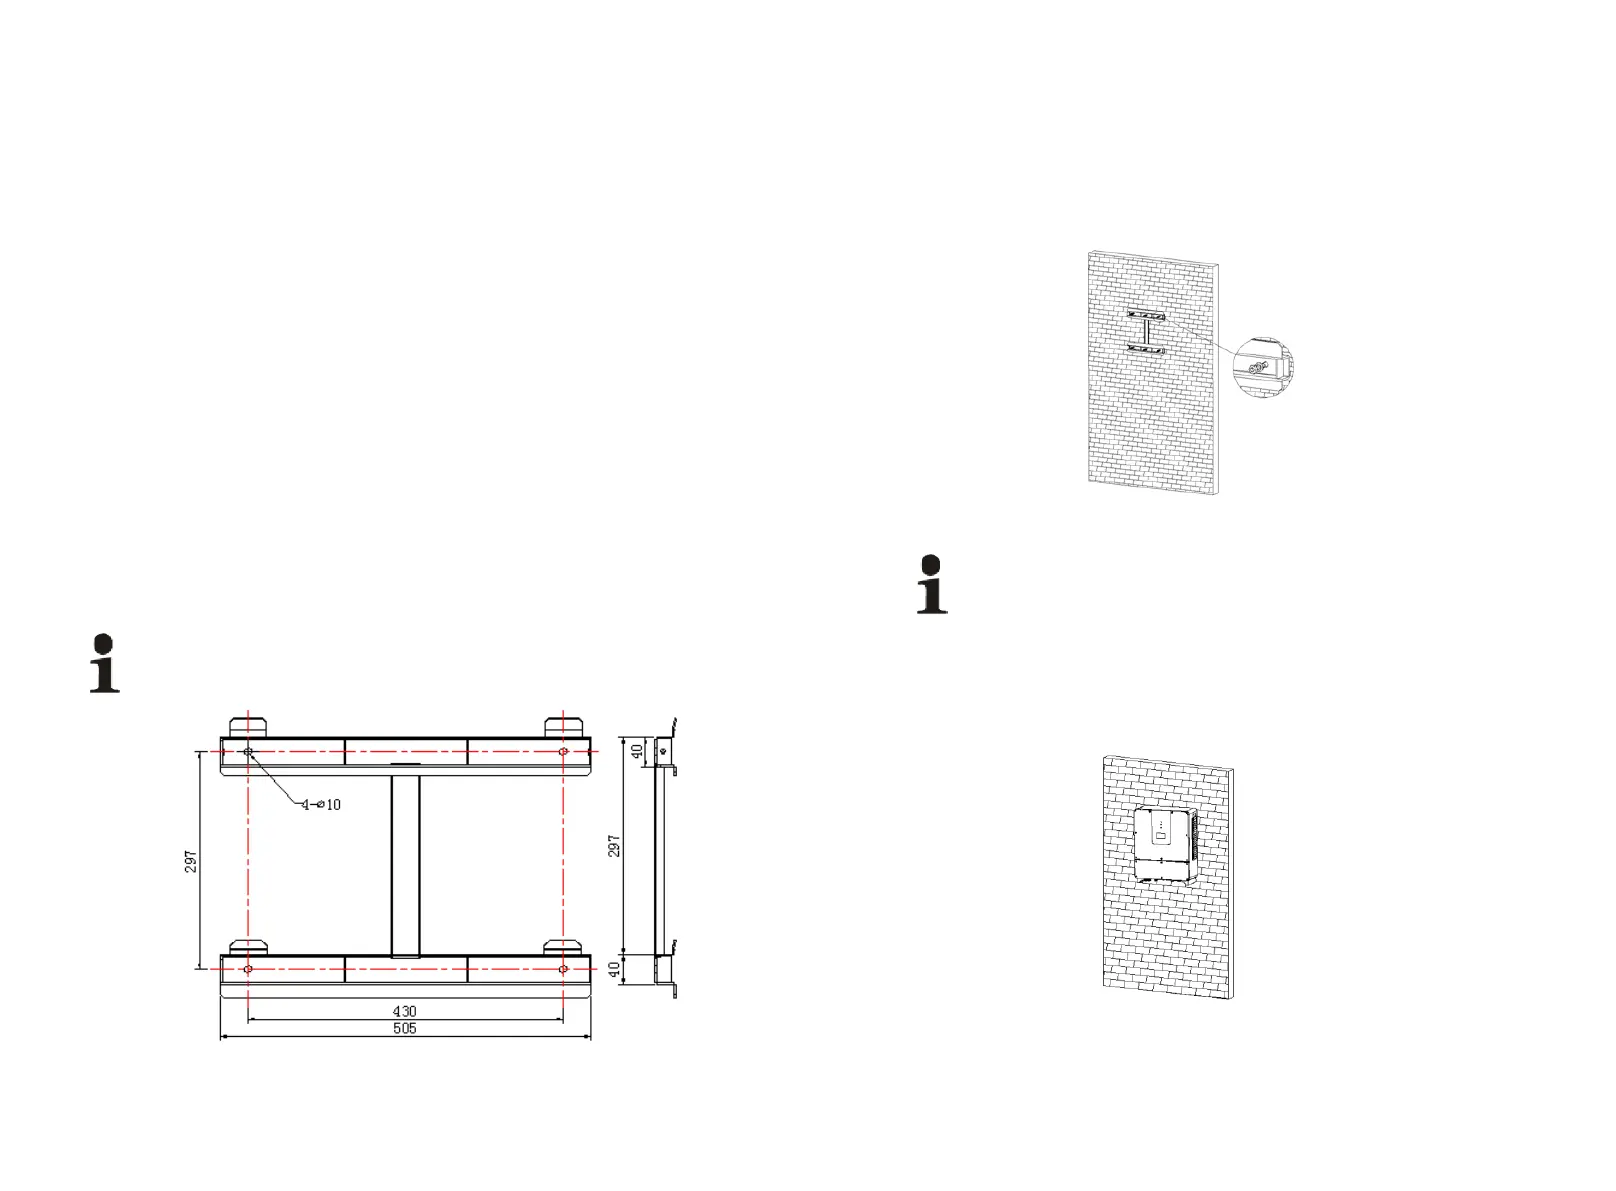
4.5.1 Installation of wall-mounting kit
Before installing the wall-mounting kit, please check and make sure there’s
no electric cable and gas pipe in the location of installation.
Figure 4-5-1-1 installation gap
Steps:
A: Drill hole according to location of the wall-mounting bracket screw hole, total 6
B. Refer to figure 4 for installation of wall-mounting bracket
Figure 4-5-1-2 bracket installation
Note: wall-mounting bracket must be installed first before installing HPS
4.5.2 Installing HPS
A. keep the inverter balance when hanging it to the bracket
Figure 4-5-2-1 Hanging of inverter