♦
Before starting maintenance on the machine, clean
it in order to avoid exposure to hazardous
substances. See “Dust and fume hazard”.
♦
Use only authorised parts. Any damage or
malfunction caused by the use of unauthorised
parts is not covered by warranty or product liability.
♦
When cleaning mechanical parts with solvent,
comply with appropriate health and safety
regulations and ensure there is satisfactory
ventilation.
♦
For major service of the machine, contact the
nearest authorised workshop.
♦
After each service, check that the machine's
vibration level is normal. If not, contact the nearest
authorised workshop.
NOTICE Never aim a water jet directly at the fuel
filler cap. This is particularly important when using a
high-pressure cleaner.
Cleaning the machine
♦
Do not spray water directly onto electrical
components or the instrument panel.
♦
Place a plastic bag over the fuel filler cap and
secure with a rubber band. (This will prevent water
from entering the venting hole in the filler cap.
Otherwise this could cause operational
disturbances, such as clogged filters.)
Every 10 hours of operation
(daily)
Daily maintenance routines before starting up:
♦
Check that leakages or other faults are detected
and rectified.
♦
Check the ground under the machine. Leakages
are more easily detected on the ground than on
the machine itself.
♦
Check and replenish fuel and engine oil. See the
engine manual for more information.
♦
Check and clean the air filter.
♦
Check the tightness of all nuts and bolts.
♦
Check that the machine is clean.
♦
Check or clean the engine's cooling flanges. See
the engine manual for more information.
♦
Check that the controls are not damaged or do
not jam.
♦
Check the oil level in the spring-loaded leg.
♦
Check the air filter indicator.
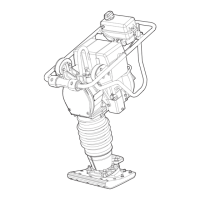
Checking the engine
A. Check the oil level on the dipstick.
B. Check the fuel level.
C. Check air filter.
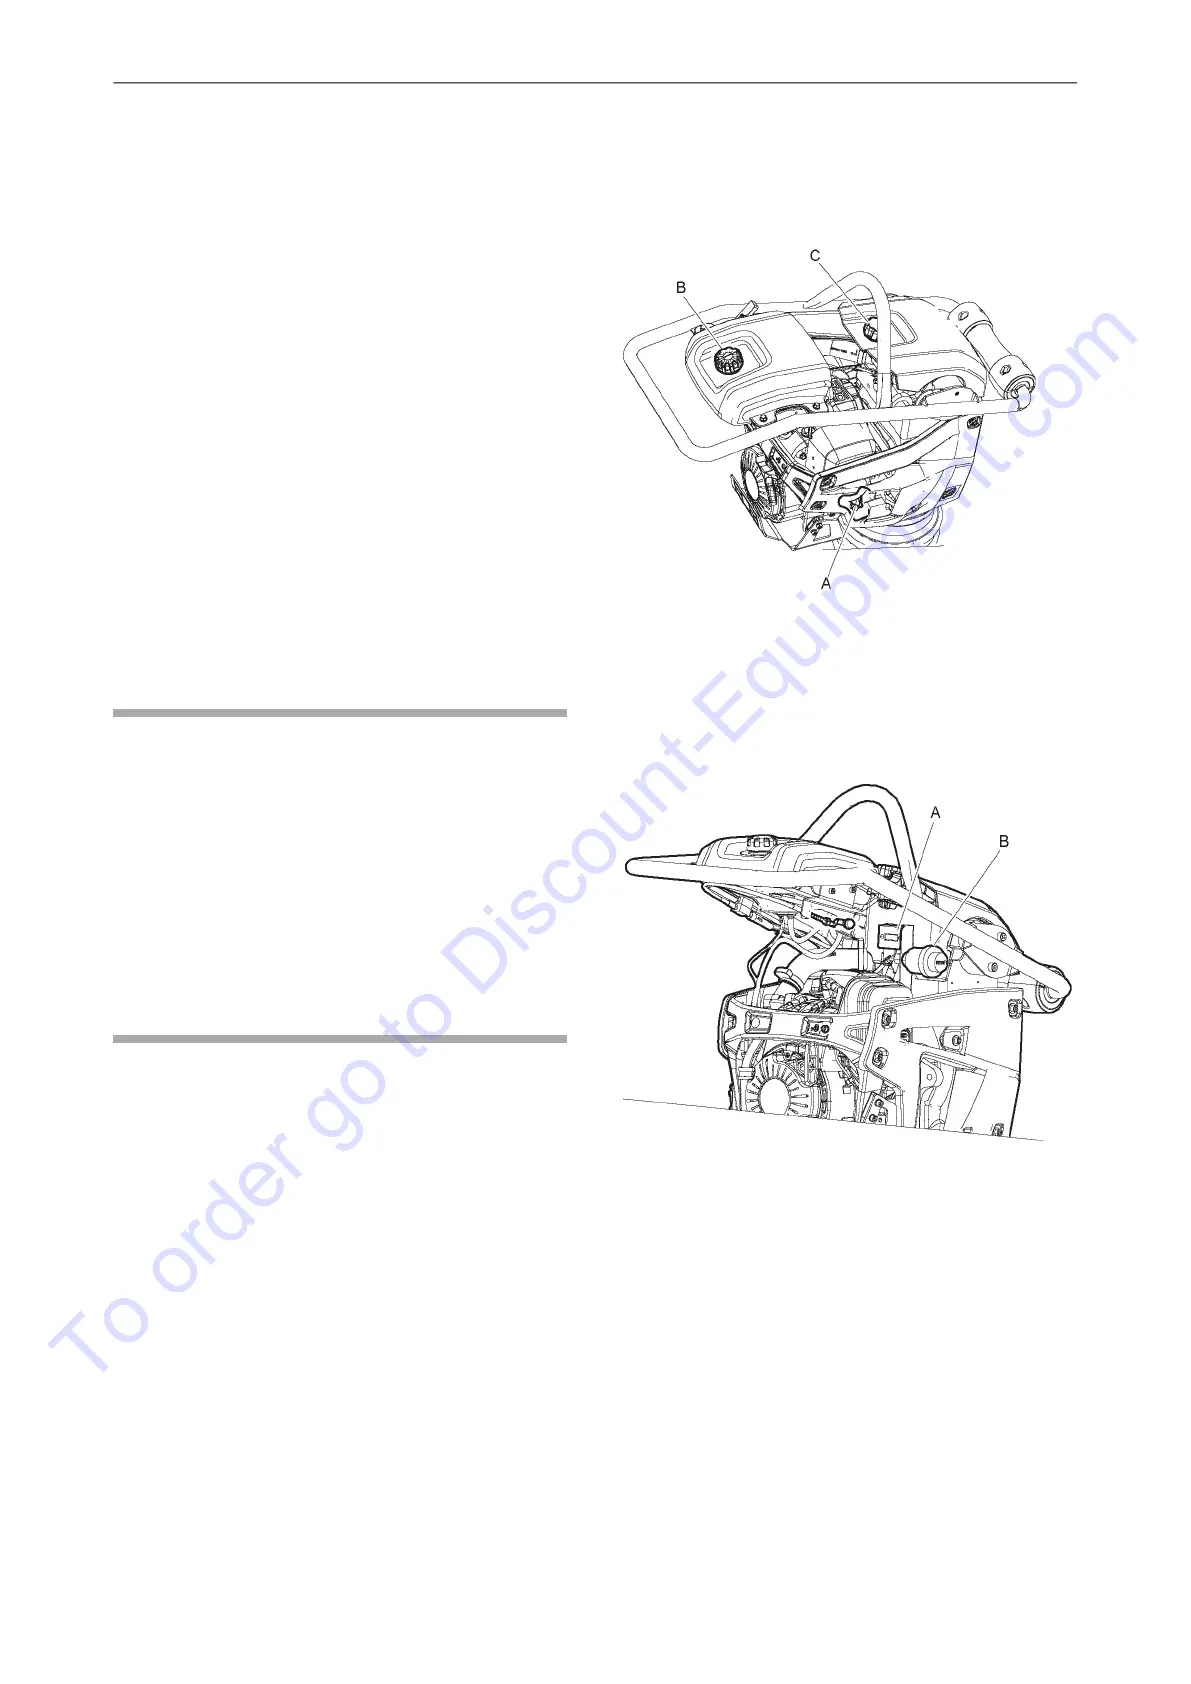
Check the air filter indicator
Check the air filter indicator (A). Replace the air filter
if the indicator reach the red level.
Push the yellow button (B) to reset the indicator.
© 2015 Construction Tools EOOD | No. 9800 1415 01b | 2015-05-26
Original instructions
20
LT 6005Safety and operating instructions
To order go to Discount-Equipment.com
 Loading...