7 4 Seats and s t o ra ge
the warranty. Always read the manufactur -
er installation instructions that came with
your roof rack system when you install the
attachments.
@ Tips
When insta lling a factory-supplied roof
rack system on the roof ra iling, the ESP
will adapt itself to a d ifferent center of
grav ity.
Attachment points
The roof rack can only be attached at the
marked locations.
Fig. 82 Roof rack attac hment points
Attach the roof rack only at the attachment
points on the roof railing. On the inside of the
roof railing there are two ho les for attaching
the rear end of t he roof rack. To prevent con-
fus ing the front and rear roof rack attach-
ments, there are three holes on the left and
two holes on the right for mounting the front
part of the roof rack
c:> fig. 82 .
The roof racks have a sticker on the left side
under neat h to identify front and rear .
A WARNING
When installing the roof rack, make sure
the sticker is on the left s ide of the vehicle
and faces the stamped arrow in the dr ive
direction .
.
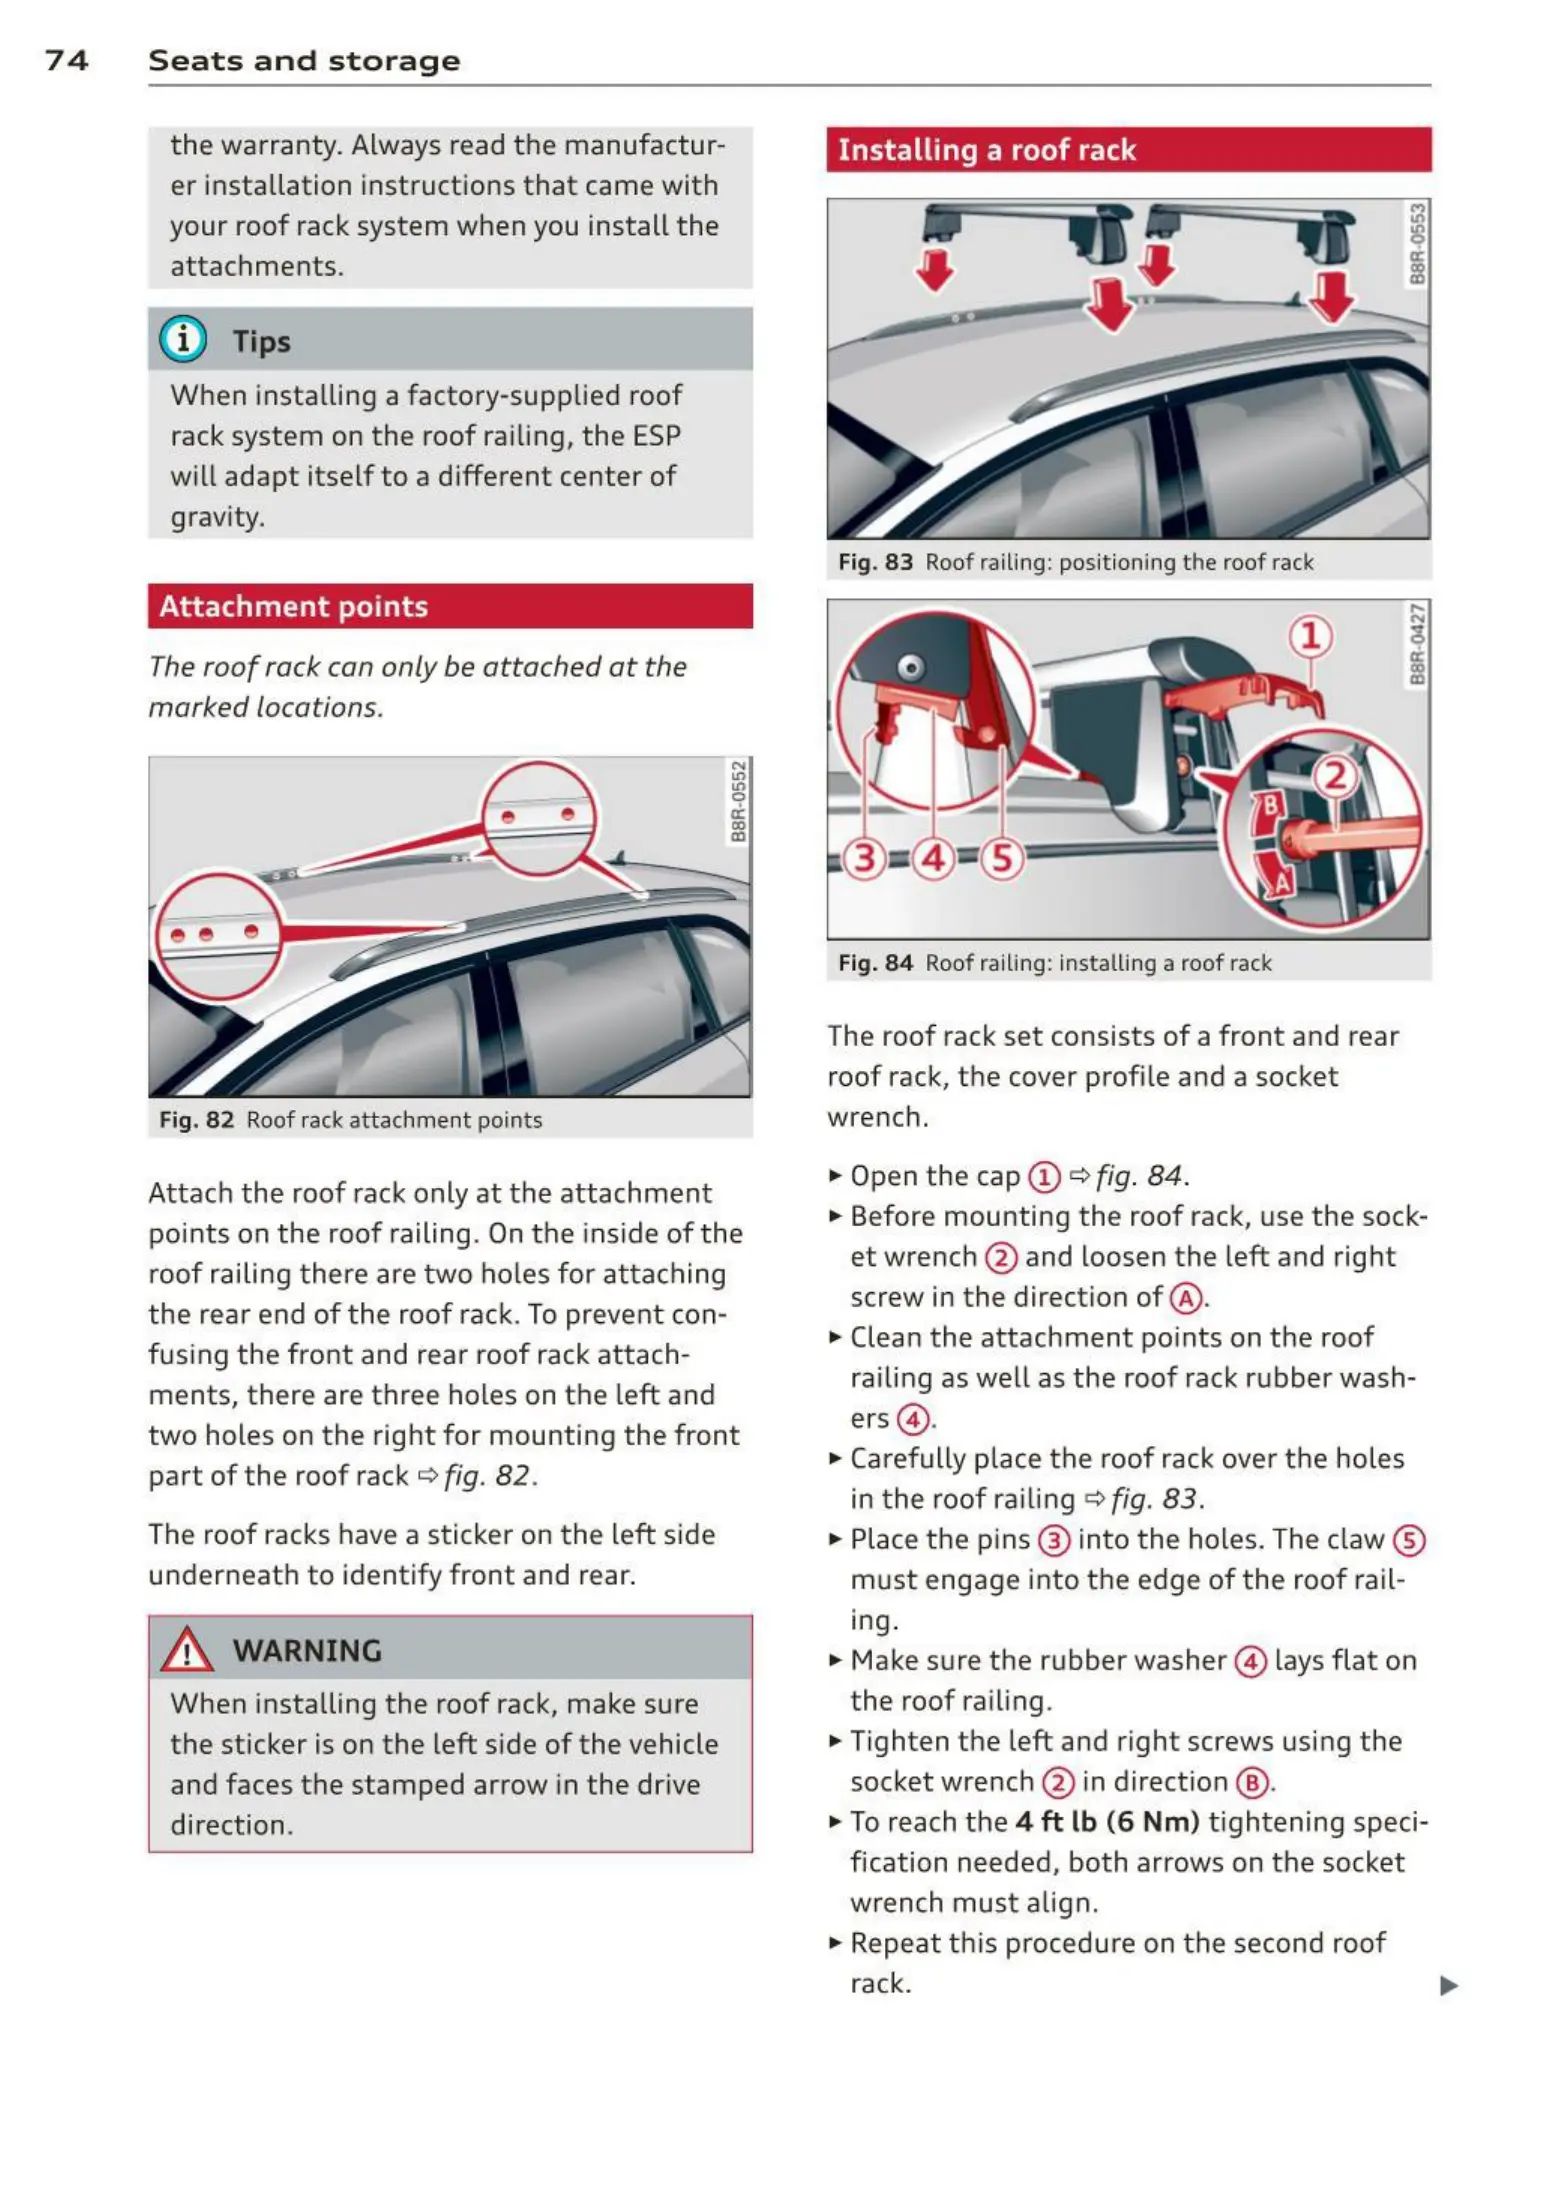
Installing a roof rack
Fig. 83 Roof railing: positioning the roof rack
Fig.
84 Roof railing: install ing a roof rack
The roof rack set consists of a front and rear
roof rack, the cover prof ile and a socket
wrench.
.,. Open the cap ©
c:> fig . 84 .
.,. Before mounting the roof rack, use the sock-
et wrench @ and loosen the left and right
screw in the direction of @ .
.,. Clean the attachment po ints on the roof
railing as well as the roof rack rubber wash-
ers @ .
.,. Carefully place the roof rack ove r t he holes
in t he roof railing
c:> fig. 83.
.,. Place t he pins @ int o the holes. The claw ®
m ust engage into t he edge of the roof rail-
ing .
.,. Make sure the rubber washer @ lays flat on
the roof railing .
.,. Tighten the left and right screws using the
socket wrench @ in direct ion @ .
.,. To reach the
4 ft lb (6 Nm) t ightening speci-
fication needed, both arrows on the socket
wrench must a lign .
.,. Repeat th is procedure on the second roof
rack.