7
Preparation for use
Installing/removing the dust cover
When attaching the dust cover, insert the hinges of the dust cover
into the two dust cover hinge holders on the back of the body. When
removing the dust cover, slowly pull the dust cover out from the dust
cover hinge holders.
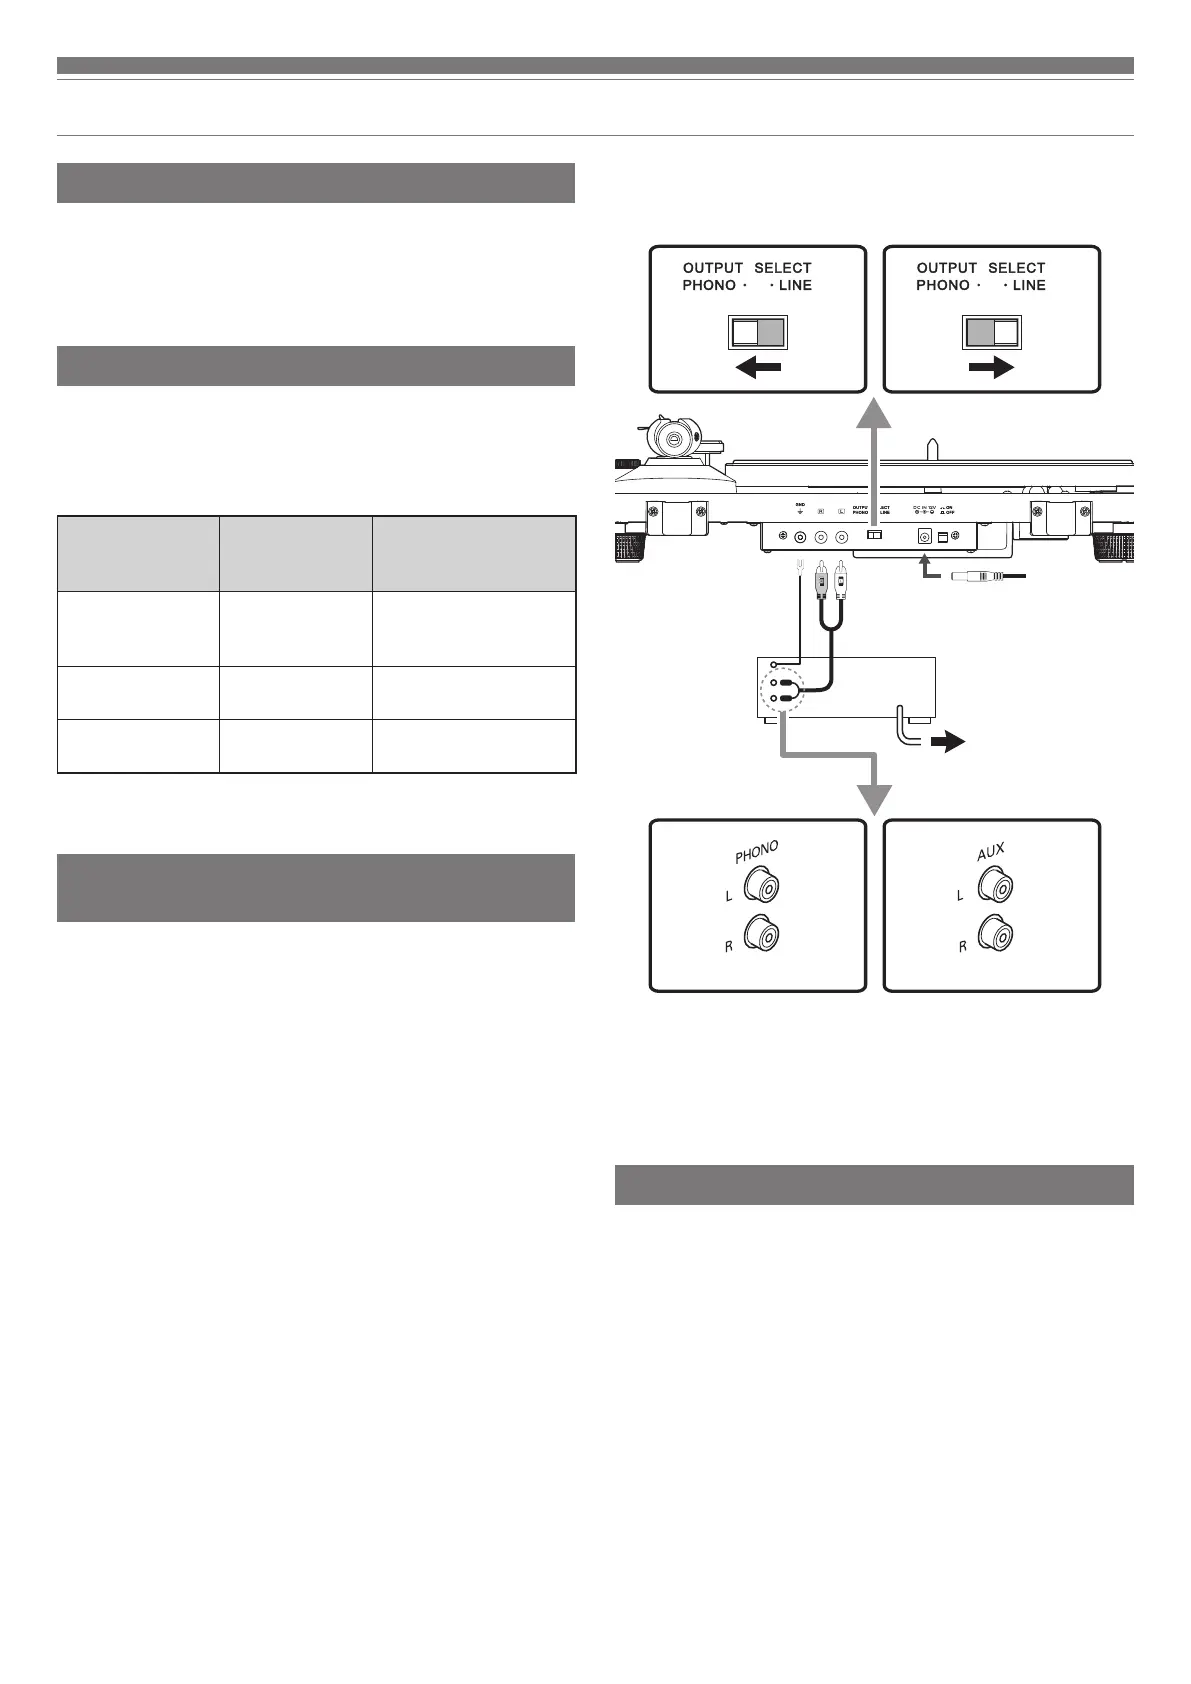
Setting output selector switch
This product has a built-in phono equalizer function. You can use the
product, even if you do not have a phono amplifier or connectable
equipment with a built-in phono amplifier, by connecting an active
speaker, etc.
Use the output selector switch to set the output, as shown below.
Connectable
equipment being
used
Position of
output selector
switch
Where to connect the
RCA audio cable
Device with phono
input
PHONO Phono input jack and
ground (earth) terminal of
connectable equipment
Device without
phono input
LINE AUX or line input jack of
connectable equipment
PC sound card LINE Sound card's line input
jack*
* An audio adapter (sold separately) may be required to connect the
RCA audio cable to the PC sound card's line input jack.
Connecting to connectable equipment (active
speakers, amplifiers, etc.)
Align the settings for the output selector switch and connect the RCA
audio cable to an input jack that is compatible with the connectable
equipment you are using (amplifier, receiver, active speakers, sound
card, etc.).
• The RCA audio cable's red jack is for the right (R) channel, and the
white jack is for the left (L) channel.
* Depending on the equipment you are connecting, a ground (earth)
terminal may exist near the phono input jack. If this is the case,
connect to it using the ground line from the RCA audio cable. This
will help prevent a low humming noise that might otherwise be heard
during playback.
Connecting the AC adapter
1. Connect the AC adapter's cord to the power input jack.
2. Plug the AC adapter into an outlet.
• Make sure that the power switch is in the “OFF” position and the control
knob is in the "STOP" position. If the power switch is in the “ON” position
with the AC adapter connected to the outlet, a standby current is always
running through the product even it is not being used.
• If you play a record immediately after plugging the AC adapter into an
outlet, the sound that is played may be garbled. Wait a short time (about
30 seconds) after plugging the AC adapter into the outlet before playing a
record.
With PHONO input*
With PHONO input*
Without PHONO input
Without PHONO input
To outlet
To outlet
Connectable
equipment
(amplifier, etc.)
 Loading...