Do you have a question about the Audio Technica AT-LP120BK-USB and is the answer not in the manual?
Attach the headshell assembly to the tone arm and secure it with the locking ring.
Balance the tone arm to hover horizontally and set the correct stylus tracking force.
Set anti-skate control and adjust tone arm height for optimal playback and wear.
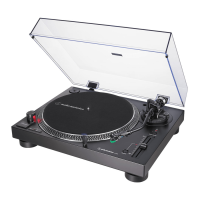
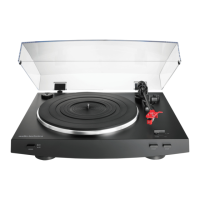
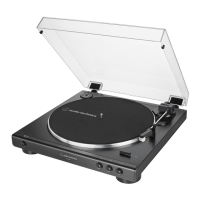
The Audio-Technica AT-LP120-USB Turntable is a professional direct-drive turntable designed for both analog and digital audio enthusiasts. Its versatile connectivity allows it to be integrated with standard audio equipment via analog outputs or directly connected to a computer via USB, making it suitable for a wide range of applications, from casual listening to record digitization. This turntable is not merely a tool for converting records to MP3s; it is equipped with a comprehensive set of features typically found in professional-grade turntables, ensuring high-fidelity audio reproduction and robust performance.
Key usage features include an adjustable tone arm, which allows for precise tracking and optimal sound quality, and pitch control, offering flexibility for DJs and those who wish to fine-tune playback speed. The turntable comes with a ½-inch Dual Magnet™ cartridge, known for its excellent sound reproduction. It supports three playback speeds—33, 45, and 78 RPM—accommodating a wide variety of vinyl records. Additionally, its DJ functionality makes it a suitable choice for professional use, offering the control and precision required for mixing and scratching.
Proper setup is crucial for maximizing the performance and longevity of the AT-LP120-USB turntable, as well as for preserving your records and stylus. The setup process begins with assembling the core components. First, the platter and slip mat should be placed onto the turntable spindle, ensuring the platter is fully seated for stable rotation. Next, the tone arm needs to be secured in its rest before attaching the headshell assembly. This involves inserting the headshell into the end of the tone arm and then rotating the locking ring counterclockwise to firmly secure it in place. This initial assembly ensures that the delicate components are correctly aligned and ready for further adjustments.
Once the headshell is in place, the counterweight needs to be installed. The counterweight, with its black stylus force gauge facing forward, is screwed onto the back of the tone arm. If you plan to use a dust cover, its hinges should be slipped into the slots on the back of the turntable, and the cover then slid into place.
A critical step in the setup process is balancing the tone arm. This ensures that the cartridge tracks properly within the record grooves, preventing premature wear of the stylus and potential damage to your records. To begin, the anti-skate dial should be set to 0. The protective cover must then be removed from the stylus by sliding it straight forward off the front of the cartridge. With the tone arm's locking clamp released, the tone arm will be unbalanced. It is important to gently hold the headshell to prevent the stylus from coming into contact with the slip mat or any other surface, which could cause damage. While continuing to hold the headshell, the counterweight is rotated until the tone arm achieves a horizontal balance, hovering freely just above the platter. Once balanced, the tone arm should be locked back into its rest.
After balancing the tone arm, the stylus tracking force must be set. This force is essential for keeping the stylus securely in the record groove during dynamic musical passages, preventing skips, and minimizing wear on both the stylus and records. Too little force can lead to skipping, while too much force can cause excessive wear. The recommended tracking force varies depending on the cartridge. For the AT-LP120-USB, if it comes with an AT95E cartridge (identifiable by a green stylus), the recommended force is 2 grams. For older models equipped with the ATP-2XN cartridge (white stylus), the recommended force is 3.5 grams. If an alternate cartridge is installed, the tracking force should be adjusted according to the manufacturer's specifications.
To set the tracking force, the stylus force gauge, located on the front of the counterweight, is rotated so that the number 0 aligns with the centerline marked on the rear of the tone arm, without adjusting the counterweight itself. Then, the entire counterweight (along with the force gauge) is rotated counterclockwise until the desired tracking force value is reached.
Another important adjustment is the anti-skate setting, which compensates for the natural "skating" force that pulls the tone arm toward the center of the record. The anti-skate knob should be set to match the value of the tracking force. However, if you anticipate performing activities like back-cueing, scratching, or reverse-direction operation, you may opt to use less or no anti-skate control to allow for greater freedom of movement.
In some cases, such as when using a taller cartridge, a thicker slip mat, or playing thick records (e.g., 180 g pressings or old 78s), the tone arm height may need to be adjusted to ensure it remains parallel to the record surface. To do this, the height-lock switch at the base of the tone arm is loosened, and the black height-adjust dial is rotated. Once the correct height is achieved, the switch is flipped back into the locked position to secure the adjustment.
Finally, the PHONO/LINE selector switch on the back of the turntable needs to be adjusted to set the proper output. If the turntable is connected to a receiver or other device with a dedicated phono input, the switch should be set to PHONO. If it is connected to a sound card, powered speakers, or AUX-type inputs, the selector should be set to LINE, which activates the turntable's internal pre-amp. If you are using the USB output to connect the turntable to a computer, the selector switch can be set to either PHONO or LINE, as this switch does not affect the USB output. These detailed setup steps ensure that the AT-LP120-USB turntable performs optimally, delivering a rich and accurate audio experience while protecting your valuable vinyl collection and stylus.
| Drive Type | Direct drive |
|---|---|
| Motor | DC Servo Motor |
| Turntable Platter | Die-cast aluminum |
| Overhang | 15 mm |
| Cartridge | AT95E |
| Outputs | RCA, USB |
| Phono Pre-Amp Gain | 36 dB |
| USB Function | Yes |
| Speed Settings | 45 RPM |
| Tonearm Type | S-shaped |
| Stylus | Elliptical |
| Phono Output Level | 2.5 mV |
| Line Output Level | 150 mV |
| USB ADC | 16-bit/48 kHz |
| Power Supply | AC 100-240V, 50/60Hz |