Quick Start
1.
It only takes a few steps
to get
your
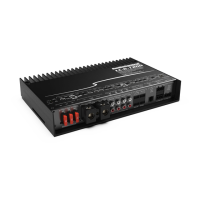
LC-1.800
amplifier up and
running!
2.
Undo
the+
12V
and Ground connections
to
the car battery
before making any connections
to
the amplifier.
3.
When making connections, designate
red
RCA
plugs
as
right,
and designate white, black,
or
grey plugs
as
left. This
is
a good
idea for all signal connections made in your audio system. The
key
is
consistency. Stick
with
the
same color coding and you'll
reduce possible problems.
4.
Use
quality interconnect cables.
We
know from experience
that
really cheap cables can cause a
multitude
of
problems. They
tend
to
break inside or corrode, causing a
loss
of
signal or hum.
They also have
poor
shielding.
5.
Connect
the+
12V
input
terminal
of
the
unit
to
the+
12V termi-
nal
of
the vehicle battery.
Use
4 gauge insulated wire or thicker.
6.
Connect the Ground terminal
of
the
unit
to
the chassis
of
the
vehicle.
Use
4 gauge insulated wire or thicker.
7.
Connect the remote power terminal
of
the
unit
to
the remote
turn-on switch
of
your source unit. Alternatively, you
can
skip
this connection and
use
the
GTO
Signal sensing which
is
ex-
plained later in this manual.
8.
Connect your audio inputs
to
the
unit-
either speaker-level
or
line-level
RCA
...
not
both.
9.
Run
the optional
ACR-1
remote
to
the front
of
the vehicle
to
adjust the
bass
level on the fly.
10.
Connect your subwoofer
(2
Ohms
minimum
load).
11.
When all connections are made, reconnect the vehicle battery.
12.
Adjust your
input
source gain using the Patent Pending
MILC.
This will indicate
if
the incoming audio signals are clipping.
13.
Set
the
LC-1.800
crossover
to
the
frequency recommended by
the subwoofer manufacturer.
14.
The optional
ACR-1
adjusts
the
overall
output
level.
15.
Enjoy the drive!
AudioCont~~al®
-----------------------
Making Good sound
GreatTM
7

 Loading...