THETFORD TOILET 68
27 TOGETHER WE’RE GOING PLACES For more information visit www.auto-trail.co.uk 28
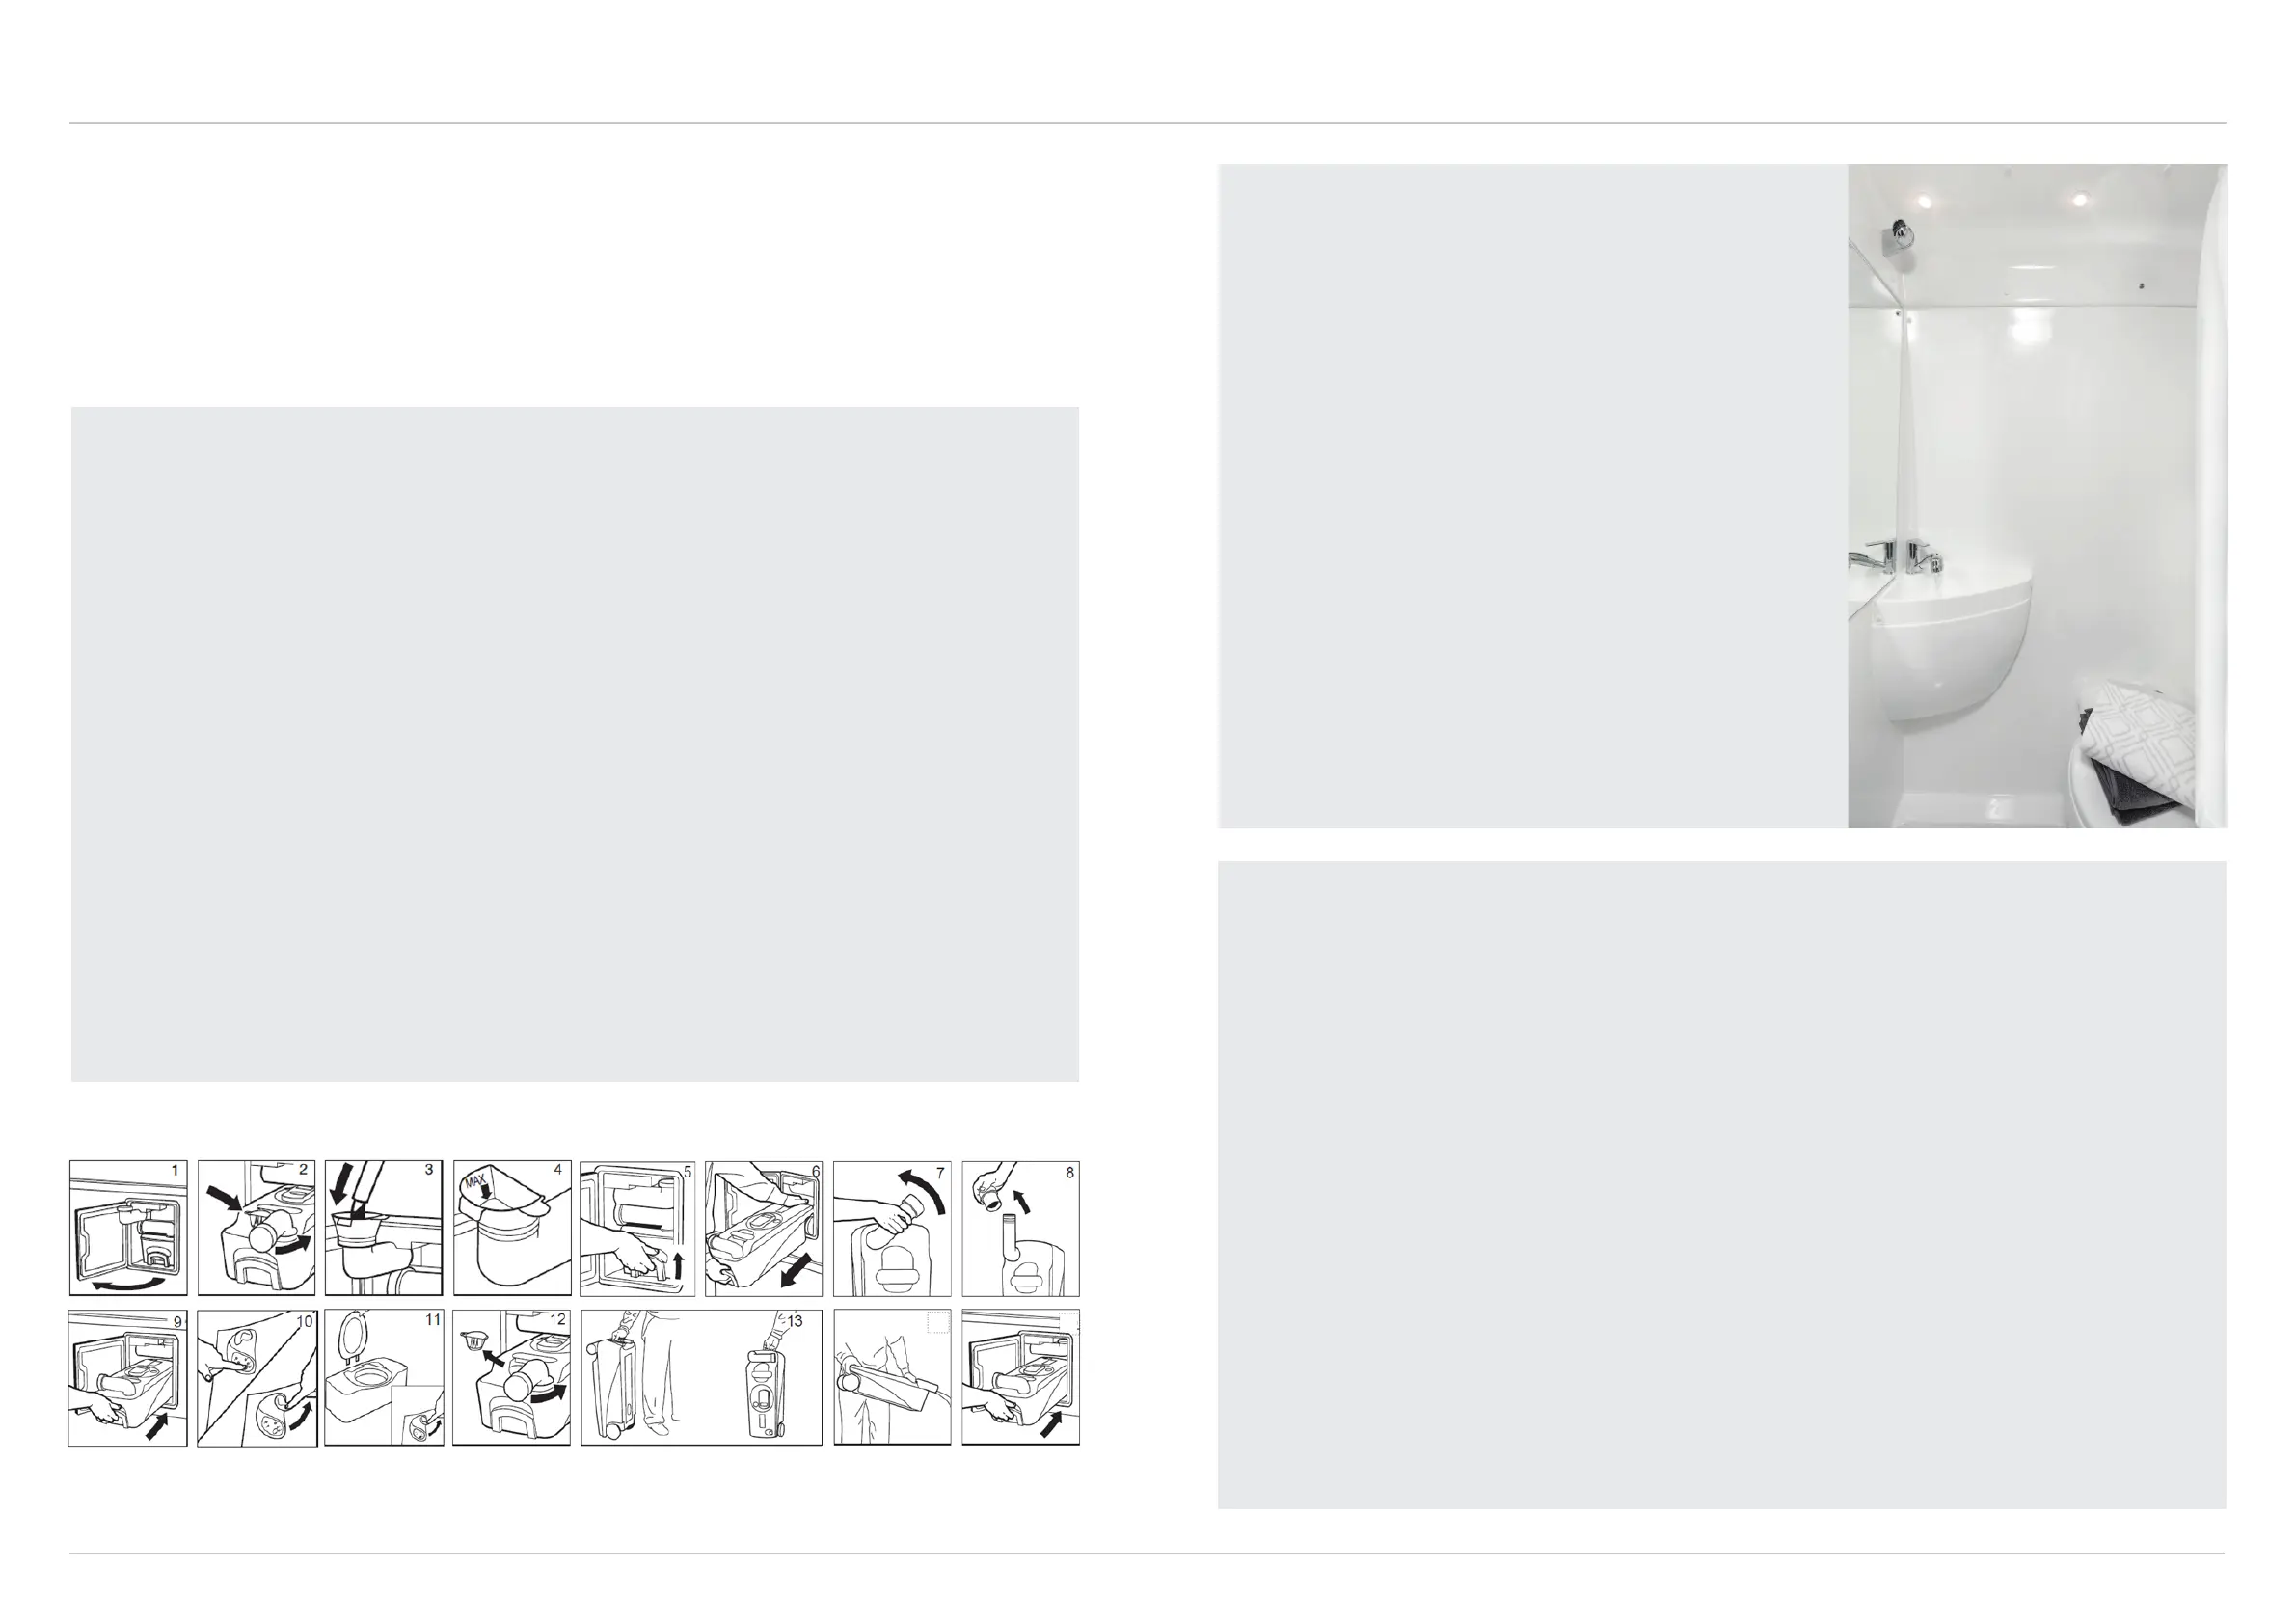
Thetford cassette toilet (C402)
These instructions apply to the Expedition 68 model only. Please see the Thetford C223 instructions on page 25
for the Expedition 66 and 67.
The toilet is made up of two parts: a permanently fixed toilet and a waste holding tank that is accessible from the
outside of the vehicle. The removable waste holding tank is located under the toilet and can be removed via an
access door on the outside of the campervan.
BEFORE USING THE TOILET
• Open the access door on the outside of your motorhome (1).
• Rotate the waste tank emptying spout 90° and remove the water filling extension (you will find it
positioned beneath the handle closest to the emptying spout) (2).
• Rotate the water fill funnel outwards, remove the cap and place the extension on the water fill funnel.
Add the stated amount of Thetford fresh water additive to the water tank. This ensures a better and
cleaner flush and keeps the water in the flush tank fresh (3).
• Fill the water tank with clean water, keeping the water level below the top of the water filling funnel (4).
• Remove the extension and return to its original position on the waste tank.
• Remove the waste tank by pulling the safety catch upwards (5).
• Pull the waste tank outward to the stop. Tip it slightly and take the tank fully out (6).
• Place the tank upright and turn the emptying spout upwards (7).
• Remove the cap, with the measuring cup inside, from the emptying spout and pour the stated
quantity of toilet fluid into the waste tank. This avoids unpleasant smells in the waste tank and keeps
the inside of the waste tank clean.
• Add approximately 2ltr of water - enough to ensure that the bottom of the waste tank is covered
• Screw the cap back onto the emptying spout and turn it back to its original position (8).
• Slide the waste tank back into place via the access door (9).
• Shut the access door and lock it.
Please note: Never use force if you cannot get the tank back into place easily. This may cause serious
damage. Make sure that the waste tank is secured with the safety catch.
USING THE TOILET
• Run water into the bowl by pressing the flush briefly
or open the valve blade by turning the handle anti-
clockwise. Your Thetford toilet is now ready for use (10).
• After use, open the valve blade (if still closed) by turning
the handle anti-clockwise. Flush the toilet by pressing
the flush knob for several seconds. The flush of your
toilet will be more eective if you pulsate the flush by
pressing the flush button several times in a row. Close
the valve blade after use (11).
Please note: Do not leave water in the bowl if the toilet is not
being used. This does not help to reduce unpleasant smells
and only leads to flooding.
Please do not travel with a flush water tank that is more than
half full (empty is best). Do not travel with water in the toilet
bowl. Failure to adhere to this notice may result in water
damage to your campervan. Please avoid travelling with a
waste-holding tank that is more than 75% full. This may
cause leakage through the venting system.
EMPTYING THE WASTE TANK
The waste tank has a capacity of 19ltr and must be emptied, at the latest, when the red light in the level
display lights up. The indicator lamp will light up when the waste tank can still take about 2ltr, which is about
three uses. It is advisable to empty the waste tank earlier.
Please note: Do not allow the waste tank to become too full.
• Make sure that the valve blade is closed. Open the access door located outside the vehicle. Pull the
safety catch upwards and remove the waste tank (5/6).
• Remove the water filling extension first to avoid it getting lost during emptying of the waste tank (12).
• Stand the waste tank upright (pull-out handle at the top, wheels at the bottom). Press the handle down
and move it away from the waste tank until it snaps out of its locked position (13).
• Pull the handle up and wheel the waste tank to an authorised waste dump.
• Push the handle back. Turn the emptying spout upwards and remove the cap from the spout. Hold
the waste tank by the upper handle with one hand, while placing your other hand by the rear handle so
that during emptying you can operate the vent plunger with your thumb. To empty the tank without
splashing, depress the vent plunger while emptying the tank (14). After emptying, flush the tank
thoroughly with water. Also clean the valve blade with water.
• Slide the waste tank into the toilet and close the access door (15).
Please note: The vent plunger should only be pressed once the emptying spout is pointing downwards.
14
15
 Loading...