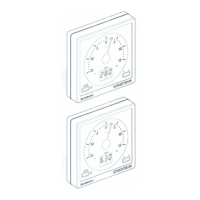
Chapter 1. ST4000+ Control Head
ST4000+ Autopilots Service Manual 83115-1 1
Chapter 1. ST4000+ Control Head
1.1 PCB Changes
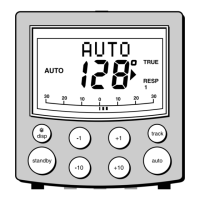
When a PCB is changed, it may be necessary to set the new PCB to the
required pilot type, ST4000+ Wheel, ST4000+ Tiller or ST4000+ Tiller GP
1. If the instrument is disassembled, fit the reflector, diffuser, elastomers,
LCD and surround to the PCB
2. Apply 12V power to the instrument/PCB assembly
3. Press and hold STDBY for 14 seconds until CAL ? is displayed
4. Momentarily press +1 and -1 together to gain access to extended
calibration (dealer set - up)
5. Advance from the CAL LOCK page to the pilot type page by pressing
DISP
6. Use the +1 and -1 buttons to set the pilot type as required, 4000 WHL
(wheel) or 4000 TILL (tiller)
7. Press STDBY to exit extended calibration
8. Switch off the power supply. Do not disconnect
9. When the pilot is fully powered down, switch the power on again
10.Check that the required pilot type is momentarily displayed before
STANDBY is entered. If not, repeat the set - up procedure. In the case of
a second failure, change the PCB.