Owner Installation Instructions GDO-9v3 SecuraLift
®
25
WARNING! Photo electric beams must be installed
if the closing force at the bottom edge of the door
exceeds 400N (40kgf).
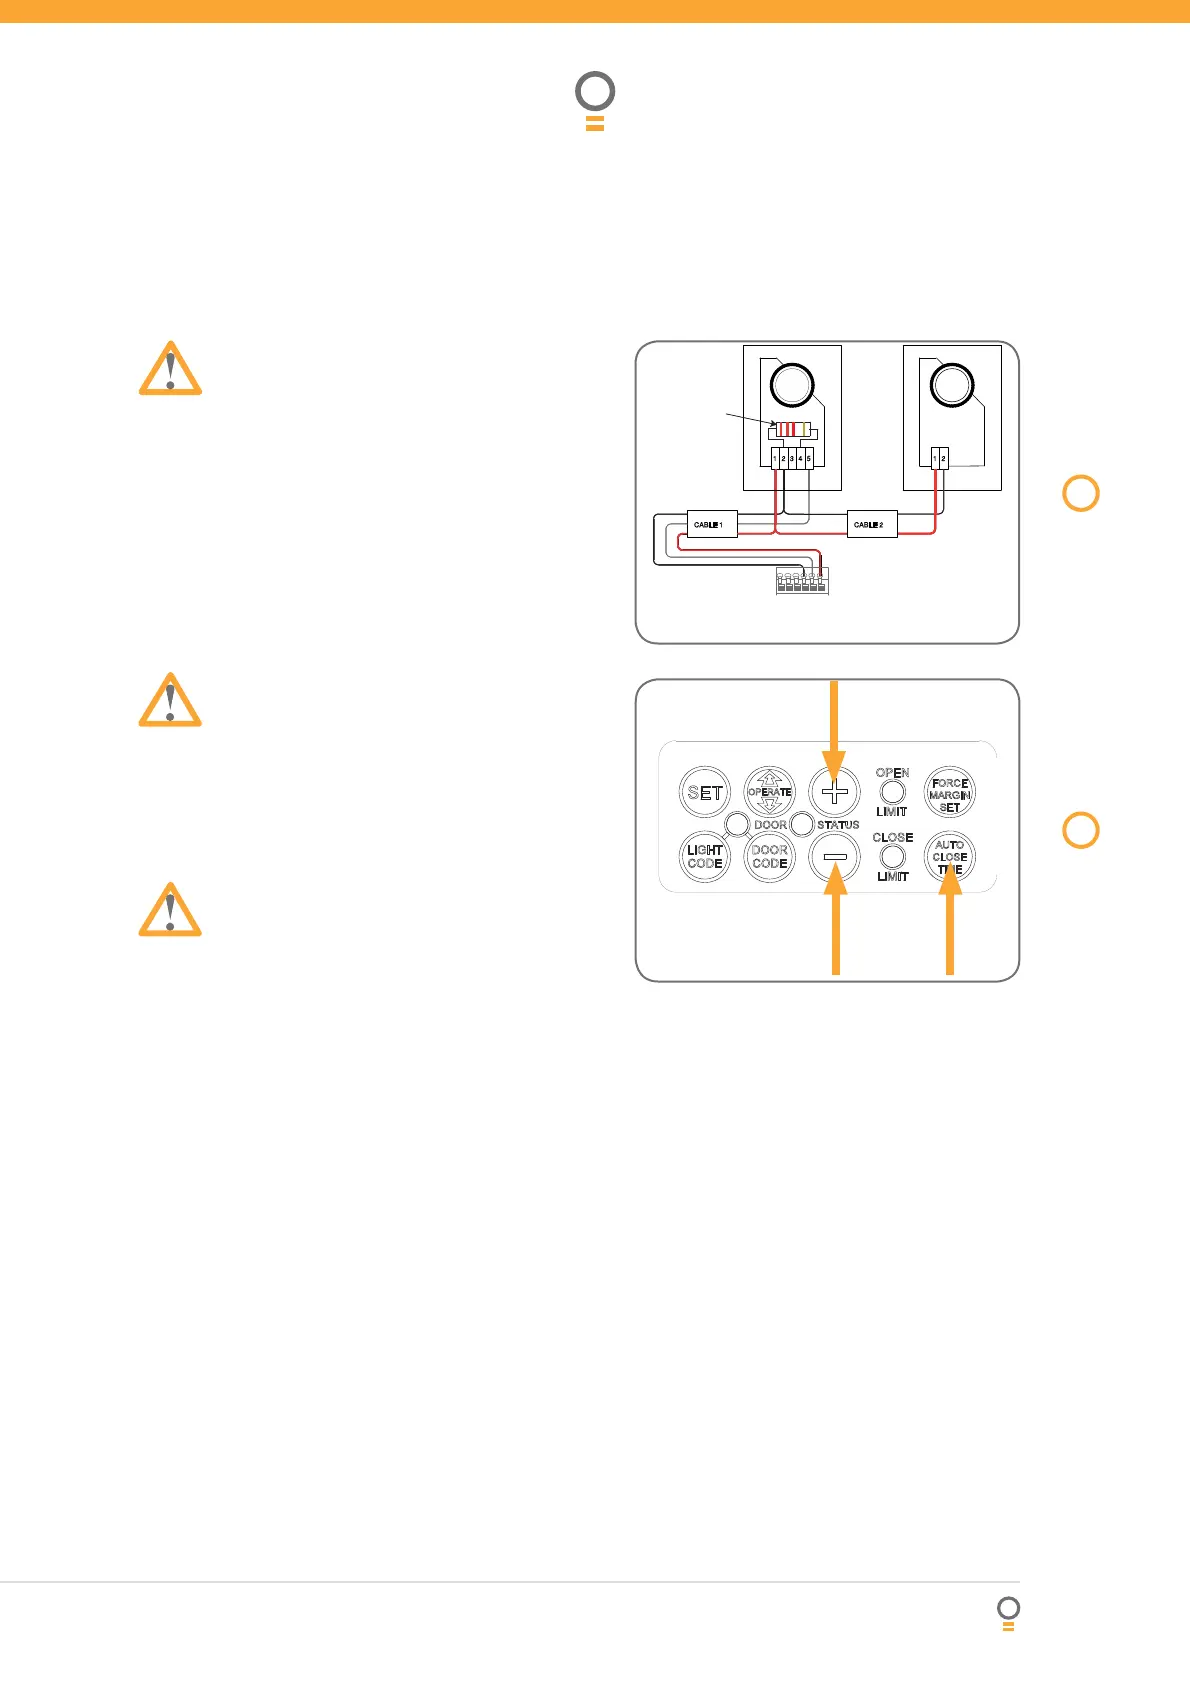
Step 20 - Fitting the P.E. Beams (optional)
Affi x the P.E. Beams in a strategic location within
the doorway. We recommend 150mm above the
fl oor level and as close as possible to the door
opening, inside the garage.
Connect the wires from the P.E. wiring harness to
terminal block (Fig. 45). The wiring diagram is for
Model PE-2 (Order Code 90214).
Make sure to align the beams correctly. Follow the
manual supplied with the P.E. Beams.
WARNING: When using Auto Close Mode and P.E.
Beams, the doorway must be clear of all obstructions
and persons at all times. The location of the beam
sand manner in which it is installed might not give
safety protection at all times. Check to make sure
that the height of the beam and type used give
maximum protection possible.
Step 21 - Setting Up Auto-close Mode
IMPORTANT NOTICE: It is compulsory to have P.E.
Beams installed when using Auto-close mode.
Auto-close mode is a function that automatically closes
the door a preset time after the P.E. Beams recognise
that a vehicle has left the garage.
The Auto-close timer only starts after the P.E. Beam’s
path is broken the Auto-close timer has been set. If
the P.E. path is not broken the door will remain open
until the path is broken. If the opener incurs a physical
obstruction (i.e. not from the P.E. Beams) while closing
the door will re-open and not Auto-close until the P.E.
Beam’s path is broken again.
Step 21.1 - Setting Auto-close Time
Hold down the AUTO CLOSE TIME button (Fig. 46).
While holding in the AUTO CLOSE TIME button,
press the PLUS (+) button - each press will add
one second to the Auto-close delay.
To decrease the delay time follow Step 21.1(a)
and press the MINUS (-) button - each press will
deduct one second from the Auto-close delay.
Press the OPERATE button or transmitter to open
the door. When the door is fully opened the
OPEN LIMIT LED will fl ash to indicate that Auto-
close mode is operational.
Break the P.E. Beam’s path momentarily to
initialise Auto-close. When the door reaches the
fully opened position, the door will pause for the
set Auto-close time and then close.
a.
b.
a.
b.
c.
d.
e.
P.E. Beam & Auto-Close
RED
RED
RED
GOLD
PWR
AUX OUT
OSC
GND
PE ( 0 V )
PE
BLACK
BLACK
BLACK
BLACK
YELLOW
RED
YELLOW
RED
+
+
-
-
RED
2K2, 0.25 WATT
RESISTOR
Receiver
Transmitter
Model PE-2
45
fi g
46
fi g