SE3-USER-M
13
1st Edition, Dec. 2023
SE3 Series Industrial Unmanaged Ethernet Switches User Manual
Wall Mounting
Follow the steps below to mount the switch using the wall mounting bracket. Bracket details and hole
patterns dier between models.
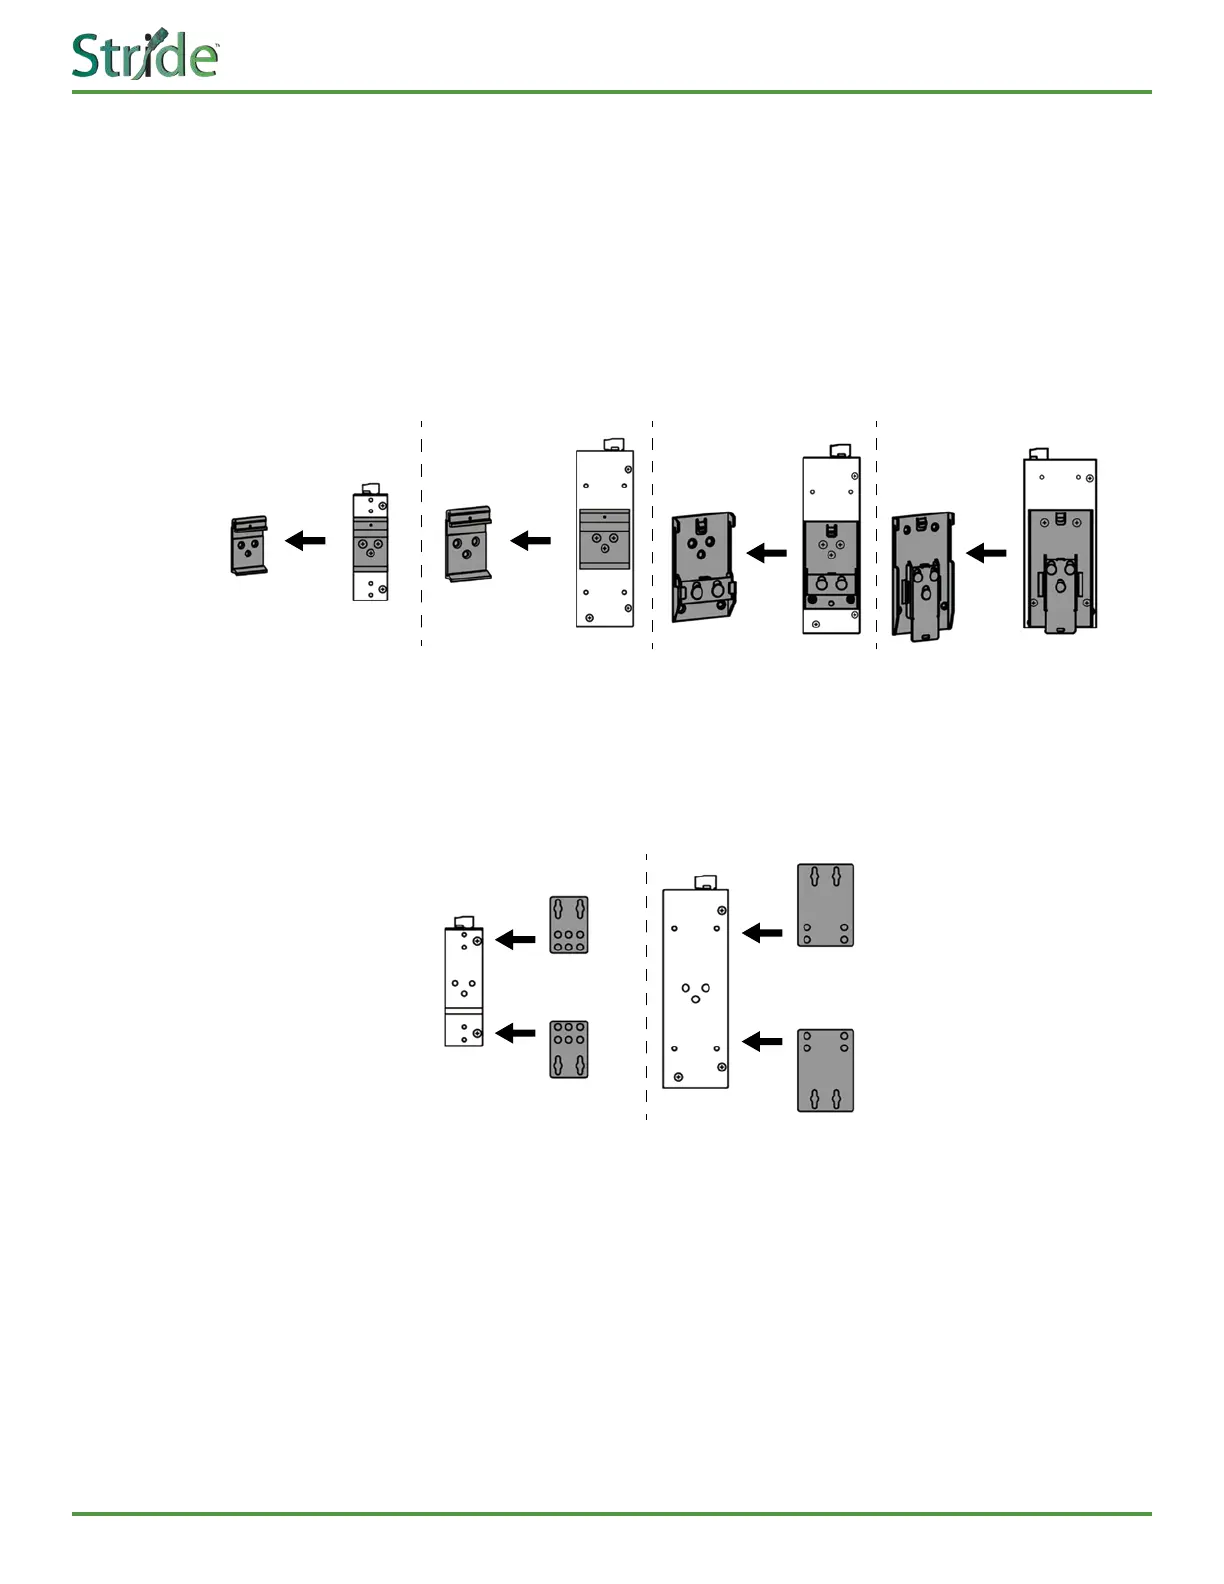
Removing the DIN rail bracket
All SE3-series switches other than the IP67 model are shipped with DIN rail mounting brackets
preinstalled. is bracket must be removed to mount the switch directly onto a panel wall.
ere are several styles of DIN rail bracket in use across the SE3 product line. In all cases, remove the DIN
rail mounting bracket by loosening several easily accessible screws.
Attaching the wall mounting bracket
Attach the wall mounting brackets on the top and bottom of the switch using the supplied hardware.
Specic mounting hole locations vary between models.
is step is unnecessary for Model # SE3-SW5U-N67-T, whose wall mounting brackets are an integral
part of the housing.
Mounting the switch to panel wall
Place screws in the panel wall based on the positions of the slotted screw holes on the mounting brackets
and attach the switch to the wall.
Remove Remove
RemoveRemove
Place & Screw Place & Screw
 Loading...