16
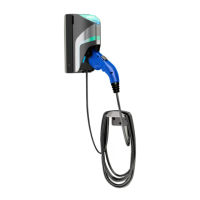
Once you’re logged in with your default Admin PIN, you will see the “Account
Manager: Activate Access Control” screen. Click the “ON” button; you will
next be taken to the “Account Manager: Charger Setup” screen.
• On “Account Manager: Charger Setup”, enter a name for the charger. (e.g.
“Charger 1, Charger 2”). Then enter your custom 4-digit Admin PIN. This
will replace the default Admin PIN.
• If you do not change the Admin PIN, anyone who is familiar with TurboDock
can log in and make changes.
• Make sure the Active button is switched on. Then click “Edit Info Screen”.
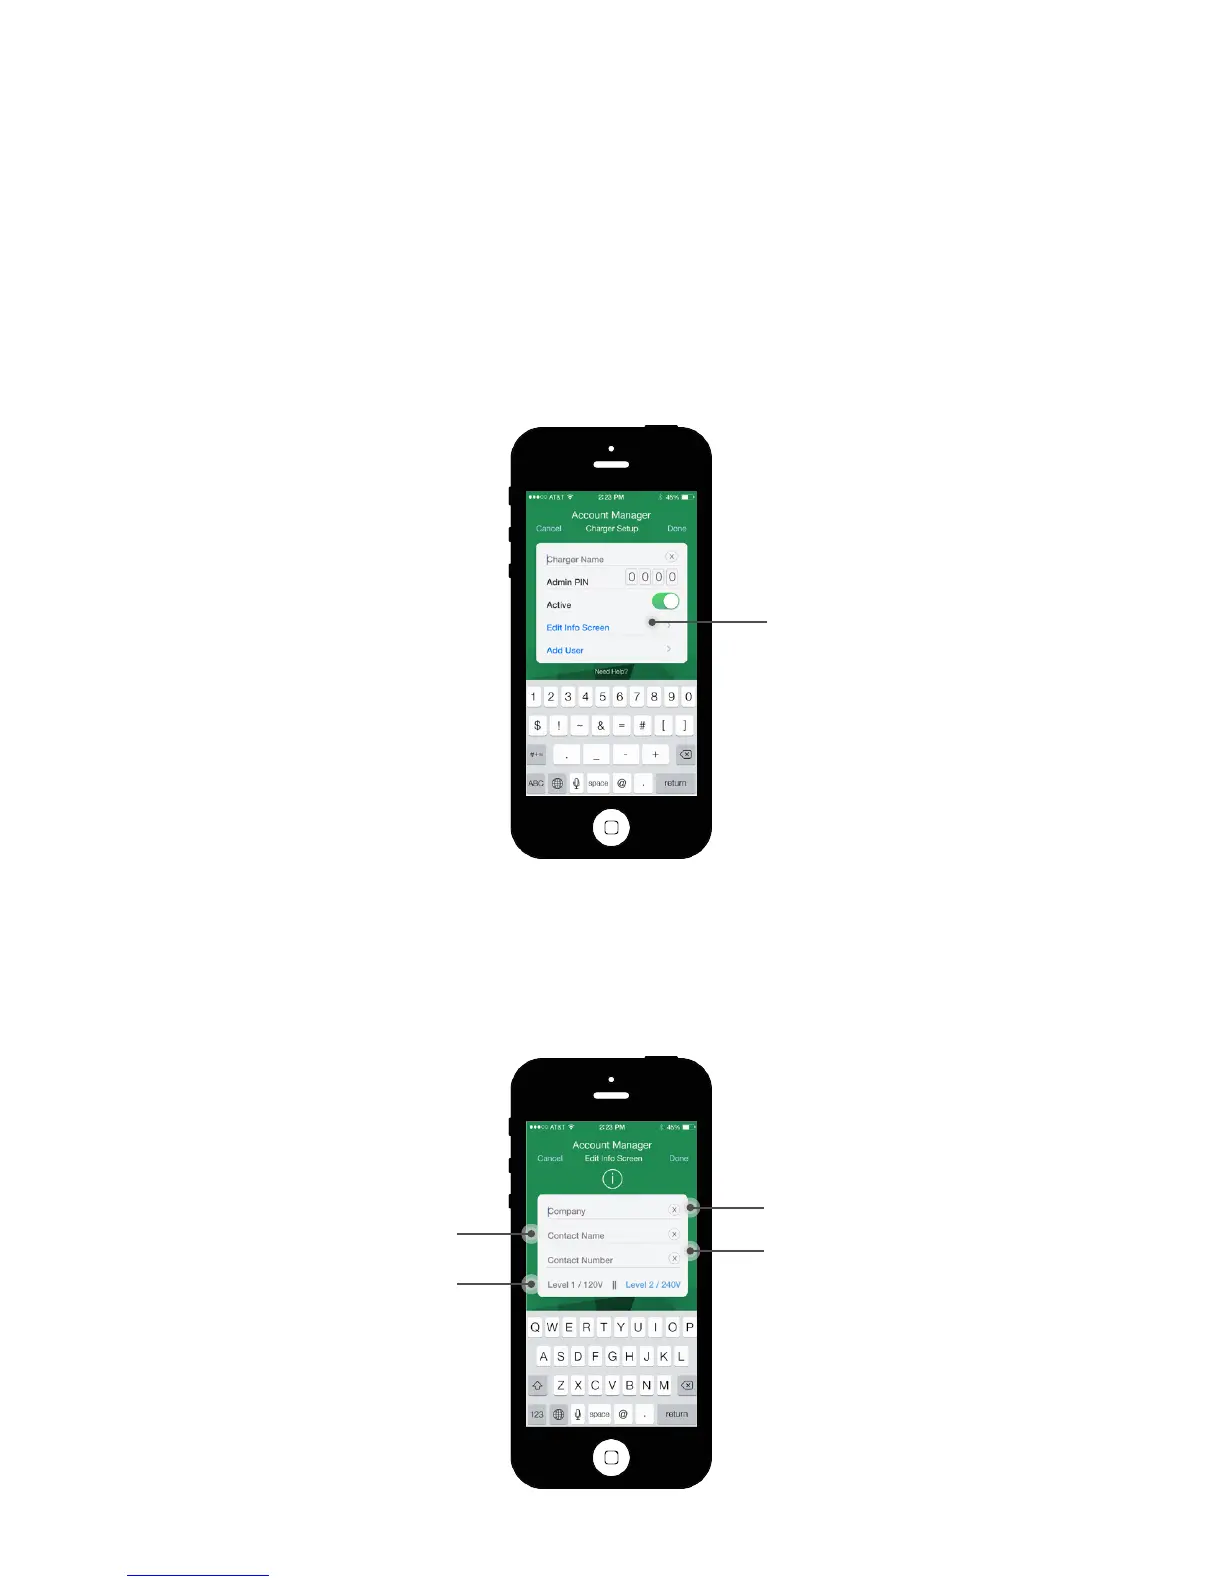
4.2 SETTING UP THE CHARGER
On the “Edit Info” screen, enter your Company Name, your name, and your
contact number. Select “Level 1/120V” or “Level 2/240V” to identify how the
charger is configured. (If you don’t know which is correct, look at the nameplate
label underneath the Coupler dock. Your installer will have marked it as “120V”
or “240V”.) Note that selecting this only tells the User on which level this
charger operates. You cannot change the configuration from one level to the
other from the app itself.
Click“Edit Info screen”
“Company”
“Contact Name”
“Phone Number”
“Level Select”