OPTIONAL EQUIPMENT (CONTINUED) PAGE 35
Remote Control (Part # 99300651)
! Do not connect 110-120 VAC to the gas control valve or wiring system of this unit.
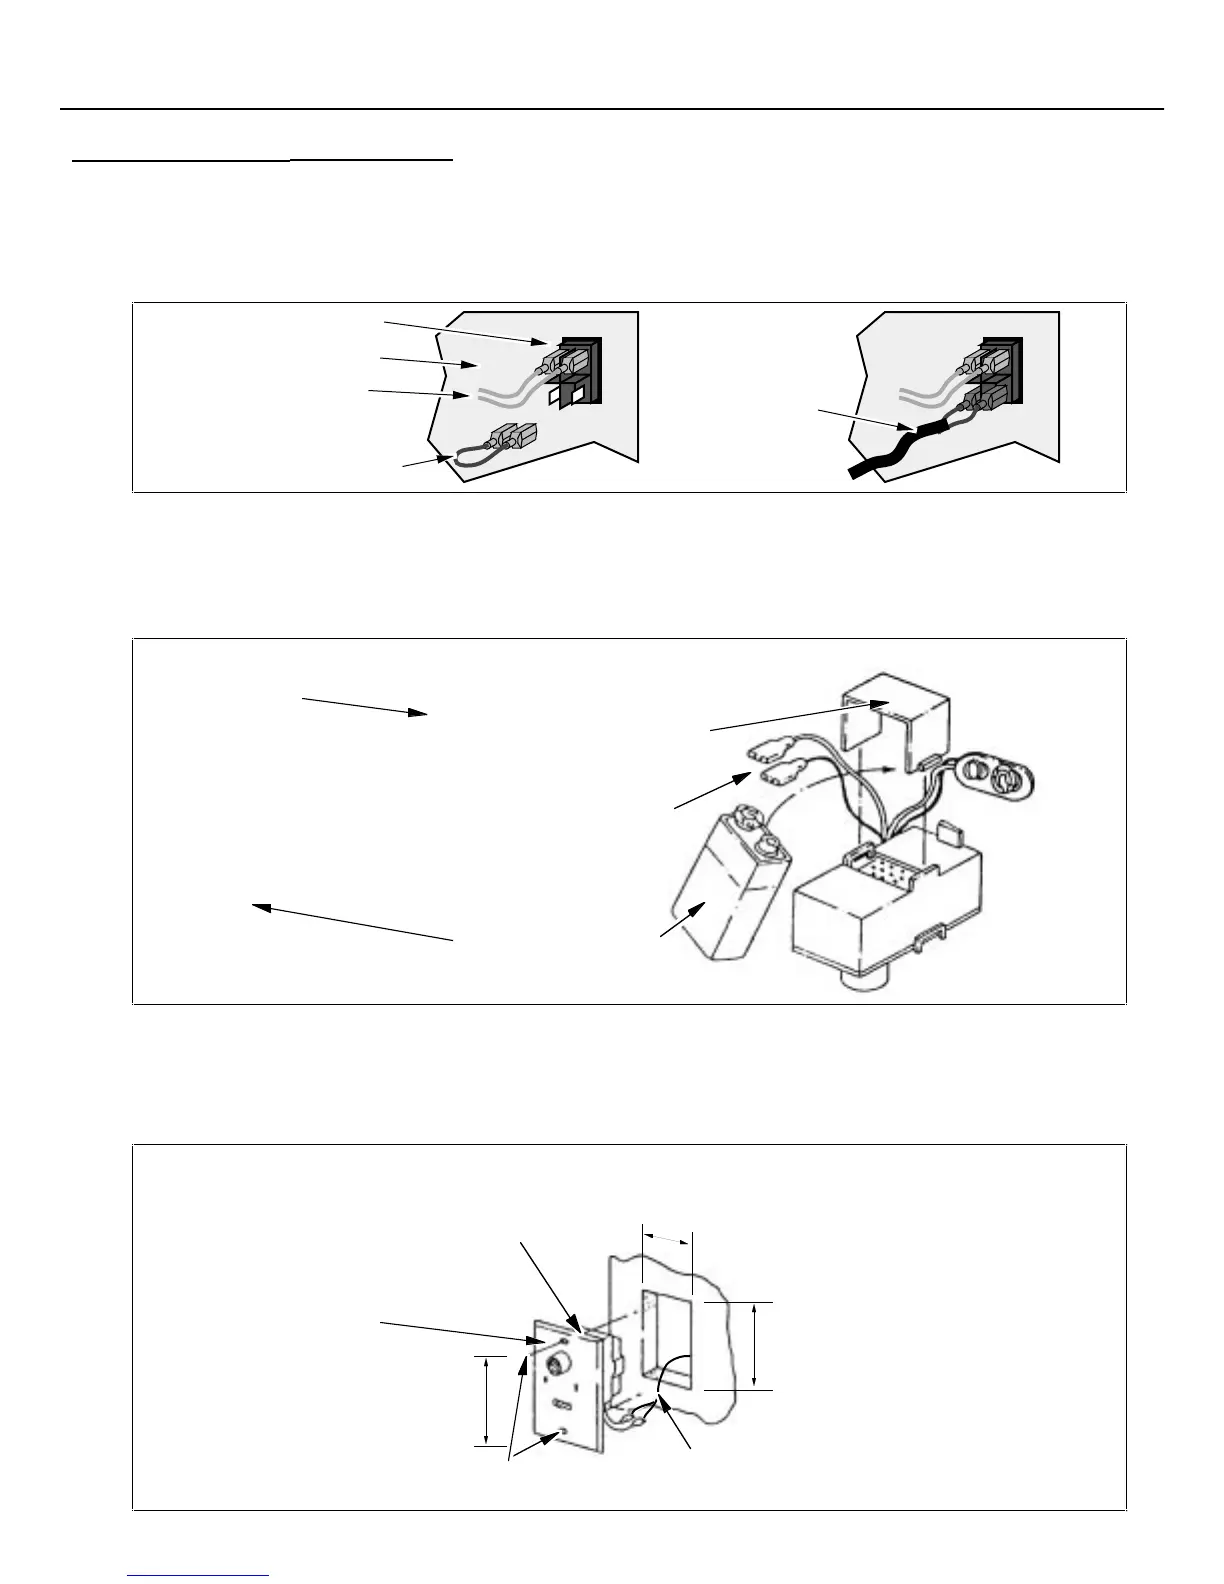
1 The rear panel must be removed and the on/off switch installed prior to installing the remote control
(see page 9 for details). Remove and discard the jumper wire on the on/off switch Connect the two
female (black) connectors on the remote control wire to the two posts the jumper wire was attached
to.
Rem ove th e jum per
wire and discard.
Back of on/off switch
Rear Panel
Red wire s leading to
the stove.
A ttach the
re m o te control
wire s to the
b o tto m tw o
posts on the
o n /o ff sw itch.
2 Route the remote control wire through the gas inlet hole and pull through all the slack (you may wish
to wrap the wire in electrical tape where it passes through the heater to prevent damage to the wire).
Attach the rear panel (see page 9 for details).
3 Turn the gas control valve to "OFF". Install a standard 9 volt battery into both the remote control
receiver and remote control.
Install a 9 volt battery in
both the remote control and
remote control receiver.
Remove this
screw with a
phillips head
screwdriver.
This clip holds the
battery in place.
Attach the remote
control wire to
these two quick-
connects.
Remote
Control
Receiver
(with cover
plate
removed)
4 Choose a location for the remote control receiver that is near the heater so that it may be reached
with the 50' length of remote control wire. Cut a 1-3/4" wide by 2-1/2" tall hole into the wall for the
remote control receiver. Route the remote control wire to the remote control receiver (the wire may
be routed externally on the wall or behind the wall). Attach the remote control wire to the remote
control receiver by inserting the quick-connects together.
The distance between the
mounting holes is 3 1/4".
The hole must
be 2 1/2" tall.
The hole must
be 1 3/4" wide.
Remote Control
Receiver
Cover Plate
The mounting screws insert here
(screws not included)
Remote
Control Wire