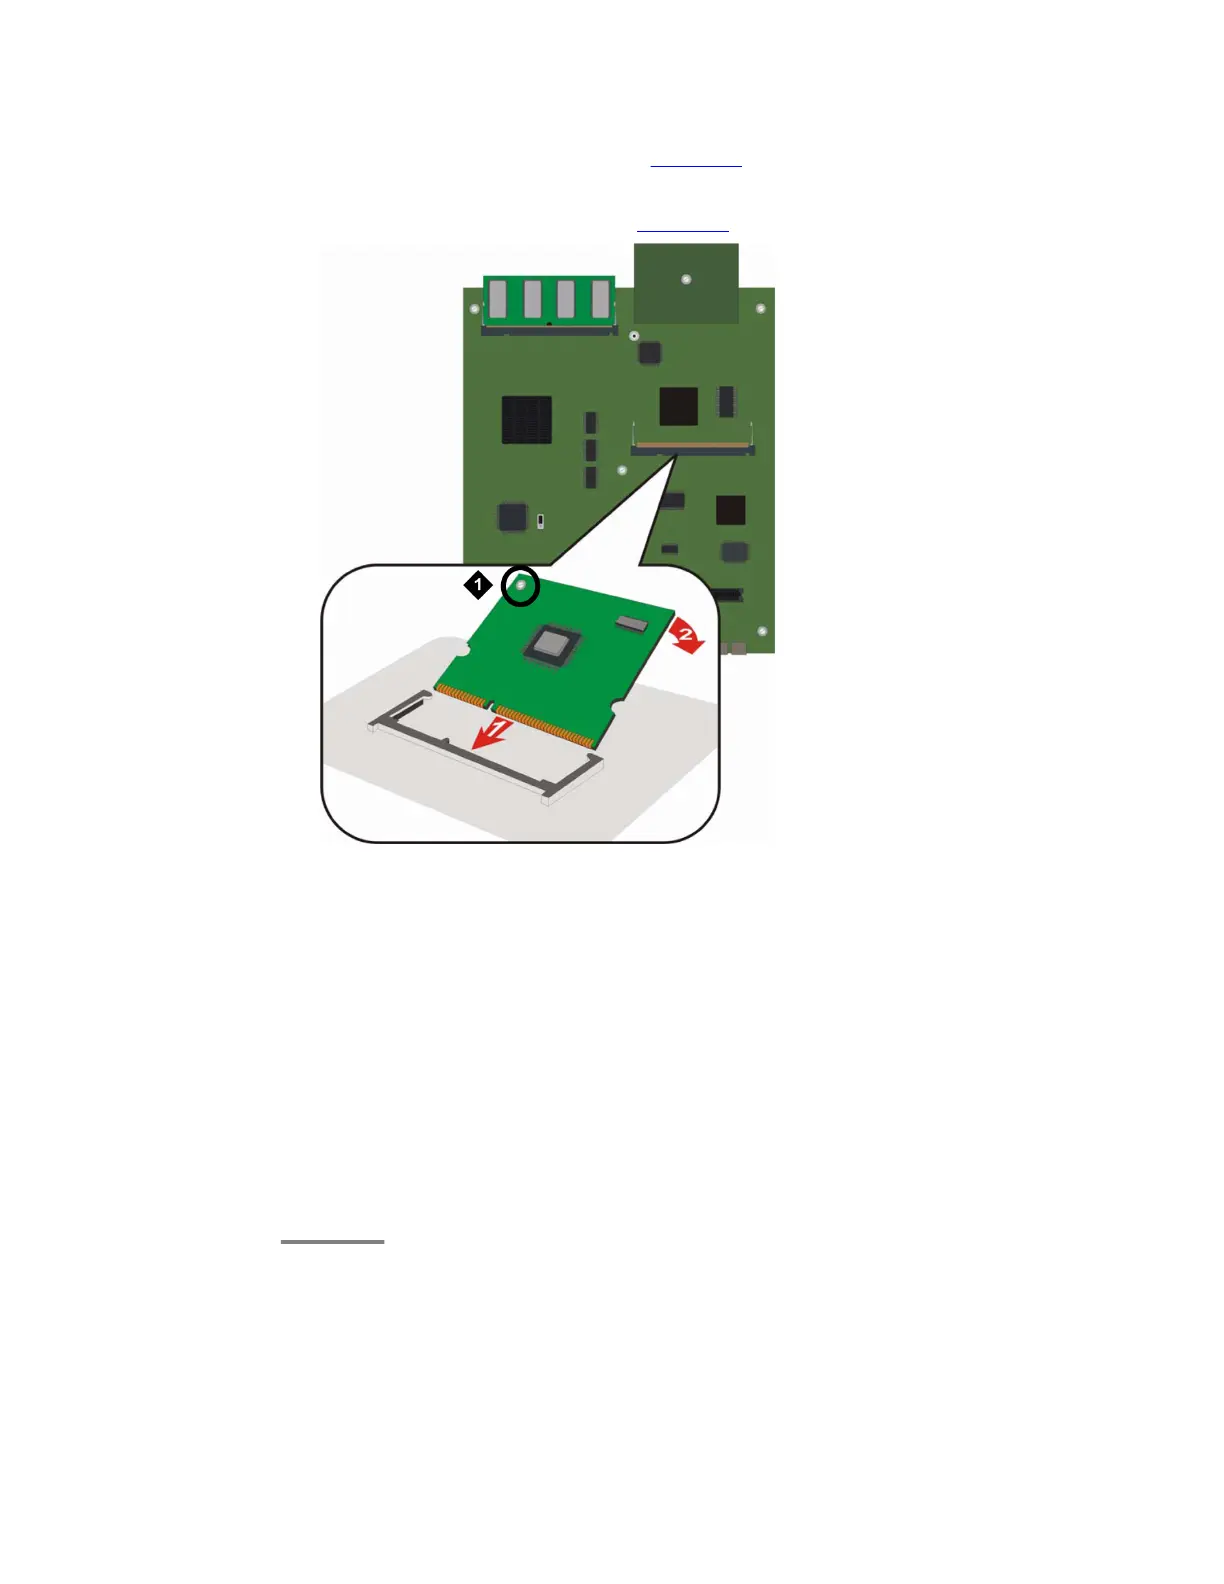
2. Locate the VoIP module slot (see the figure on page 25).
3. Position the VoIP module at a 45 degree angle to the main board, and start inserting
it into the VoIP module slot (see the figure on page 25).
Figure 9: Inserting a VoIP module into the VoIP module slot
Table 6: Figure notes:
VoIP module locking screw
4. Push the module in all the way.
Do not use too much force.
5. Flatten the module so it is flush with the main board.
The latches at both sides click shut.
6. Tighten the locking screw affixed to the VoIP module.
This secures the VoIP module to the motherboard.
Adding and removing the MP120 VOIP module
Configuring V.150.1 on Avaya G450 and G430 Branch Gateway May 2014 25


 To Next Page