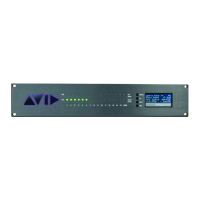
Pro Tools | MTRX Installation Guide36
To install a MTRX MADI module:
1 Remove the two fasteners that secure the faceplate over the Optical I/O slot and remove the faceplate.
Set the screws aside (you will use them later to secure the card to the unit).
2 Remove the following 14 fasteners from the back panel of the MTRX. Keep the fasteners organized to
simplify reassembly.
• Use a 3/16-inch socket or similar sized open end wrench to remove the two pairs of cable anchors (4
total) from each AES/EBU DB-25 port (items
1–4 in the figure below).
• Use a small flathead screwdriver to remove the two pairs of cable anchors (4 total) that secure the
PHD I/O ports (items
7–10 in the figure below).
• Use a #1 Phillips screwdriver to remove the three pairs of fasteners (6 total) that secure the MADI,
WC/VBB, and AES11 ports (items
5–6, and 11–14 in the figure below).
Do not remove any PSU or analog card fasteners.
Fasteners securing the Optical I/O faceplate
The MTRX MADI module has been modified since its original production to make it easier to install. If
you have a newer module, you do not need to remove the motherboard and you can skip steps 2 through
4, and steps 7 and 8. For more information, refer to this online video at:
https://www.digitalaudiosupport.com/madi-module-installation/
Fasteners to remove
AES/EBU I/O 5-8
AES/EBU I/O 1-4 MADI
in
out
in
out
100-240VAC, 50/60 Hz
Max 90 VA
Fuse T1AH/250VAC
WC/VBB
PHD I/O
Primary 1 Pr 2/Exp
AES11 in
Net 1 Net 2
Optical I/O
1
1
2
3 4 5 6 7 8 9 10 11 12 13 14