EasyManuals Logo

Avid Technology S6L Control Surface Installing

Avid Technology S6L Control Surface
17 pages
To Next Page IconTo Next Page
To Previous Page IconTo Previous Page
Page #5 background imageLoading...
Page #5 background image
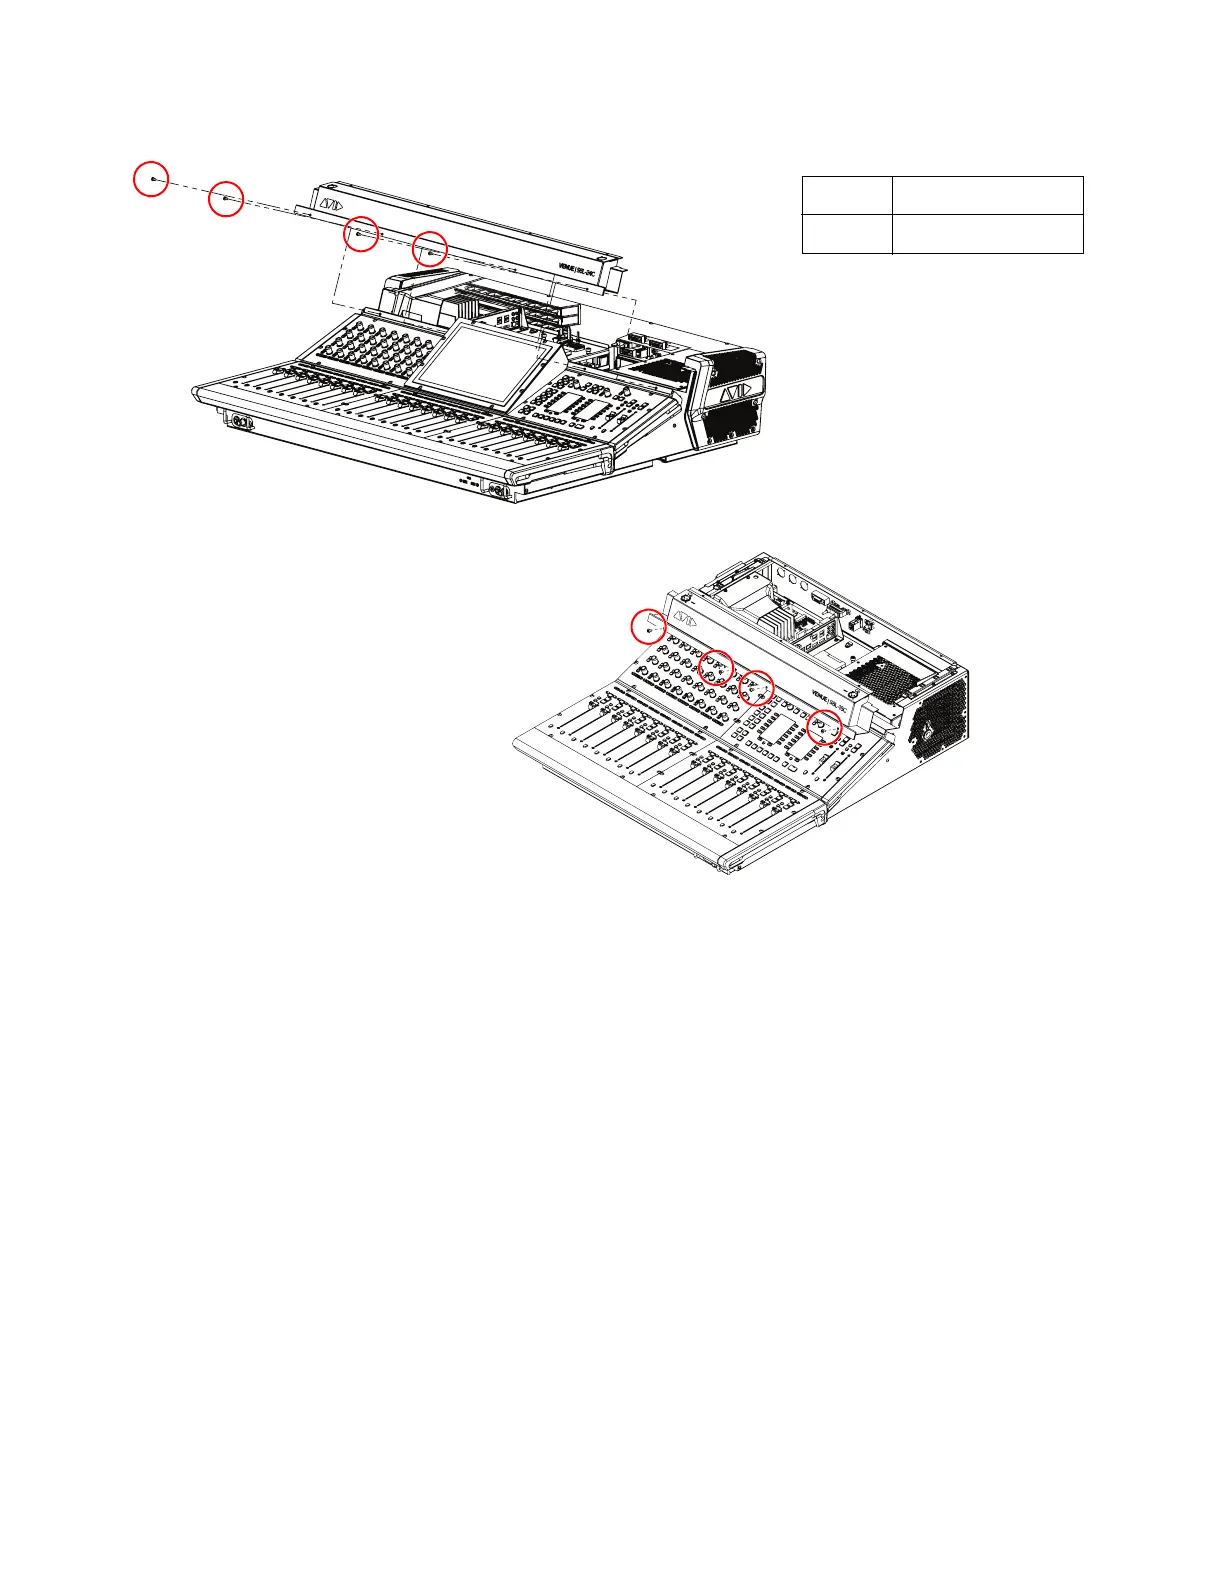
S6L Control Surface RAM Expansion 5
6 Using a 2.5mm Hex driver, remove the fasteners that secure the top cover to the control surface (S6L-24C and 16C both use 4
fasteners).
7 Set a large towel or similar across the upper modules of the control surface (CKM, MTS, MLM) to protect them.
8 Carefully lift the top cover off the chassis and set it face down on the towel you placed on the surface, being careful to not stretch
or stress the cables connected to the light sockets.
9 Proceed to Disconnect Light Cables.
Figure 6. Top cover fasteners on S6L-24C (above, with End Cap loosened) and S6L-16C (below, showing End Caps removed)
Fasteners:
Tool:
M4x8mm BHCS
2.5mm Hex driver

Other manuals for Avid Technology S6L Control Surface

Questions and Answers:

Question and Answer IconNeed help?

Do you have a question about the Avid Technology S6L Control Surface and is the answer not in the manual?

Avid Technology S6L Control Surface Specifications

General IconGeneral
BrandAvid Technology
ModelS6L Control Surface
CategoryMusic Mixer
LanguageEnglish

Related product manuals