EasyManuals Logo

Avid Technology S6L Control Surface Installing

Avid Technology S6L Control Surface
17 pages
To Next Page IconTo Next Page
To Previous Page IconTo Previous Page
Page #8 background imageLoading...
Page #8 background image
S6L Control Surface RAM Expansion 8
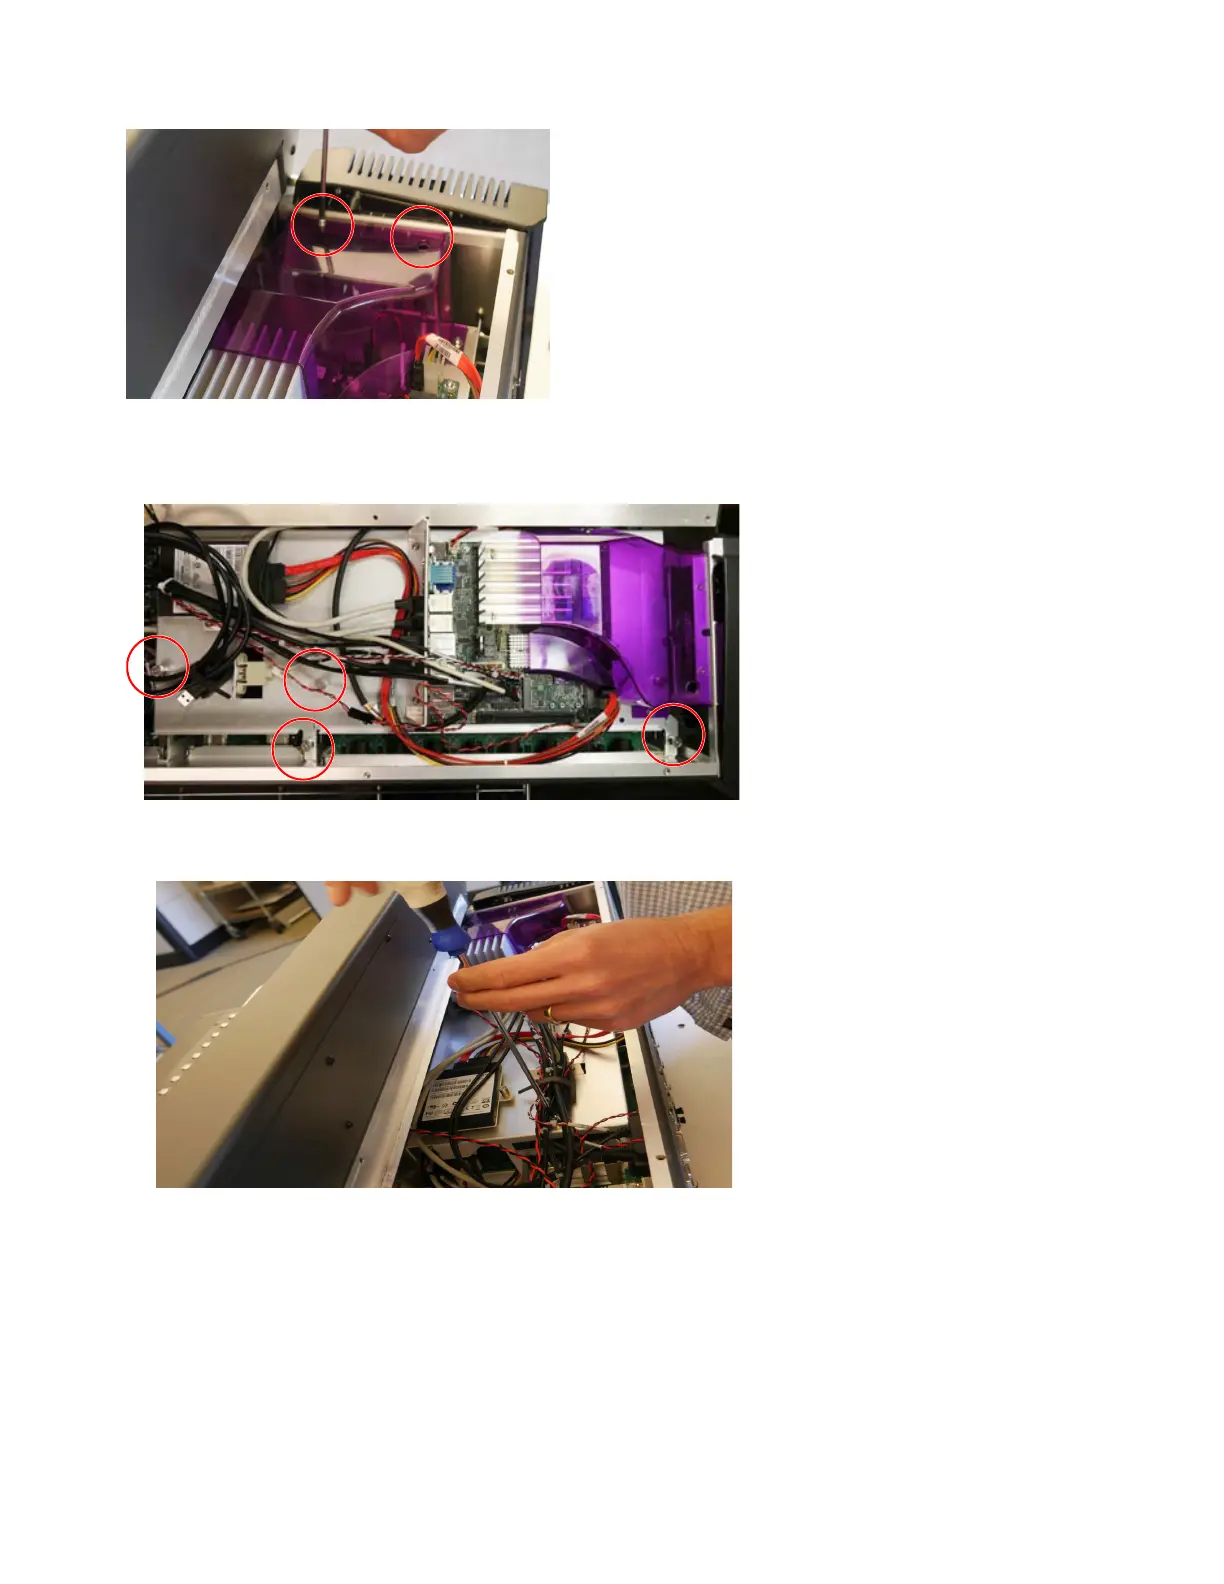
3 Using a #2 Phillips screwdriver, remove the two fasteners securing the top edge of the purple shroud to the top of the chassis.
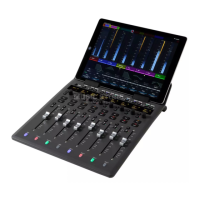
4 Locate the captive screws securing the SBC Tray to the chassis (these are in addition to the captive screw under the shroud that
you loosened earlier). S6L-24D, 32D, and 48D have four captive screws to loosen, shown below:
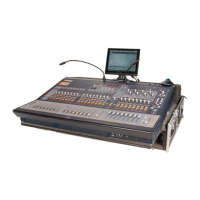
5 Using a #2 Phillips screwdriver, loosen the captive screws.
Figure 11. Fasteners to remove from the top of the shroud
Figure 12. Fasteners securing the SBC Tray to the chassis on S6L-48D, 32D, 24D, and 24C
Figure 13. Loosening one of the captive screws

Other manuals for Avid Technology S6L Control Surface

Questions and Answers:

Question and Answer IconNeed help?

Do you have a question about the Avid Technology S6L Control Surface and is the answer not in the manual?

Avid Technology S6L Control Surface Specifications

General IconGeneral
BrandAvid Technology
ModelS6L Control Surface
CategoryMusic Mixer
LanguageEnglish

Related product manuals