AXIS Q60-S Series
7
Ground wire
8
Ground screw
13. If applicable, connect an I/O device to the external I/O connector.
14. Connect the power cable (DC input) to the power connector (DC input) via the terminal
block plug.
15. Attach the ground wire to the ground screw (position 8 in the illustration).
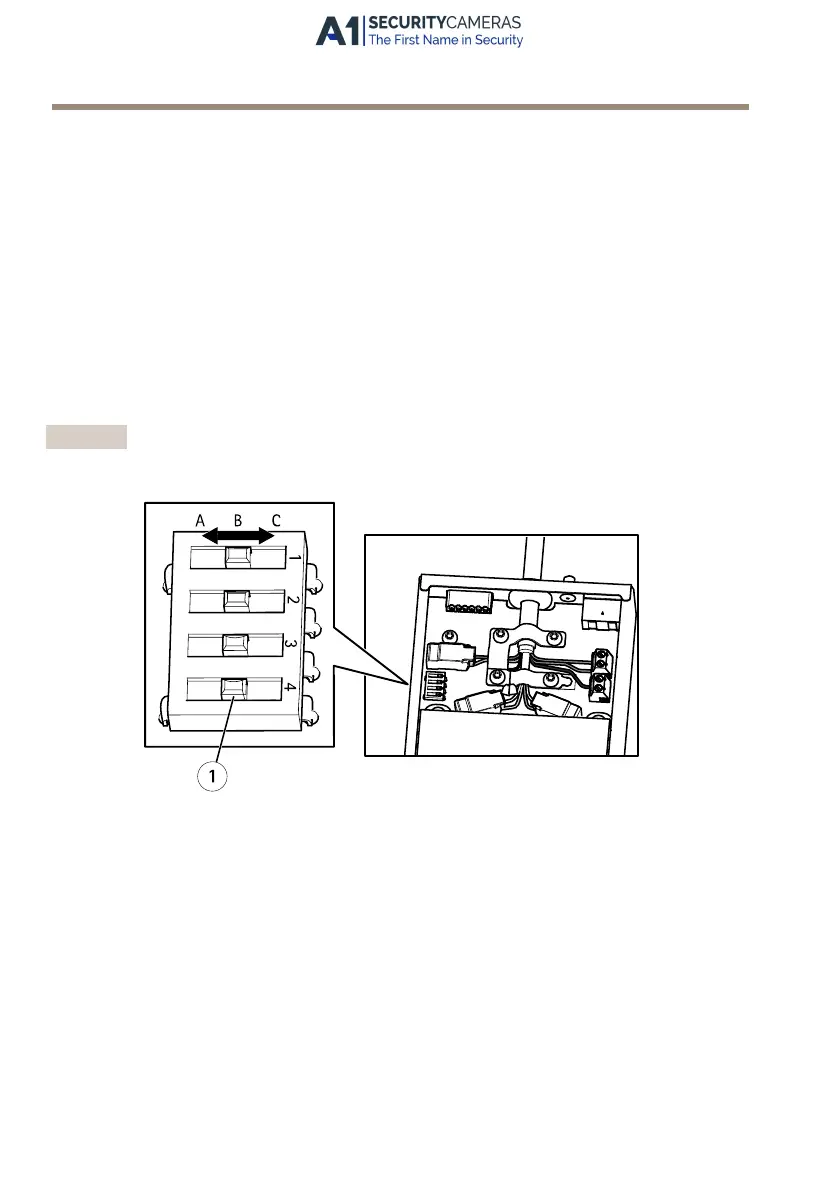
16. If connecting several media converter switches in a daisy chain, set the dip switch of
each outgoing network connector port that connects to another media converter switch
to position C.
Leave the dip switch in its default position (position B) when connecting the port directly
to the network. For more information, see Media Converter Switch Connectors on page
17 and the User Manual.
Important
If the system is not dened, use the default dip switch setting (position B).
1
Dip switch (4x)
17. Attach the cover to the media converter switch.
18. Switch on the mains supply.
19. Make sure the LED indicators on the media converter switch indicate the correct
conditions. For more information, see Media Converter Switch LED Indicators on page 14.
28
Available from A1 Security Cameras
www.a1securitycameras.com email: sales@a1securitycameras.com
 Loading...