2
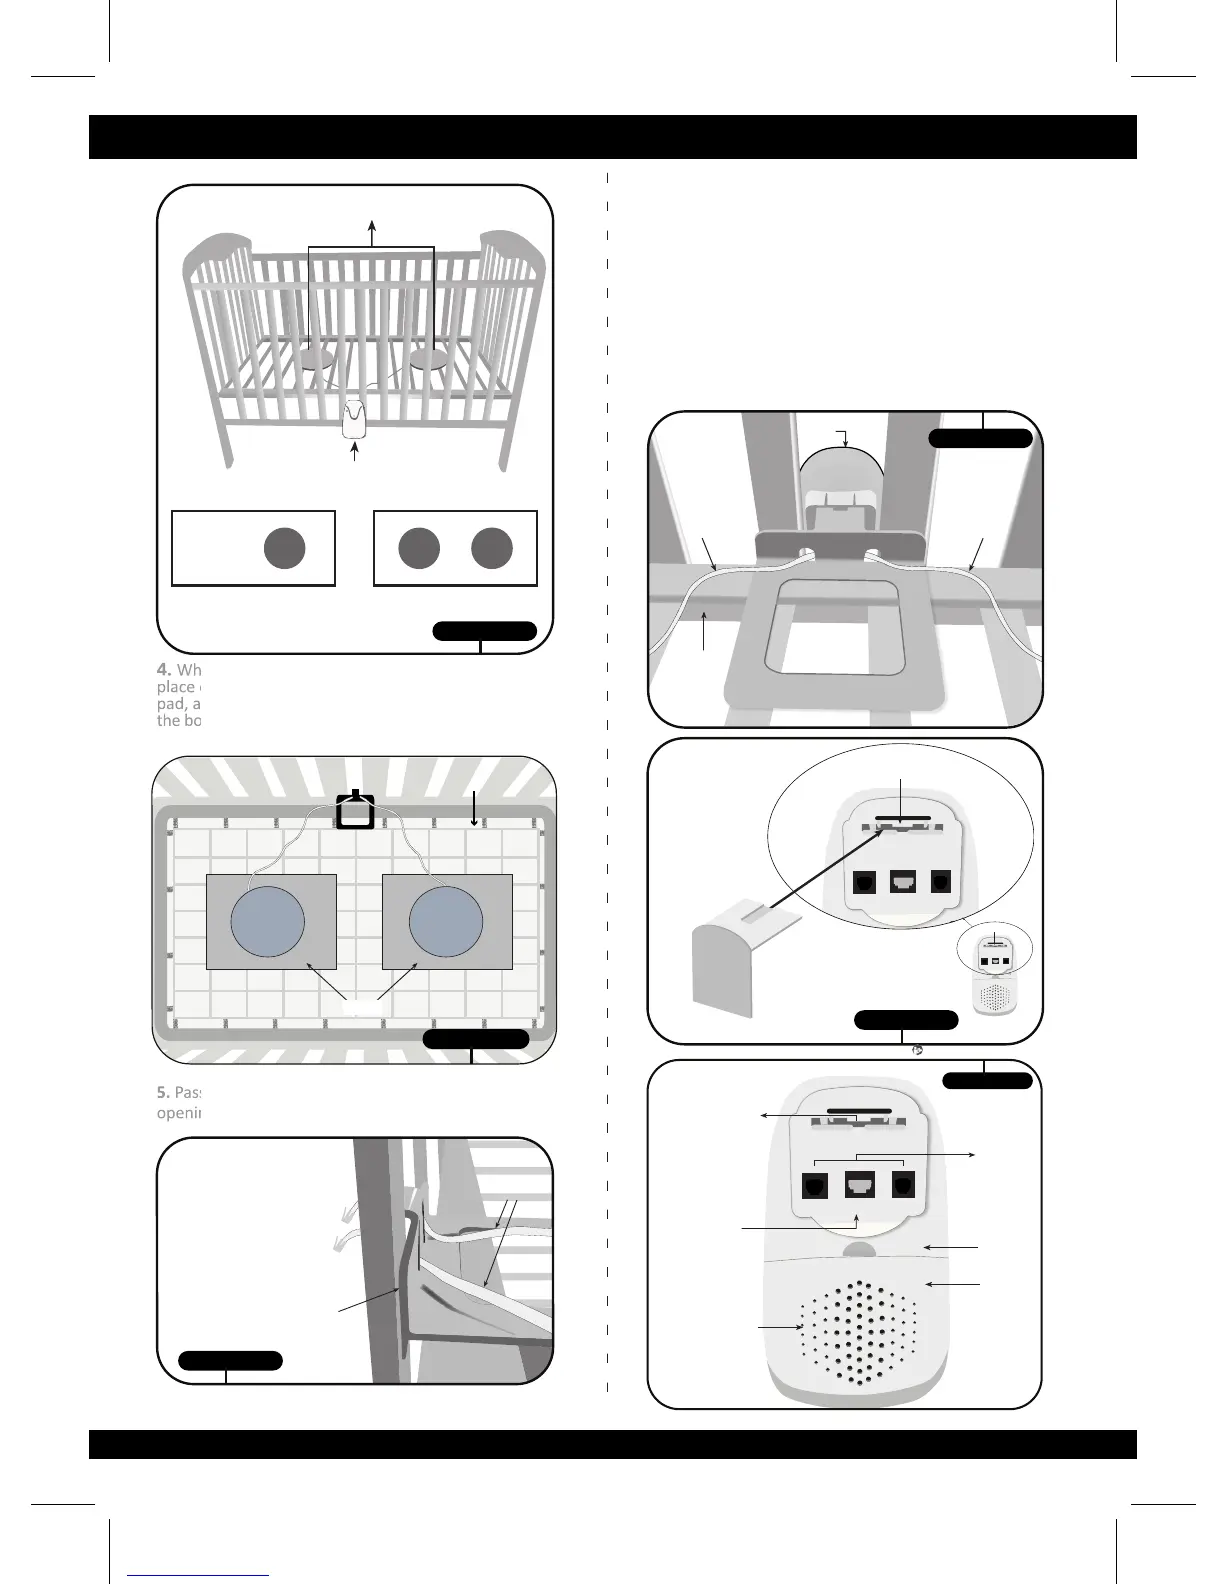
4. When using a crib/bed equipped with spring base,
place extra wooden board (plywood) under each sensor
pad, as shown in illustraon 3. The recommended size of
the board is at least 17’’ x 11’’ and 1/2’’ thick.
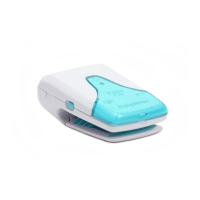
5. Pass the cord(s) of the sensor pad(s) through special
openings in the holder (see illustraon 4).
Spring base
Top crib/bed view
User Guide
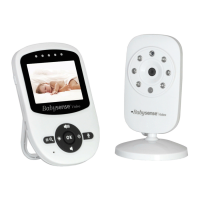
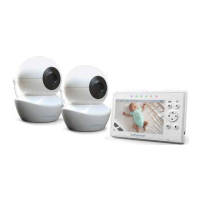
6. Aach end(s) of the cord(s) to the outlets marked
"SENSOR" on the back of control unit
(see illustraon 5 and 6). When using one sensor pad,
aach to any “SENSOR” outlet.
PLEASE NOTE: Do not aach any cable to the blocked
socket, marked "DO NOT USE".
7. Should the design of the crib / bed not allow proper
installaon with the control unit holder, please use the
oponal hanging hook (see illustraon 5) and hang
the control unit from the boom edge of the crib.