6
ASSEMBLY
3
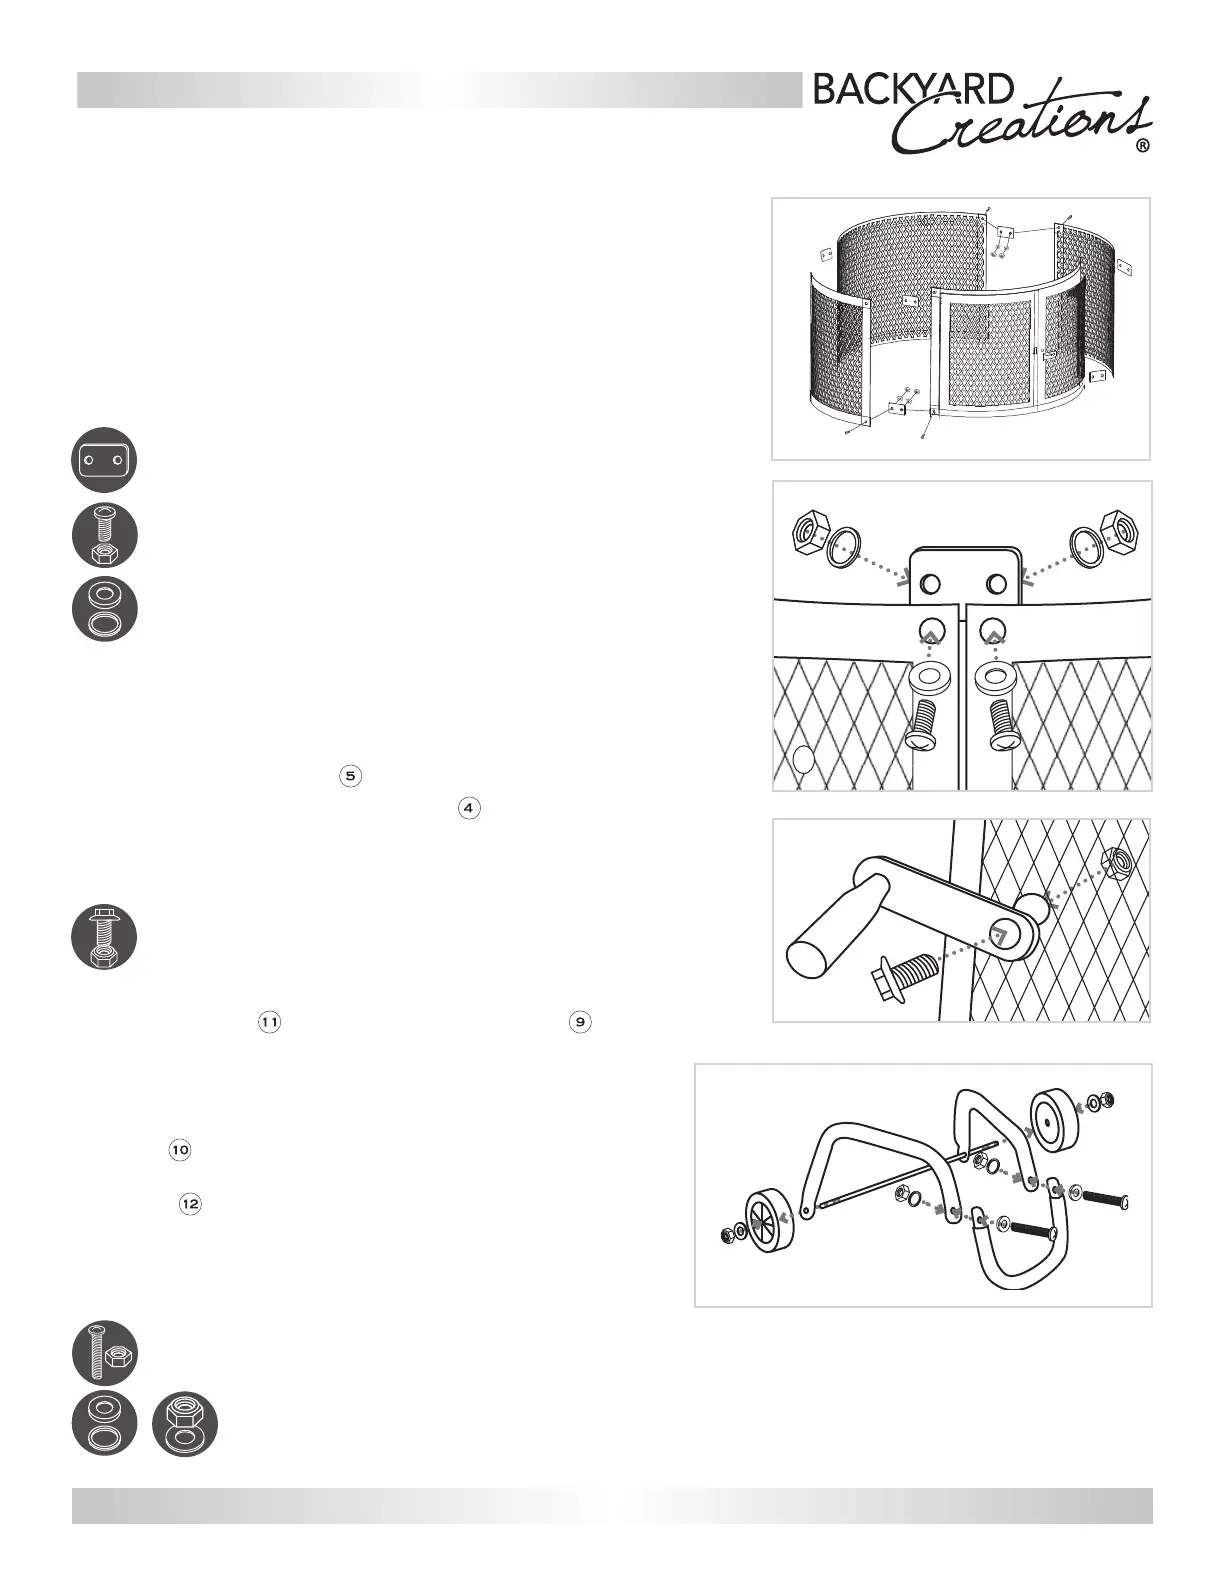
Align holes in Connecting Brackets
I
with the Screens and Screen
Door 4. (Note: Door screen and back screen have 3 holes along
the BOTTOM. Check orientation before continuing. Connecting
Brackets should be placed on INSIDE of screens). Slide M6x18
Washer
C
onto M6x15 Screw
A
and through the hole in the
Connecting Bracket and
Screen. Secure with M6x9 Lock Washer
B
and M6x15 Nut A
. Repeat with remaining Connecting Brackets.
Hardware Used: 8x Connecting Brackets
16x M6x15 Screw/Nut,
M6x9 Lock Washer,
M6x18 Washer
4
To attach the Door Latch , align the hole in the Door
Latch with the hole in the Screen Door and insert
M5x10 Screw
D
and secure with M5x10 Lock Nut
D
.
Tighten all hardware.
Hardware Used: 1x M5x10 Screw/Lock Nut
5
Insert the U-Leg into the ends of the 2 Leg Stands
and align holes. Slide M6x18 Washer
C
onto M6x35
Screw
E
, then insert through holes and secure with M6x9
Lock Washer
B
and M6x35 Nut
E
. Repeat for other side.
through
the holes on one leg Stand, then
bend back other Leg Stand and insert other end of axle.
Slide Wheel
Insert
Axle
over end of Axle. Place M12x22 Washer
F
over end of Axle
. S
ecure
Wheel with M10 Lock Nut
G
.
Repeat for
other side.
Tighten all hardware.
Hardware Used: 2x M6x35 Screw,
M6x9 Lock Washer,
M6x18 Washer, M6x35 Nut,
M12x22 Washer, M10 Lock Nut
3
3
4
5
NOTE: Indentations on Leg Stands should face
toward the outside. To tighten bolts, hold Axle
next to Leg Stand.
Contact us for assistance: cservice@welltraveled.net
For Reference Only