Do you have a question about the BALDR B0341WST2H2-V3 and is the answer not in the manual?
Remove battery compartment cover and insert 2xAAA batteries into the main unit.
Select channel on sensor and insert batteries within 3 minutes for RF signal reception.
Observe the full LCD display for 3 seconds after power-on and understand its sections.
The receiving antenna signal is flashing while searching for the sensor.
The receiving antenna signal stops flashing, indicating successful outdoor data reception.
Follow the setup order for date, time, and other settings, using buttons to adjust values.
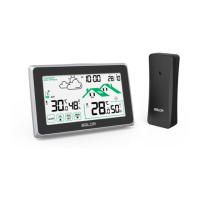
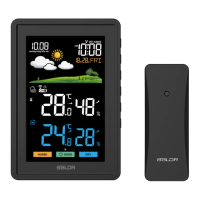
This document provides a quick setup guide for the BALDR Wireless Weather Station with Backlight, model B0341WST2H2-V3. This device is designed to provide real-time indoor and outdoor temperature and humidity readings, along with a weather forecast and current time and date display.
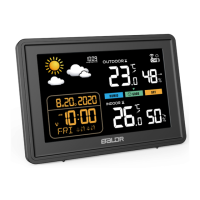
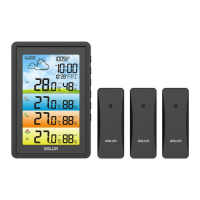
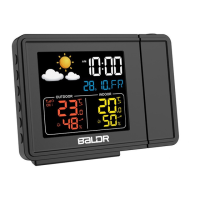
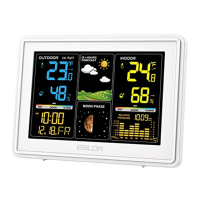
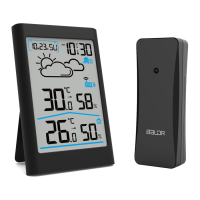
The BALDR Wireless Weather Station consists of two main components: a main unit and a wireless outdoor sensor. The main unit is responsible for displaying all the collected data, including indoor temperature and humidity, outdoor temperature and humidity, a weather forecast icon, current time, date, and weekday. It features a backlight for easy viewing in various lighting conditions. The wireless outdoor sensor is designed to be placed outdoors to measure external temperature and humidity and transmit this data wirelessly to the main unit.
The weather station offers a comprehensive set of functions to keep you informed about your local environment. It displays the current indoor temperature and humidity, allowing you to monitor the conditions within your home or office. Simultaneously, it receives and displays outdoor temperature and humidity data from the remote sensor, giving you a clear picture of the external environment. The device also includes a weather forecast feature, which is typically represented by intuitive icons (e.g., sunny, cloudy, rainy) to give you an idea of upcoming weather patterns.
Beyond environmental monitoring, the main unit also functions as a clock, displaying the current time in either a 12-hour or 24-hour format, along with the date and weekday. This integration of timekeeping with weather monitoring makes it a versatile device for daily use.
Setting up the BALDR Wireless Weather Station involves a few straightforward steps for both the main unit and the outdoor sensor.
After both units are powered on, the main unit will begin searching for the RF signal from the outdoor sensor.
The weather station allows for manual adjustment of various settings. To enter the setup mode, press and hold the "SET/C/F" button for 3 seconds. Once in setup mode, you can cycle through different settings by pressing and releasing the "SET/C/F" button (a quick press of 1 second). The available settings typically include:
To change the values within each setting, use the "CH/▲" button to increase the value and the "MEM/▼" button to decrease the value. For faster adjustments, you can press and hold either the "CH/▲" or "MEM/▼" button, which will quickly change the value by 8 steps.
The BALDR Wireless Weather Station is designed for ease of use and minimal maintenance.
This quick setup guide provides the essential steps to get your BALDR Wireless Weather Station up and running, allowing you to quickly benefit from its environmental monitoring and timekeeping features. For more detailed settings and advanced functionalities, users are encouraged to refer to the comprehensive user manual or scan the provided QR code for additional product information and operation video links.
| Model Number | B0341WST2H2-V3 |
|---|---|
| Brand | BALDR |
| Category | Weather Station |
| Display Type | LCD |
| Wireless Transmission | Yes |
| Power Source | Battery |
| Transmission Range | 100 meters |
| Features | Indoor/Outdoor temperature and humidity |
| Temperature Measurement Range | Indoor: 14°F to 122°F (-10°C to 50°C); Outdoor: -40°F to 158°F (-40°C to 70°C) |