C
ISTRUZIONI DI MONTAGGIO E USO
INSTALLATION AND USE
12
um_gfm C0_it-en_rev. 1.0
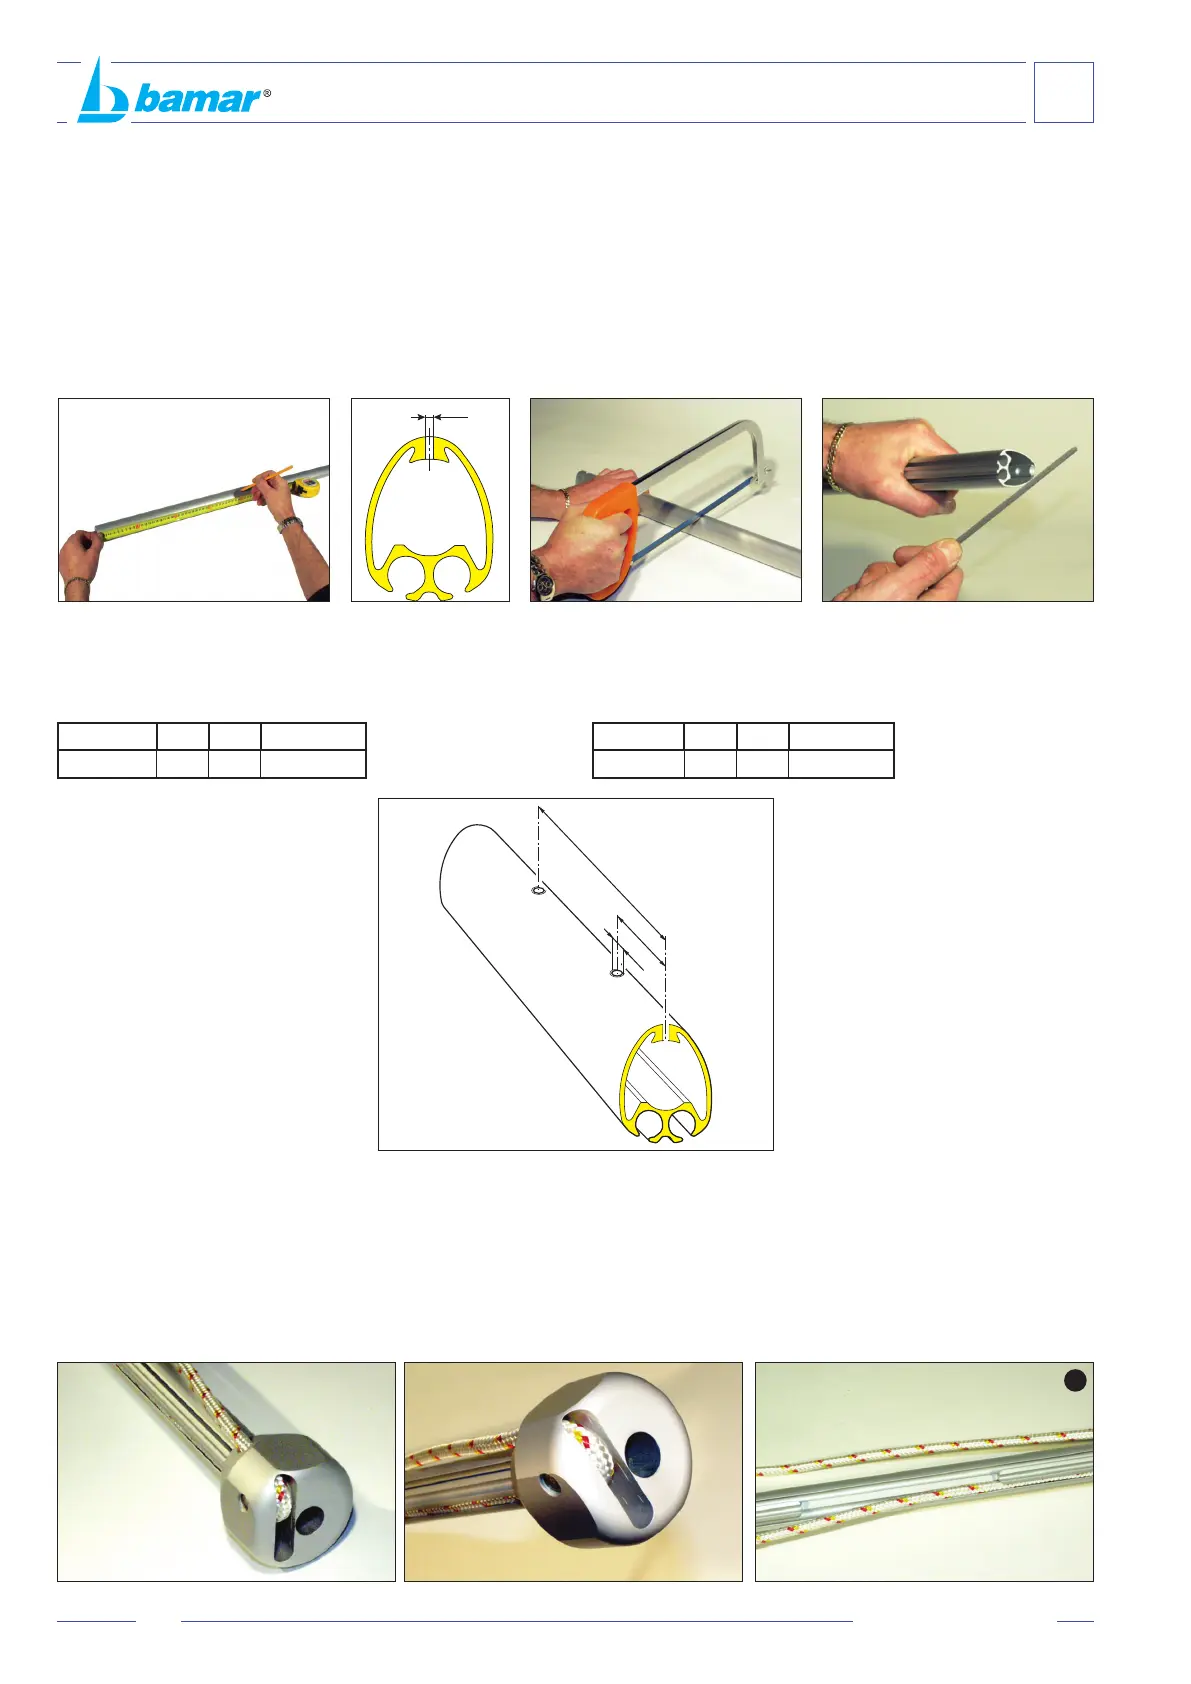
C-3 PREPARAZIONE AL MONTAGGIO PROFILI
C-3.1 Taglio a misura del prolo
• Tracciare su un prolo la misura ricavata dalla formula dal cap. C.2.
• Forare con una punta ø 7 mm il prolo
• Tagliare con un seghetto a mano il profilo sul centro del foro
precedentemente eseguito
• Con una lima a taglio dolce sbavare le estremità del prolo con
particolare cura le sedi del gratile.
C-3 HOW TO PREPARE THE FOILS
C-3.1 Cutting the foil to measure
• Mark out on a foil the measure you derived from the formula on
chap. C.2.
• Drill the foil with a ø 7 mm drill bit.
• With a hand saw cut the foil on the centre of the hole you drilled
• File the foil end with a smooth le with particular care to the luff groove.
ø 7
SX
DX
C
B
A
A
C-3.2 Foratura del prolo
• Forare e lettare il prolo, per il montaggio dei grani di ssaggio
dell’anima di giunzione, seguendo la tabella sotto riportata.
A B C
C0 15 25 Ø4.25/M5
C-3.2 Drilling the foil
• Drill and thread the foil to house the Allen screws used to hold the
splice pieces. See the table hereafter for measurements:
A B C
C0 15 25 Ø4.25/M5
C-3.3 Percorso della drizza
• Inserire la drizza fornita nel foro inferiore della testa ssa, ruotarla
sulla puleggia di 180° ed entrare all'interno della testa ssa inlandola
nella canaletta lato dx del prolo terminale.
• Aiutarsi con un piccolo cacciavite e far scorrere la cima nelle canalette
di dx di tutti i proli che si andranno ad assemblare no a farla
fuoriuscire dal prolo inferitore (A).
C-3.3 The halyard
• Insert the halyard (supplied) in the lower hole of the xed head, rotate
it by 180° on the pulley and let it slide inside the xed head. Then,
insert the halyard in the right-hand side groove of the terminal foil.
• Help yourself with a small screw-driver and let the halyard slide in
the right-hand side groove of all foils you are assembling, until you
let it get out from the hoisting foil (A).

 Loading...