C
ISTRUZIONI DI MONTAGGIO E USO
INSTALLATION AND USE
16
um_gfm C0_it-en_rev. 1.0
C-7 MONTAGGIO DELL’AVVOLGIFIOCCO CON
ALBERO ARMATO
In questo caso non è necessario smontare lo strallo,ma è suf ciente
scollegarlo dalla landa di prua per eseguire il montaggio dell’avvolgi occo.
Adottando questa soluzione i pro li non sono sottoposti allo stress
derivato dalla inevitabile essione in fase di installazione dello strallo
sull’albero.
PERICOLO
PERICOLO DI FOLGORAZIONE
ATTENZIONE
AVVERTENZA
RISPETTA L'AMBIENTE
Prima di scollegare lo strallo dalla landa di prua assicurarsi che sia stata
applicata una drizza di sicurezza.
Per eseguire il montaggio seguire la procedura descritta per l’installazione
con strallo a terra adottando alcuni importanti accorgimenti:
• Per evitare che il pro lo montato sullo strallo cada, inserire la testa
girevole e mandarla in battuta sull’anello di fermo.Collegare la drizza
sull’attacco relativo ed una piccola cima per il recupero sull’attacco di
penna.Mettere in tiro la drizza e sollevarla ripetutamente man mano
che i pro li vengono assemblati.Al termine del montaggio recuperare
la testa girevole ammainandola.
C-8 MONTAGGIO DELLA VELA
Per montare la vela occorre:
• Fissare la penna della vela alla drizza fornita.
• Inserire il gratile della vela nell'apertura del pro lo inferitore.
• Issare la vela, ssare le mure al gambetto posto sul tamburo quindi
tesare la drizza strozzandole nell'apposita strozza.
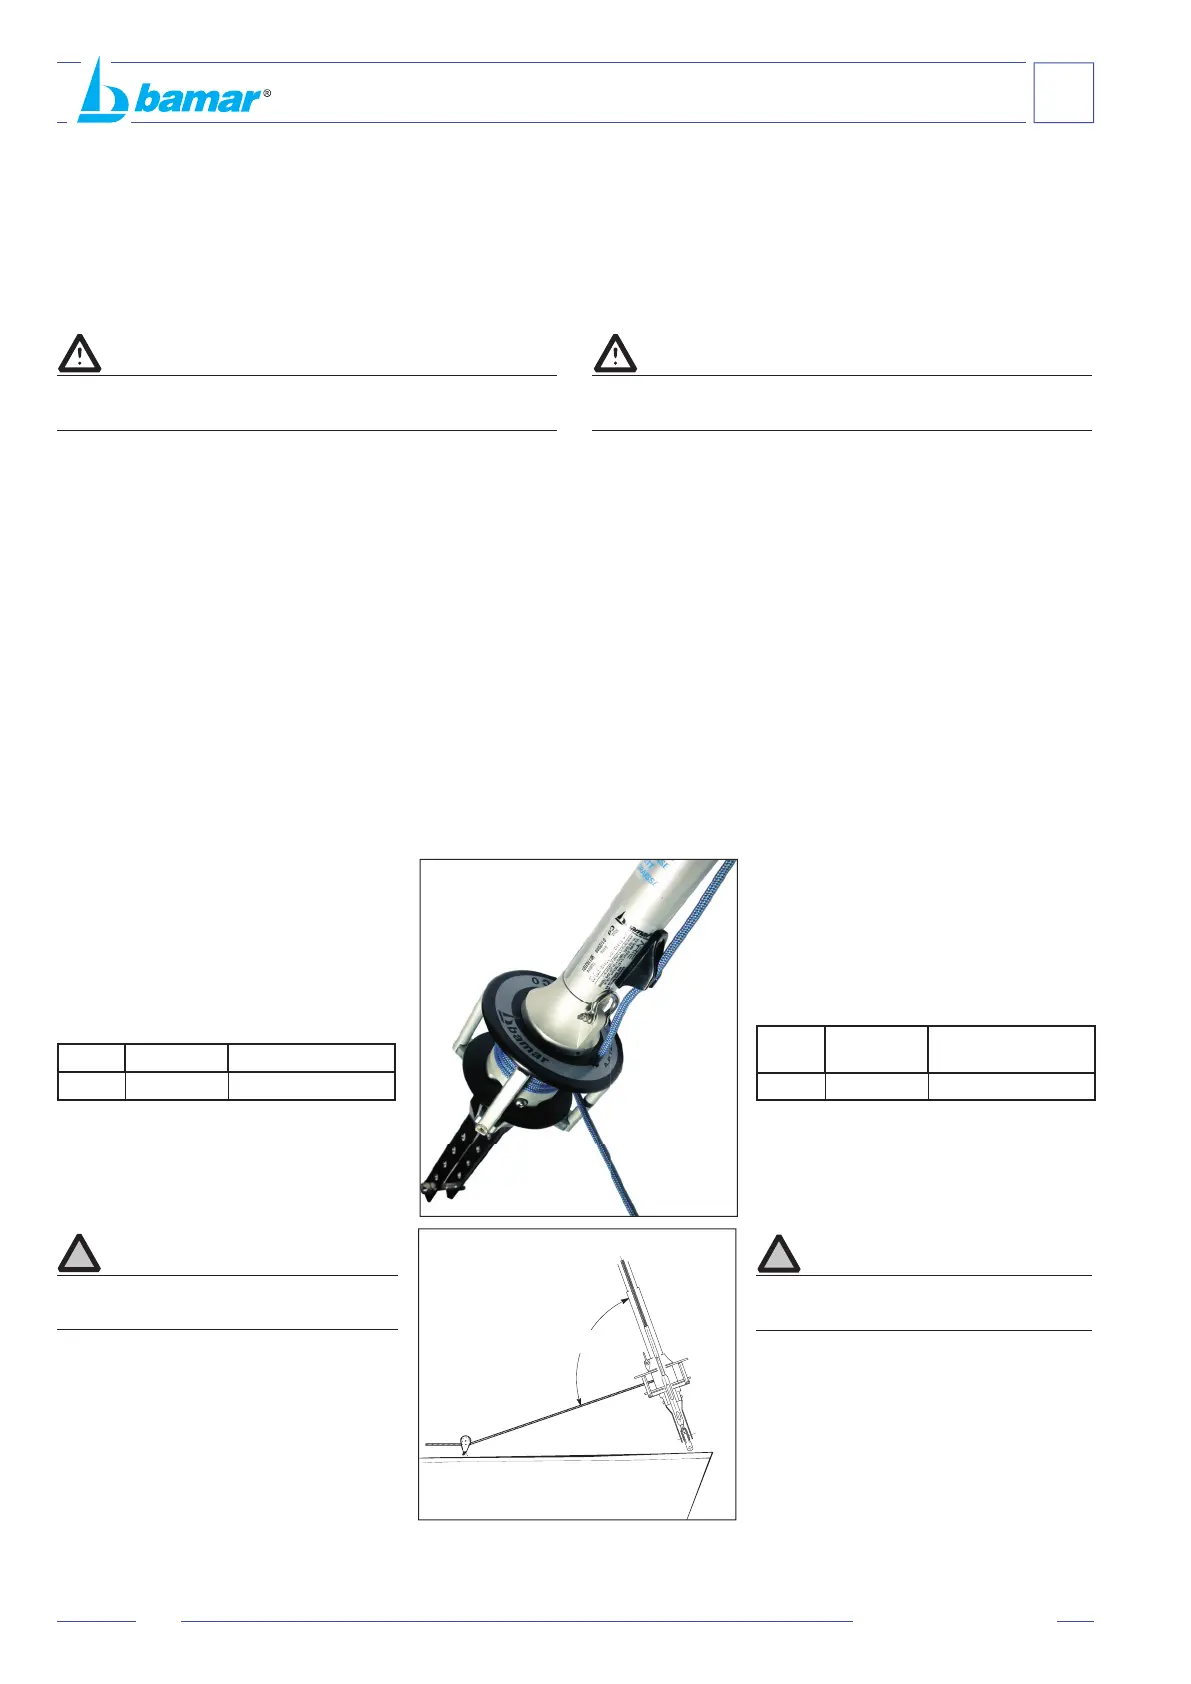
C-9 MONTAGGIO DELLA CIMA
SUL TAMBURO
• Dopo aver effettuato il montaggio della vela,
la cima residua della drizza che arma la vela
si utizza come cima di manovra.
• Inserirla nel foro sul tamburo posizionato sotto
la strozza.
Quantità e diametro della cima
Mod. Ø cima mm Lunghezza metri
C0 6 27
• Riempire il tamburo con la cima facendola
girare all'interno del tamburo con le mani.
• Regolare la posizione del 1° bozzello di rinvio
(non fornito) per ottenere un angolo di 90° sul
centro del tamburo.
PERICOLO
PERICOLO DI FOLGORAZIONE
ATTENZIONE
AVVERTENZA
RISPETTA L'AMBIENTE
Con la vela completamente chiusa devono restare
almeno 3 giri di cima avvolti sul tamburo.
C-7 HOW TO INSTALL THE FURLER ON ARMED
MAST
You do not have to take the stay off to carry out the installation, you just
have to disconnect it from the chain plate. If you choose this solution,
the extrusions will not go through the stress caused by the inevitable
bending when connecting the stay to the mast.
DANGER
DANGER OF ELECTROCUTION
CAUTION
WARNING
RESPECT THE ENVIRONMENT
Make sure you have attached the stay to a safety halyard before
disconnecting it from the chain plate.
Follow the procedure described in the paragraphs concerning installation
with stay on the ground, with some important differences:
• When you assemble the foils onto the stay, insert the halyard swivel
in order to prevent them from falling. The swivel will be stopped by the
blocking king of the terminal foil. Attach the halyard to its connection,
and a short recovery line to the top shackle. Lift the halyard as you
assemble the foils.Take down the swivel when the installation is over.
C-8 HOW TO HOIST THE SAIL
In order to hoist the sail you will have to:
• Attach the sail head to the halyard supplied.
• Insert the luff into the hoisting foil.
• Pull up the sail, attach the tack to the shackle located on the drum,
then stretch the halyard and block it with the cleat.
C-9 HOW TO FIT THE FURLING
LINE TO THE DRUM
• After having hoisted the sail, the halyard left
can be used as furling line.
• Insert the line in the hole on the drum
positioned under the cleat.
Line length and diameter
Mod. Ø line mm
Length
m
C0 6 27
• Fill the drum with the furling line by turning
the drum with your hands.
• Adjust the position of the rst leading block
(not supplied) in order to achieve a 90° angle
at mid-height of the drum.
DANGER
DANGER OF ELECTROCUTION
CAUTION
WARNING
RESPECT THE ENVIRONMENT
When the sail is completely furled there have to
be still three turns of line around the drum.
90°

 Loading...