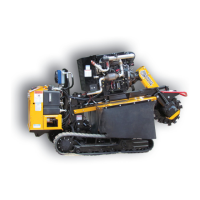
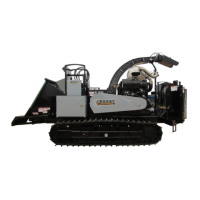
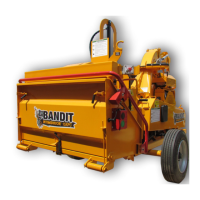
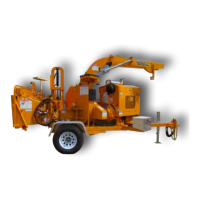
Bandit25
MODEL 75 MAINTENANCE
DAILY MAINTENANCE
Replace any missing or damaged decals and/or
engine gauges.
Check for proper operation. Repair or replace as
needed. With everything shut down and stopped,
ensure last chance cables freely operate feed control
valve.
Check entire machine for any loose parts or
components. Check for loose nuts or bolts. Torque,
tighten, or replace any of the loose components. See
page 49 for specic bolt torques.
Check to make sure all guards are in place and
installed correctly. Make sure they are secure.
CHIPPER HOOD HINGE
Make sure the chipper hood hinge operates
correctly, and is lubricated. Replace hinge if
damaged.
Before opening the hood, make sure the clutch
is disengaged, the engine o, the disc lock pin
is installed, battery is disconnected, and also
make sure the ignition key is in your possession.
Remove the hood pin padlock, disconnect the
chipper hood engine disable plug, and remove the
hood lock pin. Look for any foreign objects inside
the chipper housing or in the knife pockets of the
disc. Remove any foreign objects found.
FOREIGN OBJECTS
Very carefully, manually with a pry bar or wood
bar, turn the chipper disc a full revolution. This
is to ensure the anvil and knives have proper
clearance. If the chipper disc is jammed with
debris or frozen in place, DO NOT attempt to start
the engine and engage clutch until the chipper
disc rotates freely.
CHIPPER DISC TO TURN
All knife mounting hardware must be
factory approved. Knife mounting hardware
must be replaced after maximum of 4-5 knife
rotations/changes to ensure safe clamping ability.
Torque set, AT ALL TIMES to 180 ft.-lbs. (245 Nm)
Sharpen, le, or replace the knives to keep them
sharp. Check the fan blades, anvil, and a ttaching
hardware for the knives and anvil. Replace if
necessary.
The hydraulic oil reservoir tank level should always
remain at 7/8 full. Remember to check DAILY to avoid
excessive heat build up.
Check the fuel level, running out and repriming is
time consuming. Do not over ll, and you must leave
fuel expansion space in the top of the tank.
HYDRAULIC OIL LEVEL
FUEL LEVEL
After closing chipper hood, reinsert the hood pin
and padlock, make sure pin is tight and secure.
If worn replace immediately. Don’t use a worn or
makeshift hood pin. Make sure the spring lock for
the hood pin is in the correct position. Make sure the
chipper hood engine disable plug is installed correctly
and that it is also operating properly.
HOOD LOCK PIN & PADLOCK
SAFETY DECAL & ENGINE GAUGES
SAFETY EQUIPMENT
LOOSE BOLTS, NUTS, PARTS OR
COMPONENTS
SAFETY GUARDS
KNIFE MOUNTING HARDWARE
KNIVES, ANVIL, FAN BLADES &
ATTACHING HARDWARE
Follow the engine manufacturer manual
recommendations for fluid levels. You must
follow specific engine manufacturer’s manual
recommendations for radiator coolant, additives,
lubrication, correct engine speed, etc.
ENGINE OIL & COOLANT LEVEL
Check the Diesel Emissions Fluid (DEF) level on
Tier 4 engines. Fill to engine manufacturer’s manual
recommendations.
Inspect for any oil, fuel, hydraulic oil, or engine
coolant leaks. Check all hoses, ttings, lines, and
tanks. Do not use fingers or skin to check for
hydraulic leaks. Repair or replace any damaged or
leaking components.
Check the hydraulic pump and hydraulic motor
shafts for t and tightness.
DEF LEVEL ON TIER 4 ENGINES
FLUID LEAKS
HYDRAULIC PUMP & MOTOR SHAFTS
GREASE CHIPPER BEARINGS
Note: Must open the chipper hood to purge the
chipper bearing.
Use an EP-2 Lithium type grease to purge chipper
bearings. You cannot over grease these bearings.
This type of bearing is designed with a relief system
that will not allow over greasing. You cannot hurt the
bearing seals by pumping in too much grease. Most
of the failures related to bearings are diagnosed
as “Contamination”. Contamination is caused by
improper lubrication. Wipe off excess grease.
Excessive grease will attract dirt.
CHIPPER DISC ASSEMBLY
Check chipper disc assembly for excessive wear,
elongated knife bolt holes, secure welds, and impact
cracks. If a problem is found, contact your nearest
dealer or Bandit Industries, Inc. Check the chipper
base, belly band, and hoods for wear or damage.
Inspect the chipper bearings for loose bolts and
cracks.