If the Cloud Permissions are set to Read, the web server only views data from the device and cannot write data to
the device. If the permissions are set to Write, the web server only writes to the device and cannot read the data. If
the permissions are set to Read/Write, the web server can read the data from the device and write to the device from
the web.
5. Click Modify Registers to apply the changes.
Set the IP Address
Follow these instructions to change the DXMR90-4K's IP address.
By default, the DXMR90-4K is set to a static IP address of 192.168.0.1. The IP address can be changed by using the DXM
Configuration Software and updating the XML.
1. Launch the DXM Configuration Software.
2. Go to the Settings > Ethernet screen.
3. In the IP Address section, select Static IP or DHCP from the drop-down list.
• If Static IP is selected, enter the IP address, Subnet, and Gateway address as desired.
• If DHCP is selected, the IP address, Subnet, and Gateway address are grayed out and not configurable.
Changing the IP Address to DHCP can make it so the DXM cannot be reached. Before changing this to DHCP,
you MUST have a server that is going to assign an IP Address to the DXMR90-4K.
4. Save your changes to the configuration file (File > Save).
5. Upload the configuration file to your controller (DXM > Send Configuration to DXM).
Save and Upload the
Configuration File
After making any changes to the configuration, you must save the configuration files to your computer, then upload it to the
device.
Changes to the XML file are not automatically saved. Save your configuration file before exiting the tool and before sending
the XML file to the device to avoid losing data. If you select DXM > Send XML Configuration to DXM before saving the
configuration file, the software will prompt you to choose between saving the file or continuing without saving the file.
1. Save the XML configuration file to your hard drive by going to the File > Save As menu.
2. Go to the DXM > Send XML Configuration to DXM menu.
Figure 8. Status indicator bar
• If the Application Status indicator is red, close and restart the DXM Configuration Tool, unplug and re-plug in the
cable and reconnect the DXM to the software.
• If the Application Status indicator is green, the file upload is complete.
• If the Application Status indicator is gray and the green status bar is in motion, the file transfer is in progress.
After the file transfer is complete, the device reboots and begins running the new configuration.
3.3 Mechanical Installation
Install the DXMR90-4K to allow access for functional checks, maintenance, and service or replacement.
All mounting hardware is supplied by the user. Fasteners must be of sufficient strength to guard against breakage. Use of
permanent fasteners or locking hardware is recommended to prevent the loosening or displacement of the device. The
mounting hole (4.5 mm) in the DXMR90-4K accepts M4 (#8) hardware. See the figure below to help in determining the
minimum screw length.
NUT
3 mm *
for minimum
engagement of
three threads
Screw Length = 16.0 mm + “X” mm + 3 mm
X
*
16.0 mm
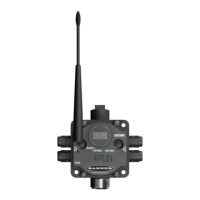
DXMR90-4K IO-Link Master
12 www.bannerengineering.com - Tel: + 1 888 373 6767

 Loading...