Do you have a question about the Barco C5011S and is the answer not in the manual?
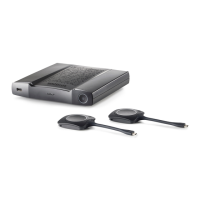
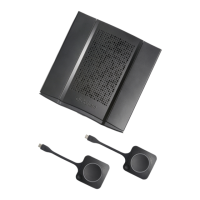
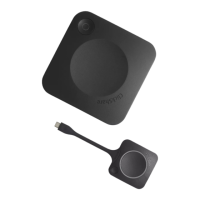
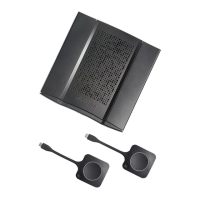
Overview of the CX-50 Gen2 features, versions, and components.
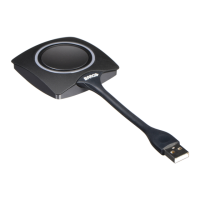
Detailed technical specifications for the CX-50 Gen2 Base Unit and Button.
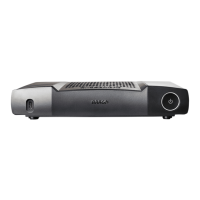
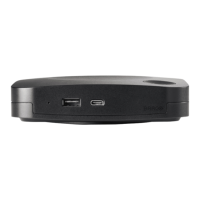
Details on the Base Unit's functionality, ports, and physical layout.
Information on supported mobile devices and apps for ClickShare.
Guidelines for checking ambient temperature, humidity, and environment conditions.
Recommendations for keeping Base Units and Buttons updated and securing access.
Step-by-step guide for the initial setup and operation of the CX-50 Gen2.
Overview of different physical and network integration methods for the Base Unit.
Best practices and recommendations for optimal ClickShare conference system installation.
Instructions for placing the Base Unit directly on a meeting room table.
Detailed instructions for mounting the Base Unit securely on a wall.
Guidance for setting up the CX-50 Gen2 as a standalone unit without network integration.
Recommendations for enterprise network integration, including required ports and firewall rules.
Instructions for connecting the Base Unit to the network for seamless user experience.
Configuration for organizations with advanced network setups using dual connectivity.
Setting up an isolated network for controlled AV traffic, ensuring bandwidth and security.
Methods for connecting displays to the Base Unit via HDMI or USB-C.
Connecting peripherals for different room setups: full, audio-only, or camera-only.
Configuring the CX-50 Gen2 for collaboration bars or modular in-room systems.
Connecting touch screen displays to the Base Unit for interactive functionality.
How to connect USB cameras to the Base Unit for video conferencing.
Connecting audio sources, including speakerphones, for content sharing.
Connecting and configuring echo-canceling speakerphones for clear audio.
Instructions for establishing a wired network connection using an Ethernet cable.
Connecting HDMI sources to the Base Unit using a converter kit.
Methods for powering the Base Unit via AC adapter or USB-C.
Enabling wired roomdock functionality for high-resolution content sharing.
Workflow for the initial power-on and setup of the Base Unit.
Step-by-step guide for the recommended initial configuration and setup process.
How to start the device without completing the full configuration wizard.
Procedure for registering the device with XMS Cloud for management and SmartCare.
Steps to integrate calendar availability display with XMS Cloud and Azure AD.
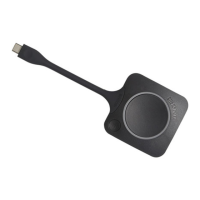
Process for pairing ClickShare Buttons with the Base Unit for operation.
Overview of the ClickShare Extension Pack for upgrading user experience.
Instructions for installing the ClickShare Extension Pack, including silent setup options.
Information about the auto-installed Windows certified driver for ClickShare Buttons.
Using the ClickShare Desktop App for wireless conferencing and content sharing.
Instructions for installing the ClickShare Desktop App using the MSI installer.
Methods to access the ClickShare Configurator via LAN, direct connection, or wireless network.
Guide to using the configuration wizard for initial setup of the Base Unit.
Setting up on-screen language, meeting room name, and welcome messages.
Selecting and managing background wallpapers for the ClickShare display.
Uploading and changing custom wallpapers for a personalized user experience.
Downloading and uploading configuration files for backup and duplication.
Configuring display output settings, resolution, and modes like Clone or Extended.
Setting up input modes for wired roomdock or DisplayPort over USB-C.
Managing connected peripherals like cameras, speakerphones, and their quality scores.
Configuring the CX-50 Gen2 for collaboration bars or modular in-room systems.
Configuring wireless network settings, including access point and client modes.
Setting up the Base Unit as a Wi-Fi access point, including SSID and passphrase.
Connecting the Base Unit to an existing network over Wi-Fi using client mode.
Configuring wireless client connection using EAP-TLS authentication with certificates.
Configuring wireless client connection using EAP-TTLS authentication with passwords.
Configuring wireless client connection using PEAP authentication with certificates.
Configuring wireless client connection using WPA2-PSK authentication with a pre-shared key.
Configuring wired network settings, including hostname, IP address, and DHCP.
Setting up wired authentication methods like EAP-TLS, EAP-TTLS, or PEAP.
Configuring wired LAN connection using EAP-TLS with certificate-based authentication.
Configuring wired LAN connection using EAP-TTLS with password-based authentication.
Enabling services for mobile device connectivity like ClickShare App, AirPlay, Google Cast, Miracast.
Activating PresentSense for automatic room detection and connection via ultrasound.
Enabling and using the ClickShare API for remote control and integration.
Configuring SNMP for network management and device information collection.
Setting security levels for the ClickShare system to enhance protection.
Changing passwords for the ClickShare Configurator and API access.
Configuring HTTP encryption using self-signed or custom certificates.
Viewing status information like firmware version, uptime, and overall system status.
Manually setting the date, time, and time zone for the Base Unit.
Synchronizing the Base Unit's clock with an external time server using NTP.
Configuring standby modes and display timeout settings to save energy.
Viewing and managing connected Buttons, their serial numbers, and firmware versions.
Configuring Buttons to connect to an external access point using EAP-TLS.
Configuring Buttons to connect to an external access point using EAP-TTLS.
Configuring Buttons to connect to an external access point using PEAP.
Configuring Buttons to connect to an external access point using WPA2-PSK.
Enabling or disabling blackboard saving functionality for annotations.
Integrating the device with XMS Cloud for remote management and updates.
Updating the Base Unit's firmware via web interface or USB stick.
Accessing troubleshooting tools, downloading logs, and managing debug logging.
Resetting device settings to defaults to resolve issues.
Restoring the Base Unit to its original factory settings.
Running diagnostic tests like TCP dump to capture network data for analysis.
Methods for updating the Base Unit firmware via network or USB stick.
A list of common problems, their causes, and solutions for the CX-50 Gen2.
| Display Technology | LCD |
|---|---|
| Resolution | 1920 x 1080 |
| Brightness | 500 cd/m² |
| Lens | Fixed |
| Input | HDMI, USB |
| Screen Size | 50 inches |
| Viewing Angle | 178° (H/V) |
| Operating Temperature | 0°C to 40°C |
| Storage Temperature | -20°C to 60°C |