5. Lenses & lens holder
1
2
3
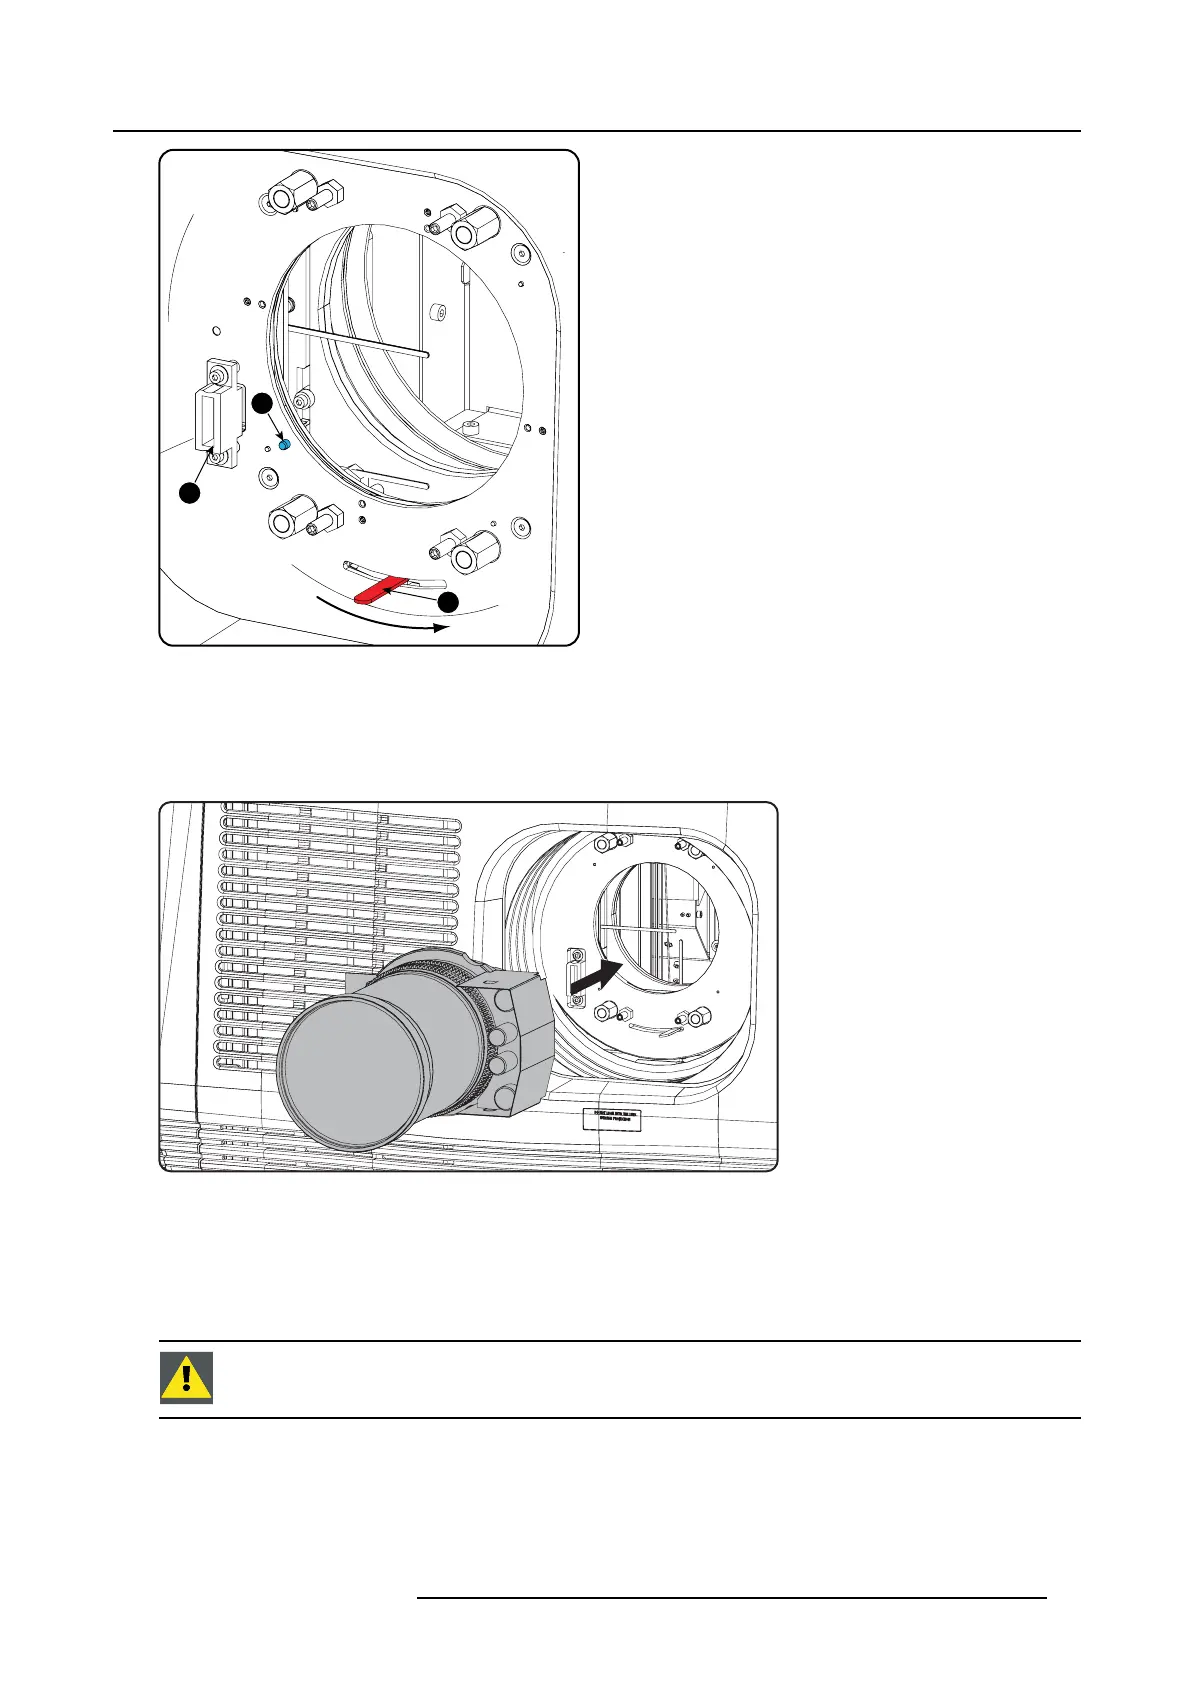
Image 5-13
1 Lens holder lock
2 Power connector lens
3 Alignment pin
4. Ensure that the lens holder stands in the O n- Axis position (horizontal and vertical m id position).
Note: The lens holder is placed de fault in the On-Axis po sition at factory.
5. Gently insert the lens in s uch a way that the lens connector matches the socket (B).
Image 5-14
6. Insert the lens until the connector seats into the socket.
Warning: Do not r elease the Lens yet, as the Lens may fall out of the Len s Holder.
A clear “click” should be heard wh en the retainer springs en gage into the slot provided on the lens. B esides the clear click, the
springs actually help to guide the lens into position and hence prevent jam ming.
7. Check if the lens is really secured by trying t o pull the lens out of the lens holder.
CAUTION: Never transport the projector with a Len s mounted in the Lens Holder. Always remove the Len s
before transp orting the projector. Neg lecting this can da mag e the Lens Holder and Prism.
R5905050 DP2K C-SERIES 10/07/2012 41
 Loading...


