17
REV 0.9.5
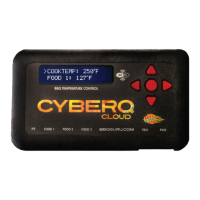
10. Hit the Enter (center) button on the CyberQ Cloud. (Note: Your device may
take up to 2 minutes to register.)
11. Once the device is successfully registered, ShareMyCook will automatically
refresh and display a picture of your device.
12. Click on ‘Continue’ to enter the dashboard.
PROFILE SETUP
Once your account is created and your CyberQ Cloud is synced to ShareMyCook,
we recommend you setup your personal profile.
1. While on the dashboard, click the ‘Update Profile’ icon. (If you are not on
the main dashboard or don’t see it, you can access your profile by clicking the
‘Account’ drop down menu and then selecting ‘My Profile’.
2. The profile page allows you to store your real name and as well as a separate
screen name that will be used publicly. Add any basic background informa-
tion that you’d like to which will appear on your public profile page.
3. To upload a profile picture, click ‘Choose File’ and select a photo from
your computer.
4. Select your Default Temperature Unit by clicking ‘Fahrenheit’ or ‘Celsius’. Fahr-
enheit will default automatically. (Note: This temperature is only for ShareMy-
Cook. If you want to change the temperature that displays on the device, go
to ‘Manage My Devices’, click ‘Manage’ on the device you want to change,
and select ‘System Setup’.)
5. Select your preferred Time Zone by clicking the drop down menu. Eastern
Time will default automatically.
6. Your profile is made public by default. To change your privacy setting, click
the checkbox next to ‘Make account private’. Your profile, recipes and cooks
will be hidden and be made unavailable to the public.
7. You have the option to share Facebook, Twitter, Instagram, and Pinterest
social media accounts to your profile. To add your accounts to ShareMyCook,
enter the full URL address starting with: http, not just your username or han-
dle. These will appear in your public profile page.
8. Once completed, click ‘Update Profile’ to save your updates.
VERIFY EMAIL TO RECEIVE NOTIFICATIONS
ShareMyCook allows users to receive email alert notifications based on cooks and/
or the CyberQ Cloud. Before you can use this feature, you must verify your email.
1. Click the ‘Account’ drop down menu and select ‘Account Settings’.
2. When you first created an account, you should have received an email that
had a link in it that you could click on to verify your account. If the page says
‘Email not verified’, you still need to verify it.
3. Click on the button that says‘Send Verification’.
4. Within 1-2 minutes, you should receive an email. If you don’t see it, check your
junk mail folder.
5. In the email, click the link to automatically verify the account. You will auto-
matically be directed back to ShareMyCook.
 Loading...