20
REV 0.9.5
3. Enter the amount of time it takes to prepare and cook your recipe by click-
ing the drop down menu next to ‘Prep Time’ and ‘Cook Time’ and select
how many hours and/or minutes it takes.
4. Enter how many people the recipe serves by typing the amount next to ‘Serves’.
5. If you select the ‘Is Featured’ checkbox, your recipe will appear in a priori-
tized position on your public profile. (Note: When users look at your profile,
your previous four recipes will be shown. By clicking ‘Is Featured’, your
recipe will become a priority so others will see it.) If you no longer want to
feature your recipe, uncheck the box.
6. To enter the ingredients for your recipe, type it inside the box labeled ‘Ingre-
dients’. Only list one ingredient per line. For each ingredient, add a new
line by hitting the enter button on your keyboard.
7. To enter the directions for your recipe, type it inside the box labeled ‘Direc-
tions’. Only have one direction step per line. For each step, add a new line
by hitting the enter button on your keyboard.
8. To upload a photo of your recipe, click ‘Choose a File’ and select a photo
from your computer.
9. Click ‘Save’ once completed.
10. You will be automatically redirected to your recipes library page. To edit
recipes, click the ‘Edit’ button next to the recipe you want to make any
adjustments to. To see how your recipe appears in the public recipe area
to other ShareMyCook users, you can click the ‘View’ button next to the
recipe you want to view.
You will be automatically directed to your archived recipes. To edit recipes, click
‘Edit’ to make any adjustments. To see how your recipe appears to other Share-
MyCook users, click ‘View’.
CREATE A COOK
A ‘cook’ is a recorded session, including graphing, of your cook. This feature allows
users to track cook times, manage temperatures, add notes and descriptions to
cooks, share cooks with friends and on social media, and upload pictures.
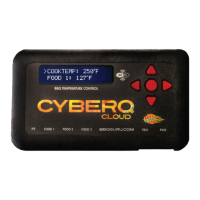
If you are recording a cook, your CyberQ Cloud must be registered on and
connected to ShareMyCook. The CyberQ Cloud will send updates to ShareMy-
Cook every 15 seconds during a cook with a good Wi-Fi connection. You should
expect to see an update about 3 to 4 times a minute.
1. To start recording a cook, go to the main dashboard and select ‘Create
Cook’. You can also access this page by clicking the ‘Manage’ drop down
menu and select ‘Manage Cooks’, and then clicking on ‘Add New’ button.
2. If you want to create a cook quickly, just type in a name of the cook, select
your CyberQ Cloud device, and then click ‘Save and Start Recording’. If
you’re not ready to start recording, you can just hit ‘Save’, and start record-
ing later.
3. If you want to track many other details of your recorded cook, you can track
many other details.
 Loading...