Adjusting the limit positions with a rotary switch or a locking button
Intelligent installation management
Completion of installation following automatic setting of limit position "Stop"
Next time the “stop” limit position is travelled to, this position will be provisionally saved as the limit position. Once the limit position
has been detected at this position 3 times in a row without any problems, it will be definitively saved. This normally takes place dur-
ing regular operation.
To complete installation quickly, it is sufficient to travel to the “stop” limit position 3 times in a row from approx. 20 cm.
Limit position status indicator
A brief stopping and restarting indicates that no limit position has been set in that direction of movement.
If the tubular drive switches off prematurely while opening or closing due to an obstruc-
tion, the obstruction can be cleared by reversing a short way and removing the obstruc-
tion. The desired limit position can then be set by opening/closing again.
The limit position becomes fixed after the tubular drive has turned off automatically in the desired position three times.
Lower stop to upper stop
Close to the permanent lower stop.
▻
The tubular drive switches off automatically.
Then open to the permanent upper stop without pausing.
▻
The tubular drive switches off automatically.
►
The limit positions are now set.
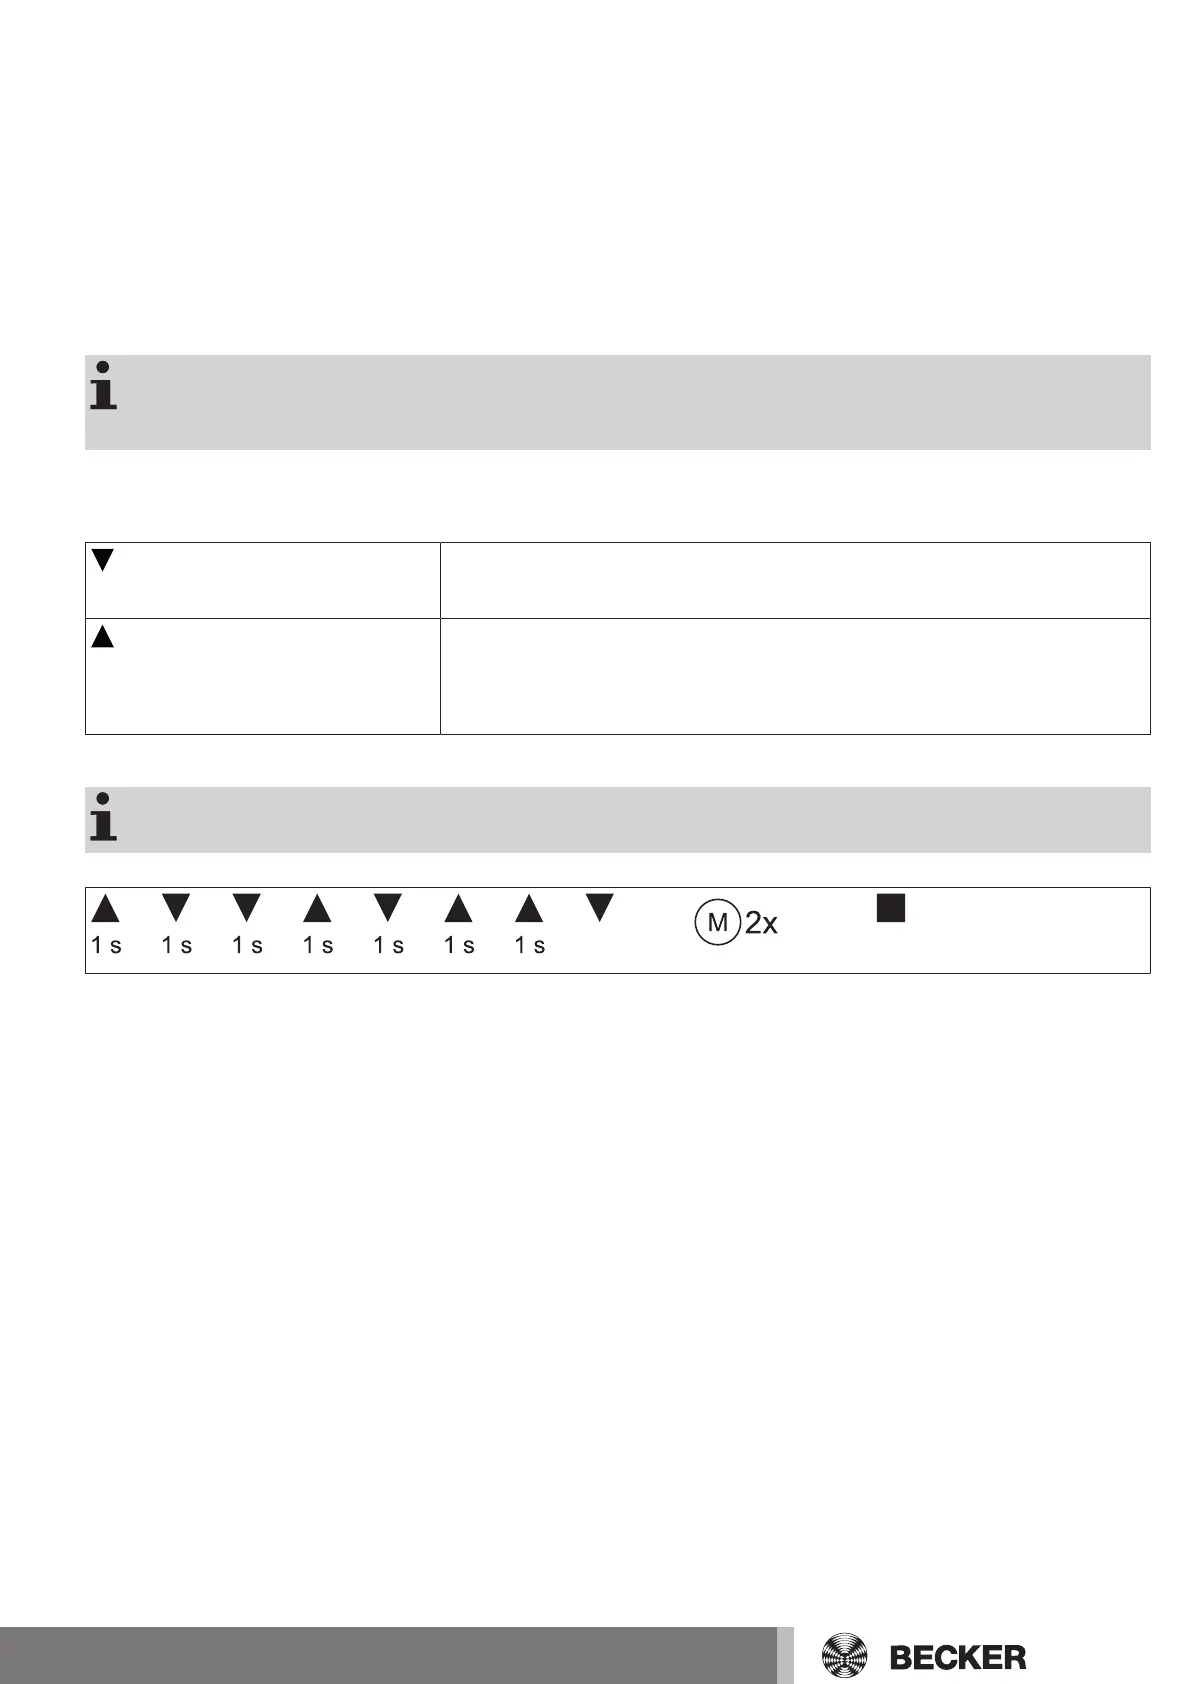
Deleting the limit positions with a rotary switch or a locking button
The switching commands sequence must be carried out in quick succession.
Carry out the following deletion sequence without interruption between the individual drive commands:
The tubular drive acknowledges.
Both limit positions are deleted.
11-en