This document is an installation and user manual for Belling G755, G756, 757, and 758 slot-in natural gas double cavity cookers.
Function Description:
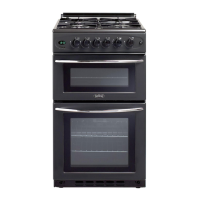
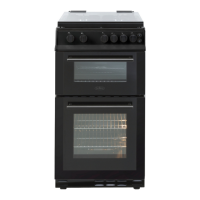
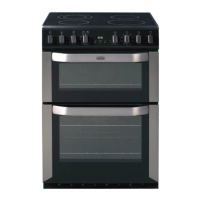
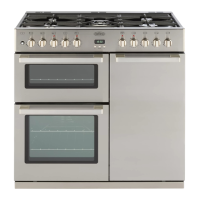
The Belling G755, G756, 757, and 758 series are slot-in natural gas double cavity cookers designed for domestic use. These appliances are supplied for use with Natural Gas I2H and cannot be converted to any other gas type. The cookers are designed to fit between standard kitchen units spaced a minimum of 500mm apart.
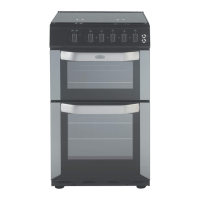
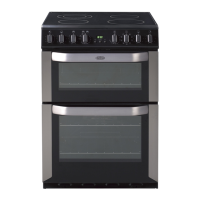
The G755 and G757 models feature a conventional main oven, a grill, and a hob with four gas burners. The G756 and 758 models offer enhanced features, including a conventional main oven with a light, a top conventional oven/grill, a hob with four gas burners, and a clock/minute minder.
Important Technical Specifications:
- Gas Type: Natural Gas I2H (G20 at 20mbar). Not convertible to other gas types.
- Electrical Connection: 230V AC, 50 Hz. Must be earthed.
- Maximum Wattage:
- G755: Electric = 0.02 kW, Gas = 14.0 kW
- G756: Electric = 0.06 kW, Gas = 14.0 kW
- Grill Wattage: 2.0 kW
- Top Oven Wattage (G756 Only): 2.0 kW
- Conventional Oven Wattage (G755 Only): 2.5 kW
- Conventional Oven Wattage (G756 Only) inc 25W~230V Lamp: 2.5 kW
- Hob Burners:
- Rear Left Hotplate: 2.0 kW (Semi-Rapid Burner)
- Front Left Hotplate: 3.0 kW (Rapid Burner)
- Front Right Hotplate: 2.0 kW (Semi-Rapid Burner)
- Rear Right Hotplate: 2.5 kW (Rapid Burner)
- External Dimensions (Unpacked): H: 900mm, W: 500mm, D: 600mm
- External Dimensions (Packed): H: 985mm, W: 560mm, D: 700mm
- Net Weight: 49 kg
- Gross Weight: 57 kg
- Grill Area: 800 sq cm
- Top Oven Capacity (G756 Only): 16 Litres (0.55 Cu ft)
- Main Conventional Oven Capacity: 39 Litres (1.4 Cu ft)
- Safety Features: Push Button Electric Ignition, Gas valves are lockable. The hob glass lid incorporates a safety valve that shuts off the gas supply to the four hob burners when the lid is lowered.
- Ventilation Requirements: The room containing the cooker must have an air supply in accordance with current regulations, including an opening window or permanent vent depending on room volume.
- Stability: The cooker must be secured by a security chain to the wall or partition behind it.
Usage Features:
Hob:
- Glass Lid: Toughened for protection and safety. It is decorative and not intended as a work surface. Must be open (upright) during hob operation.
- Burner Operation: To light a burner, ensure the electricity supply is on and the glass lid is open. Push in and turn the control knob anti-clockwise to the large flame symbol. Press the ignition button until the burner lights. Adjust the flame by turning the control knob. To turn off, turn the knob fully clockwise to the 'O' symbol.
- Pan Suitability: Use saucepans with smooth, flat bases. Avoid split pans or those with recessed/ridged bases. Choose pan sizes appropriate for the burner (e.g., 18cm for auxiliary, 20cm for semi-rapid, 22cm for rapid).
- Energy Saving Tips: Use lids on saucepans, place pans centrally over burners, avoid flames licking up pan sides, fill kettles/pans with only needed liquid, turn down gas once contents boil, and use a pressure cooker where possible.
Grill:
- Operation (G755 & G757): Depress and turn the grill control knob anti-clockwise to the large flame position. Hold the knob and press the spark ignition button for 15 seconds until the flame establishes. Pre-heat for 5 minutes. Adjust setting between large and small flame symbols. Turn fully clockwise to 'O' to turn off.
- Operation (G756 & G758): Depress and turn the grill control knob clockwise to the large flame position. Hold the knob and press the spark ignition button for 15 seconds until the flame establishes. Pre-heat for 5 minutes. The gas flame is not adjustable. Turn fully anti-clockwise to 'O' to turn off.
- General Grill Use: Always ensure the grill door is open when grilling. Use only the bottom shelf position. Position food correctly under the burner. Do not line the grill pan with aluminum foil.
- Grill Pan Handle: Detachable handle. Always use an oven glove as metal parts become very hot. Ensure the handle is securely located between the raised profiles across the front of the grill pan.
Ovens:
- Conventional Ovens: One or two gas conventional ovens. Heat zones vary, with the middle shelf corresponding to the thermostat setting, hotter above, cooler below.
- Shelf Positions: Main oven has two shelves and five positions (1-5 from top). Top oven (G756 & G758 Only) has one shelf and two positions (1-2 from top).
- Operation: Open the door. Adjust shelves. Turn the oven on by depressing and turning the oven control knob anti-clockwise to setting 7. Hold the knob and press the spark ignition button for 15 seconds until the flame establishes. Close the door. Select temperature. Allow 10 minutes for pre-heating. Turn fully clockwise to 'O' to turn off.
- Oven Lamp (G756 & G758 Only): Main oven is fitted with a 25W ~ 230V SES (300°C) lamp, illuminated by depressing the lamp switch on the control panel.
Timer (G756 & 758 Only):
- 3 Button LED Clock/Minute Minder:
- Set Time of Day: Ensure electricity is on. Display shows 0.00 flashing. Press the "D" button, then "+" or "-" to set the time.
- Minute Minder: Press "+" until the desired time is set (adjusts in 10-second intervals up to 99mins 50secs). A "Bell" symbol lights up. A bleeping sound and the "Bell" symbol disappear at the end of the set time. Cancel by pressing "+". Adjust bleeper pitch by pressing "-" while sounding.
Maintenance Features:
General Cleaning:
- Safety First: Always turn off the cooker at the main wall switch and allow it to cool before cleaning.
- Glass Lid: Clean with a cloth wrung out in soapy water. Stubborn stains can be removed with cream/paste/liquid cleaner or fine steel wool pads. Polish with a dry cloth.
- Glass Lid (Painted Trims): Clean with a cloth wrung out in hot soapy water only. Polish with a dry cloth. DO NOT USE ABRASIVES.
- Burners: Remove pan supports and top burner plate. Wash with soapy water and rinse. Gas burner caps and pan supports can be washed with soapy water (not in a dishwasher). Use a metal surface cleaner for stubborn dirt on burner heads.
- Vitreous Enamel Hob Surround: Clean with a cloth wrung out in soapy water. Stubborn stains can be removed with cream/paste/liquid cleaner or fine steel wool pads.
- Control Panel: Wipe with a damp cloth and polish with a dry cloth. Do not use oven cleaners, aerosols, scouring pads, or abrasive powder on plastic knobs.
- Oven & Grill Compartments: Remove grill/meat pan and grid immediately after use for washing. Wipe oven/grill compartment with a fine soap impregnated steel wool pad (avoid harsh abrasives). Remove rod shelf for washing. Take care not to damage thermostat phial during cleaning.
- Doors and Handles: Wipe with a cloth wrung out in hot soapy water, rinse with clear water, and dry with a soft clean cloth. Do not use scouring pads or abrasive powder. Take care not to damage or distort the Door Seal. Only use oven cleaners with the Vitreous Enamel Development Council's Approvals symbol.
'Cookclean' Oven Liners (If fitted):
- Function: Treated surfaces absorb cooking soils at 220°C (Gas Mk 6) or above, slowly destroying them. Normal cooking often cleans them. For heavy soiling or if higher temperatures are not used regularly, run the oven at 230°C (Gas Mk 9) for a couple of hours (monthly or every two/three months).
- Cleaning: Normally not necessary to clean with water. If desired, remove rod shelf and side panels, wash in warm soapy water, rinse in clear water. Do not use enzyme/biological washing powder, harsh abrasives, or oven chemical cleaners. Do not rub dry. Replace panels immediately and run the oven at maximum setting for 30 minutes to prevent enamel deterioration.
Replacing the Oven Lamp (G756 & 758 Only):
- Procedure: Switch off cooker at mains. Remove oven shelves. Unscrew and remove lamp cover glass. Unscrew the old lamp and replace with a new 25W ~ 230V SES (300°C) lamp. Replace lamp cover glass before switching on. Note: The oven lamp is not covered by the guarantee.