No-Solvent Analysis Method TD-550/560 Oil in Water Analyzer
24 TD-550/560 Oil in Water Analyzer
Operation Manual
PN 106737
REV H
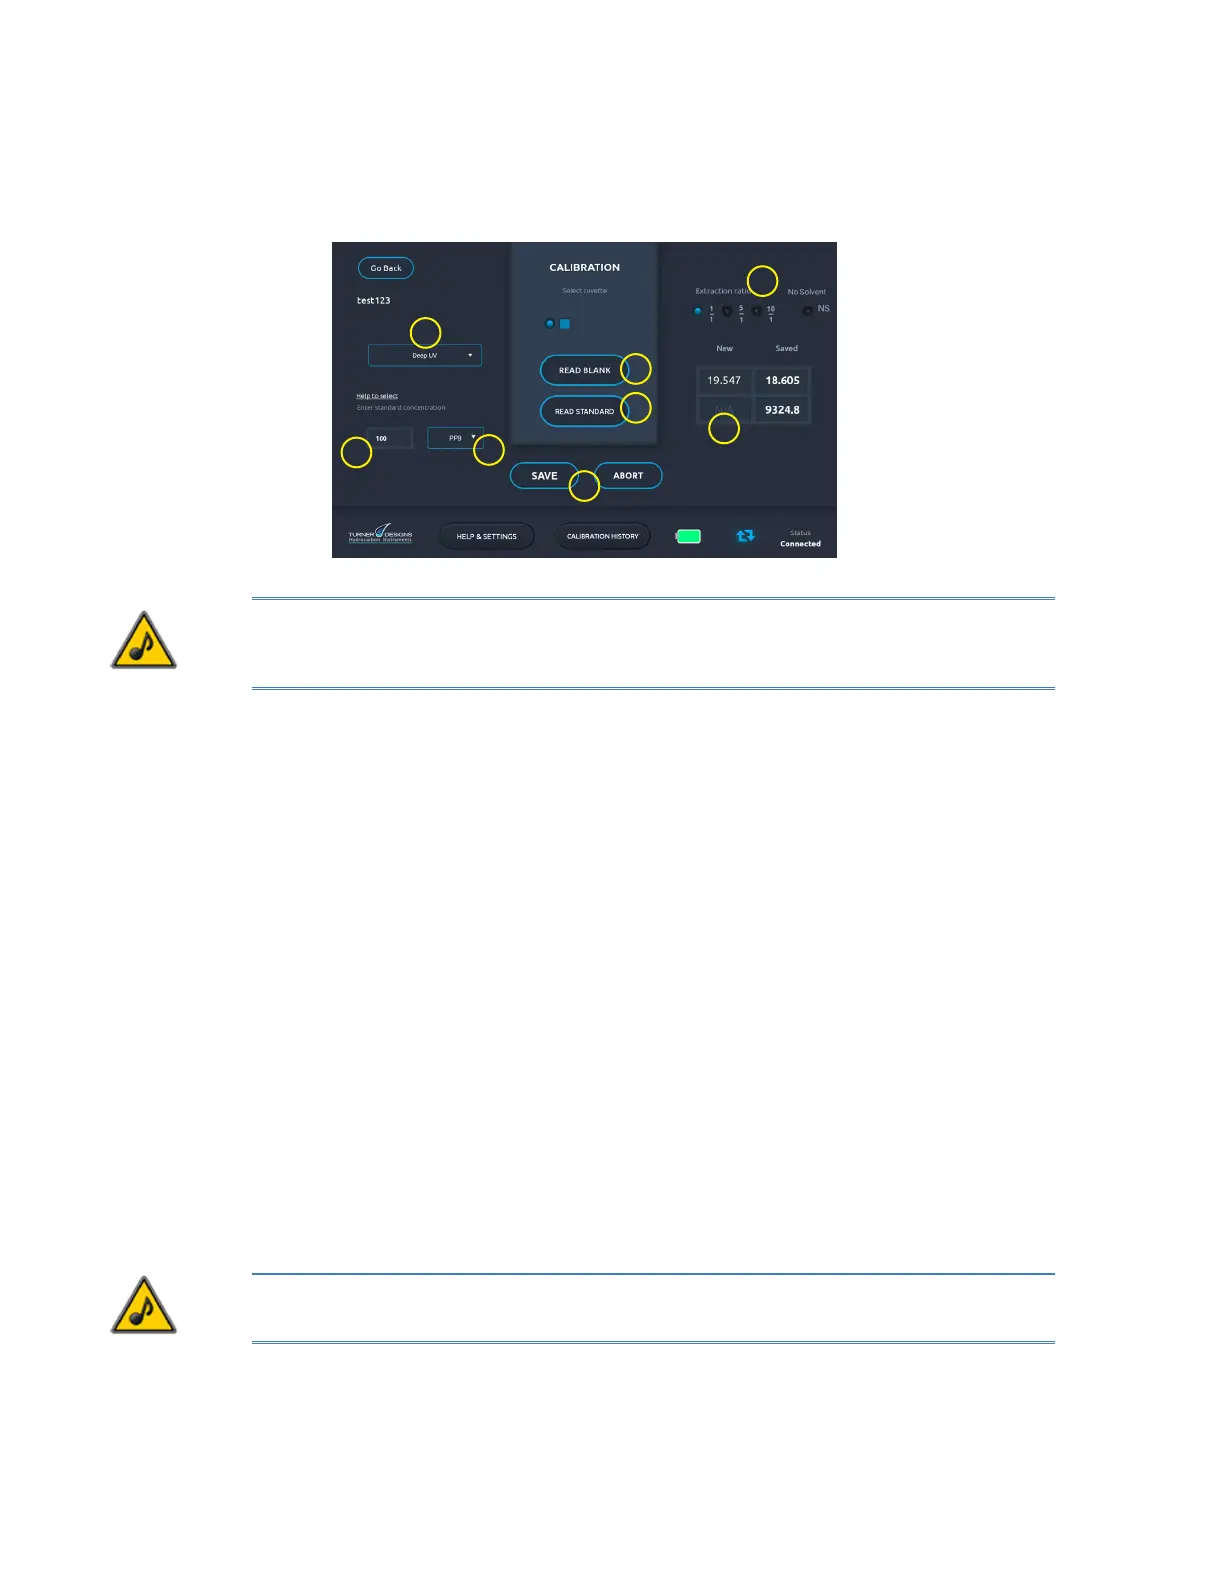
3. On the Create Calibration screen, tap the Name eld (1) and enter a name for your calibration.
4. Tap the Password eld (2) and enter your password.
5. Tap Save (3). The Calibration screen appears.
8
2
6
8
7
1
3
4
5
6. On the Calibration screen, choose Near UV from the drop-down menu (TD-560 only).
NOTE: The Deep UV channel is not compatible with the No Solvent Method because of surfactant
interference. You will not be able to save calibrations conducted by the No Solvent Method when the
Deep UV channel is selected.
7. In the Standard Concentration eld (2), enter 1000.
8. The cuvette type and extraction ratio settings are chosen by default. Make sure to select No
Solvent (NS) rather than one of the extraction ratios (3).
9. Both the NUV and DUV channels (TD-560) default to PPM in the Units drop-down list. Select a
different unit of measurement if necessary (4).
10. Wipe the outside of the blank cuvette with a clean laboratory grade tissue to remove any liquid,
dirt or oil that might be present.
11. Open the sample well lid, insert the blank cuvette into the cuvette adapter, and close the lid.
12. Tap Read Blank (5) to make a reading. Do not tap Read Blank more than once.
13. Remove the blank cuvette from the sample well.
14. Fill a new cuvette with the 1000 ppm calibration standard. Wipe the outside of the cuvette with
a clean laboratory grade tissue to remove any liquid, dirt or oil that might be present.
15. Insert the 1000 ppm calibration standard cuvette into the cuvette adapter and close the lid.
16. Tap Read Standard (6) to have the analyzer record the uorescence response of the
calibration solution. Do not tap Read Standard more than once.
17. Check that the uorescence response is at least 200 uorescence units greater than the
blank. Calibrations with uorescence response differences less than 200 indicate insufcient
sensitivity. If this occurs, consult Section 6 Troubleshooting.
18. A value appears in the New eld (7). To store the calibration (8) tap Save, or tap Abort to try
again. Do not attempt to read blank or standard more than once.
19. On the Home screen tap and hold a calibration in the list if you want to delete it.
NOTE: For measurement of samples with expected concentrations near zero, see Section 6
Troubleshooting for suggestions on how to express the results.