2
Secure the compressor in a vise to help mitigate risk of
personal injury.
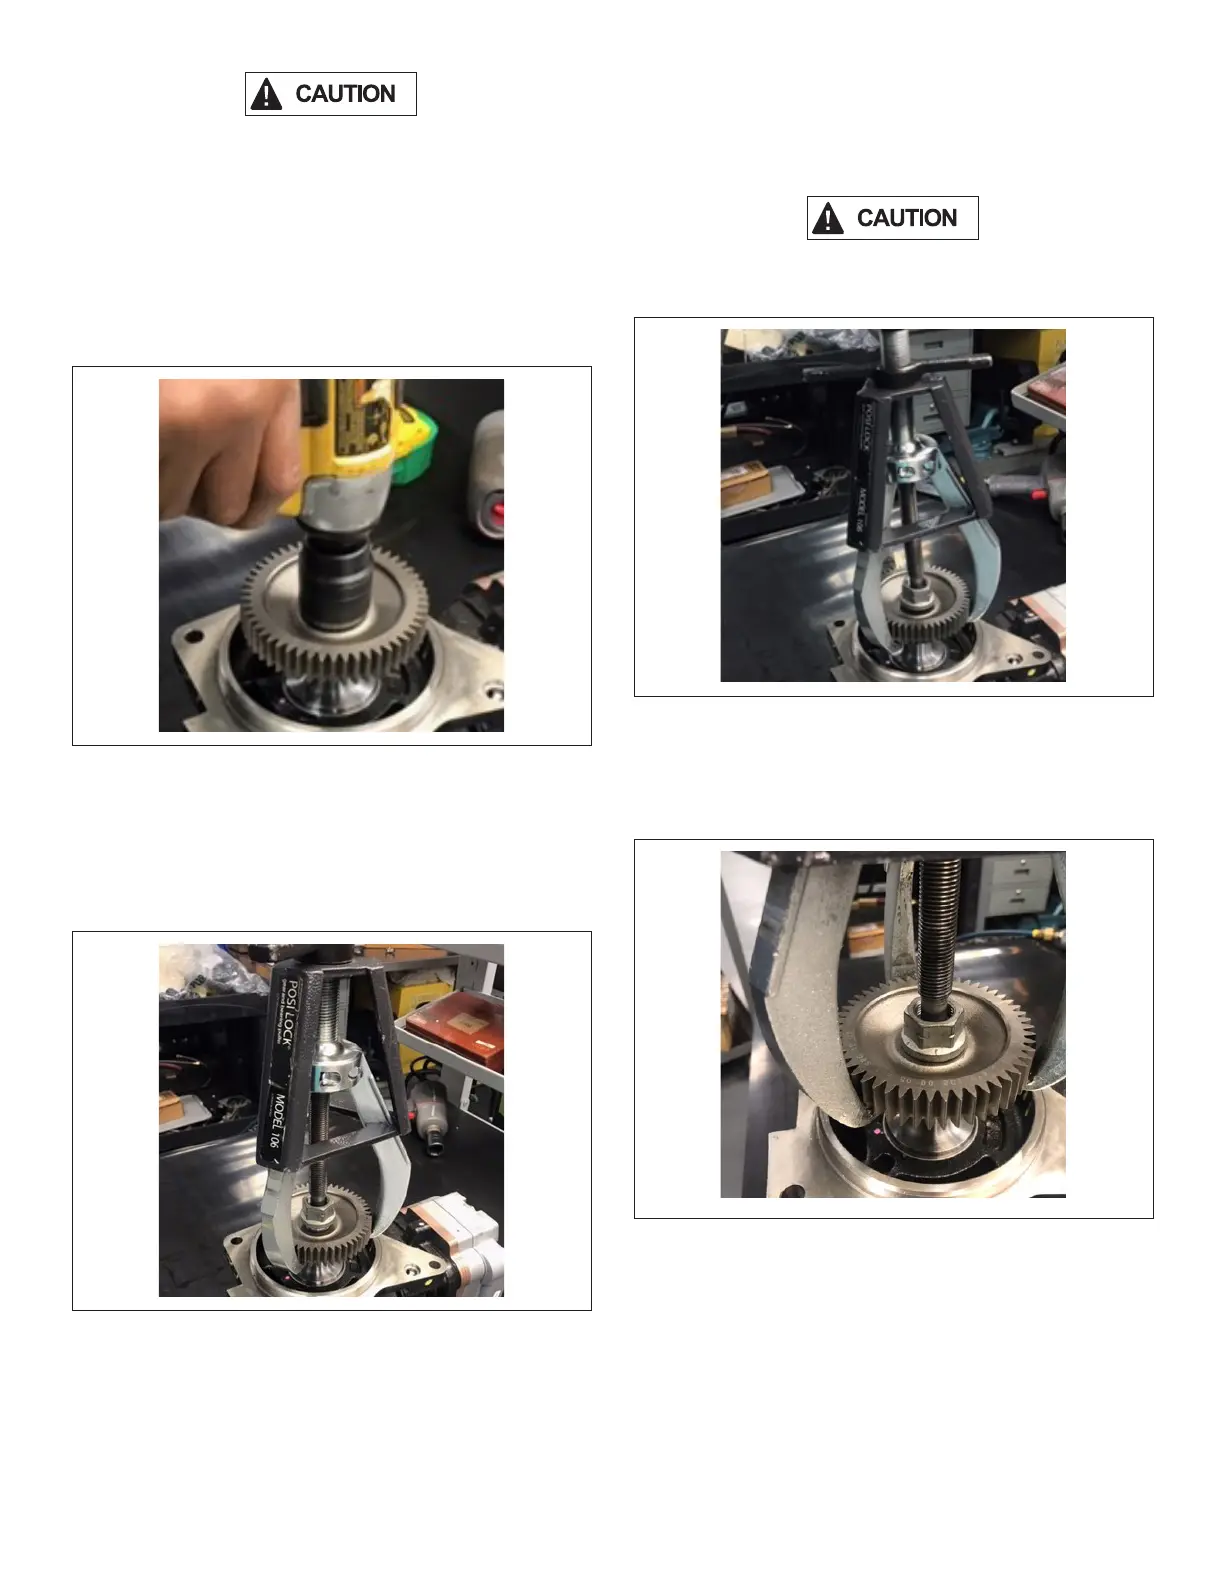
2. Using a pneumatic or electric torque gun with a 27-mm
socket, loosen the lock nut by turning it clockwise (this
is a left-hand threaded lock nut). Leave the lock nut
partially threaded on the crankshaft to prevent the gear
from fully dislodging. See Figure 2.
Figure 2 – Loosen the Lock Nut
3. Position a gear puller on the drive gear and hand snug
the puller screw against the crankshaft. Bendix suggests
a gear puller like the one shown in Figure 3 that uses
a retaining cage to help position and secure the puller
arms. See Figure 3.
Figure 3 – Gear Puller
4. Again, using a pneumatic or electric torque gun with a
27-mm socket, tighten the gear puller screw until the
compressor drive gear comes loose from the crankshaft.
The lock nut should capture the gear and prevent it from
coming completely o. See Figure 4.
The drive gear may quickly "pop" free during this step.
Extra caution is necessary to prevent personal injury.
Figure 4 – Loosen the Compressor Drive Gear
5. It is now safe to remove the gear puller and lock nut from
the crankshaft. Once the lock nut is removed, the gear
can slide o. See Figure 5.
Figure 5 – Slide Off the Gear