3
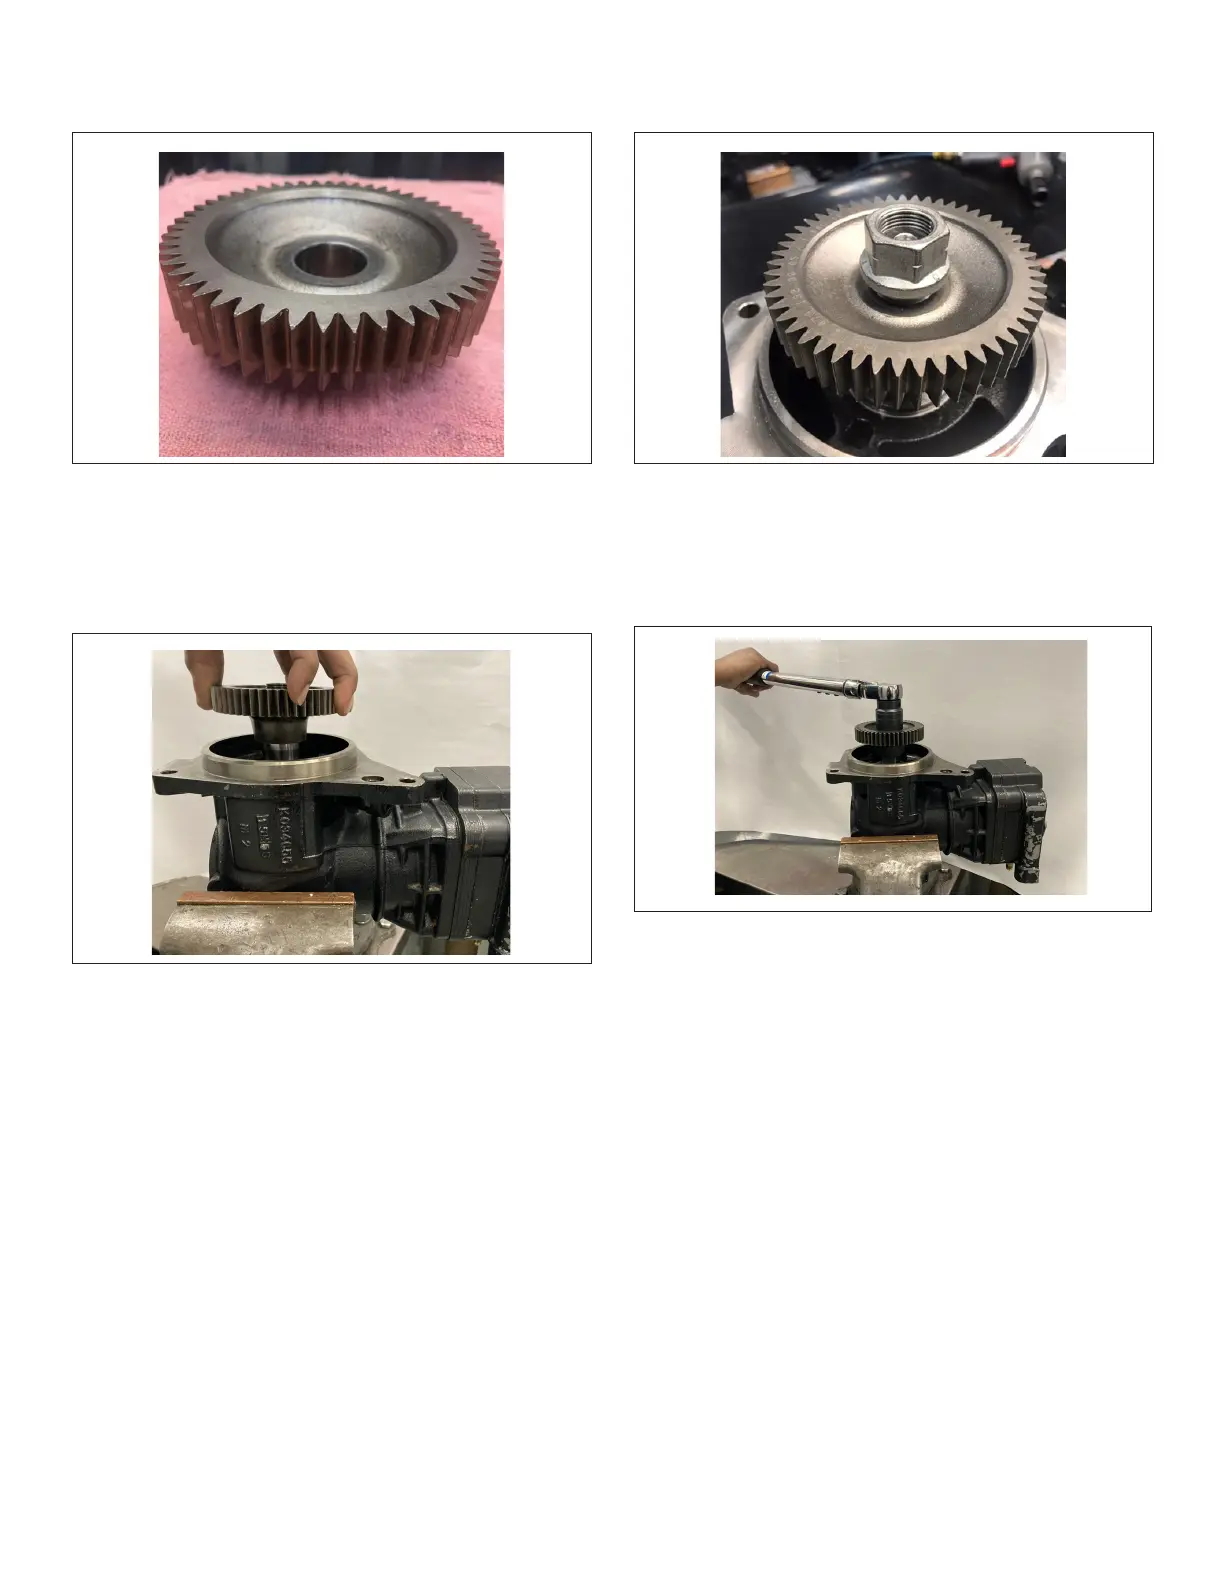
6. Once the gear is removed, thoroughly clean the gear
and inspect it for any physical damage. See Figure 6.
Figure 6 – Clean and Inspect the Gear
7. Secure the remanufactured compressor with the
crankshaft oriented upward, and carefully place the
salvaged drive gear on the crankshaft ensuring it is
square. See Figure 7.
Figure 7 – Place the Drive Gear on the Crankshaft
8. Replace the lock nut and hand tighten counter-clockwise
(this is a left-hand threaded lock nut). See Figure 8.
Figure 8 – Replace the Lock Nut
9. Once the lock nut is snug, use a torque
wrench to secure the lock nut to 165-200 ft-lbs
(220-280 N•m). Ensure the crankshaft is secure while
torquing the lock nut. See Figure 9.
Figure 9 – Secure the Lock Nut
10. Reinstall the compressor – and any ttings that were
removed – per the engine manufacturer's specications.