19
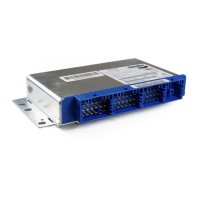
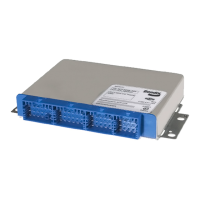
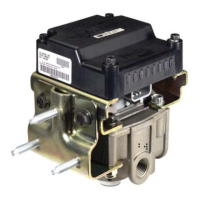
1. Position and secure the EC-30
™
controller in the original
mounting orientation using the four hex head bolts.
Torque the hex head EC-30
™
controller mounting
bolts to 98 in. Ibs. Over-tightening the ECU bolts
can cause damage to the EC-30
™
controller.
2. For a valve-mounted EC-30
™
controller, position and
secure the EC-30
™
controller assembly to the vehicle,
in the original mounting orientation. Reconnect all air
lines to the EC-30
™
controller assembly. All air lines
and fittings should be checked for leaks prior to returning
the vehicle to service.
3. Reconnect the electrical connectors to the EC-30
™
controller and torque the connector retaining jack-
screws to 15-20 in. lbs. Over-tightening the ECU
connector jack-screw(s) can cause damage to the
EC-30
™
controller.
4. Apply power and monitor the EC-30
™
controller power-
up sequence to verify proper system operation.
5. When necessary, it is possible to road test the ABS
function by making an abrupt stop from a vehicle speed
of about 20 mph to check for proper function. The wheels
should not enter a prolonged lock condition and ABS
function should be audible. It is the responsibility of the
technician to perform the tests in a safe location.
6. When necessary, it is possible to road test the ATC
function by accelerating on a road surface with reduced
traction. The drive wheels should not sustain substantial
spin. Audible bursts of air or engine throttle-down should
be noticed. It is the responsibility of the technician to
perform the tests in a safe location.
ABS AND ATC WIRING
The vehicle manufacturer designs and supplies the vehicle
harnesses for the EC-30
™
controller. However, Bendix
specifies all component connectors. See chart 8 for
components. The wiring harness and connectors are
weather resistant and sealed at the connector interface.
The wire gauge and insulation type used in the wire
harnesses is specific to the circuit function, but 16 gauge
GXL is most common. Refer to BW-106-A, Bendix ABS
Application Guideline, for specific wire harness application
information.
When troubleshooting ABS wiring, some general rules
should be followed where applicable.
1. Check all wiring and connectors to ensure they are
secure and free from visible damage. Check for evidence
of wire chafing due to poor routing or poor securing of
wires. Check connectors for proper insertion and locking.
Verify that the connector leads are properly greased with
a nonconductive electrical grease compound and do not
show signs of corrosion or exposure to the environment.
2. During wiring repair, a splice must be properly soldered
and made waterproof.
3. Do not pierce wire insulation when checking for
continuity.
4. Do not deform individual pins or sockets during probing
with a volt/ohm meter.
5. Only use the correct crimping tool when replacing wire
terminals and connectors.
6. Properly resecure all wiring harness and sensor leads
when repairs are made.
TROUBLESHOOTING
Fault information can be retrieved from the EC-30
™
controller
by using the diagnostic LED display, blink code diagnostics
or a diagnostic tool. However, the technician must confirm
whether the fault resides in the component, wiring or
connectors. The following troubleshooting flow charts will
assist the technician in isolating the cause of the fault.
Troubleshooting should always begin by observing the
ABS warning lamp and the ATC active/warning lamp
during the EC-30
™
controller power-up sequence.
If it is necessary to make electrical measurements, always
begin by taking voltage and resistance measurements at
the 30-pin and 18-pin wire harness connectors.
Once the circuit fault is found, isolate the area needing repair
by repeating the measurements at all connections in the
affected circuit (modulator, wheel speed sensor, etc.).
No voltage or resistance measurements are to be made on
the bulkhead connector pins of the EC-30
™
controller.
When repairs are made, reconnect the electrical connectors
to the EC-30
™
controller and torque the connector
retaining jack-screws to 15-20 in. lbs. Over-tightening
the ECU connector jack-screw(s) can cause damage
to the EC-30
™
controller.
Troubleshooting Flowcharts
Section A - Power-up sequence - ABS warning lamp and
ATC active/warning lamp
Section B - Power-up sequence - Trailer ABS warning lamp
Section C - ABS warning lamp
Section D - ATC active/warning lamp
Section E - Trailer ABS warning lamp
Section F - Diagnostic LED quick reference
Section G - Power to the EC-30
™
controller
Section H - Wheel speed sensors
Section I - ABS modulators
Section J - ATC modulator
Section K - Serial communication