XPR-10 Series Two-Post Lifts 27 P/N 5900951 — Rev. D — May 2019
The following procedure covers installing the Hydraulic Tee Fitting, the Medium and Long Hydraulic
Lines, the Elbow Hydraulic Fittings that go at the bottom of the Hydraulic Cylinders, and the Very Short
Hydraulic Line and Nipple Fitting used only with Wide Configurations. It does
not
cover the Short
Hydraulic Line or the Elbow Fitting that connects to the Power Unit (they are covered later).
To put the Hydraulic Lines and Hydraulic Fittings into position:
1. Locate the necessary Hydraulic Lines: One Short, one Medium, one Long, and one Very Short (for
Wide Configurations only).
2. Locate the necessary Hydraulic Fittings: Two interchangeable Elbows, one Tee (and a Nut that
holds it in place), and one Nipple (for Wide Configurations only).
Note: The Elbow Hydraulic Fitting on the Power Unit and the Short Hydraulic Line cannot be
installed at this point, as the Power Unit is not yet in place.
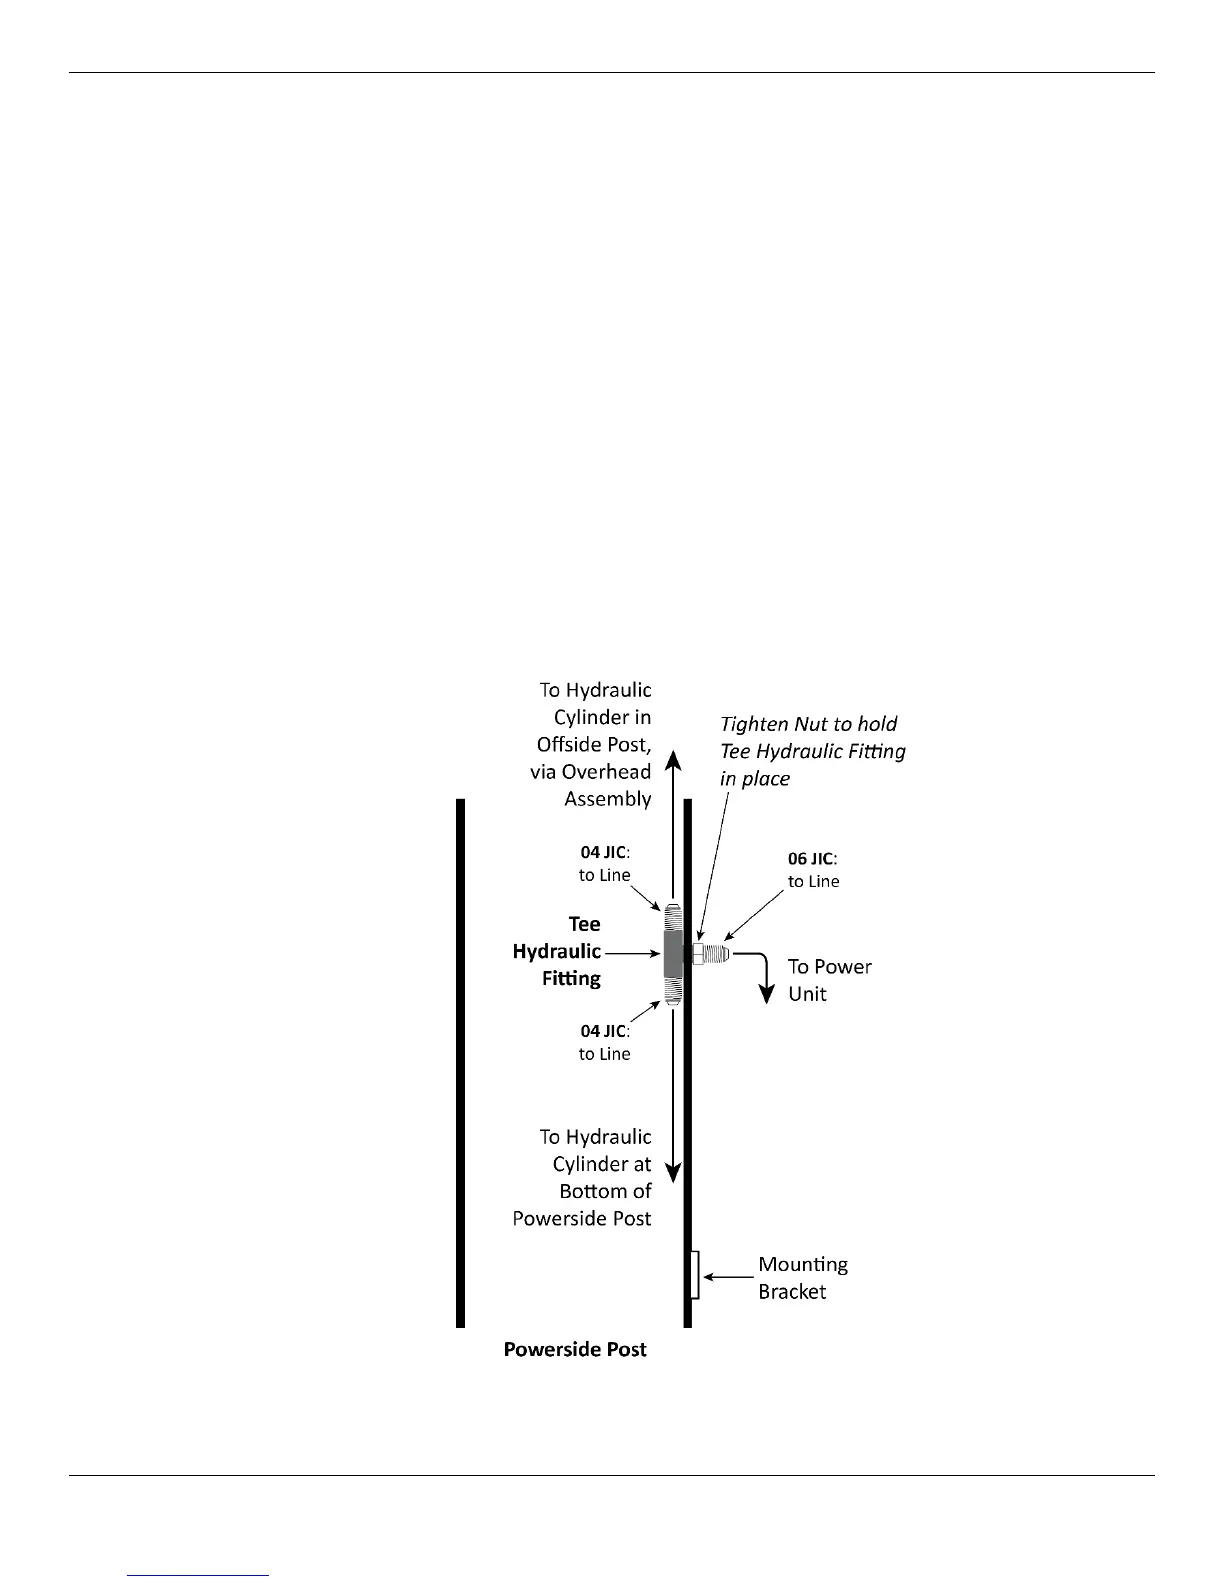
3.
Starting most of the way up the Powerside Post
, push the single fitting (06 JIC) on the
Tee Hydraulic Fitting (04 JIC to 04 JIC to 06 JIC) through the hole above the Mounting Bracket for
the Power Unit
from inside the Powerside Post
.
Note: There is only one Tee Hydraulic Fitting and it is installed on the Powerside Post above
where the Power Unit will be installed.
The end result of installing the Tee Hydraulic Fitting is two connectors inside the Powerside Post,
one connector protruding outside the Powerside Post, as shown in this drawing.
Drawing not to scale. Not all components shown. Some components exaggerated for clarity.
4. Tighten the Nut on the
outside
of the Powerside Post to hold the Tee Hydraulic Fitting in place.