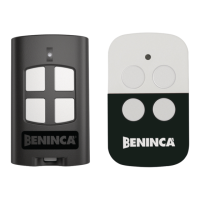
7
CONTROL UNITS WITH BUILT-IN RADIO AND LEARNING BUTTON
This type of controller features a programming button and a LED indicator that allows the user to set up the functions of the inte-
grated receiver.
The control unit must be powered, the antenna must be connected to the relevant inputs using exclusively an RG58 cable.
The name of the button and that of the LED vary depending on the controller. In the example below, we refer to a CP.J3 controller:
• Press 1 time the PGM button for 1s, LED DL1 starts blinking with a pause of 1s to indicate, to show that the receiver is waiting
for a transmitter code.
• Press within 10s the button of the transmitter to be memorised with the P.P. function. After storing the transmitter, the receiver
automatically exits the programming phase.
• Within 10s from saving, you can save other transmitters.
• Some controllers use the LED or the assistive light to confirm that the transmitter has been saved successfully.
• To exit the programming mode without saving any transmitter, wait 10s.
Some control units may feature special functions (pedestrian opening, second radio channel). Consult the device’s instructions for
more information.
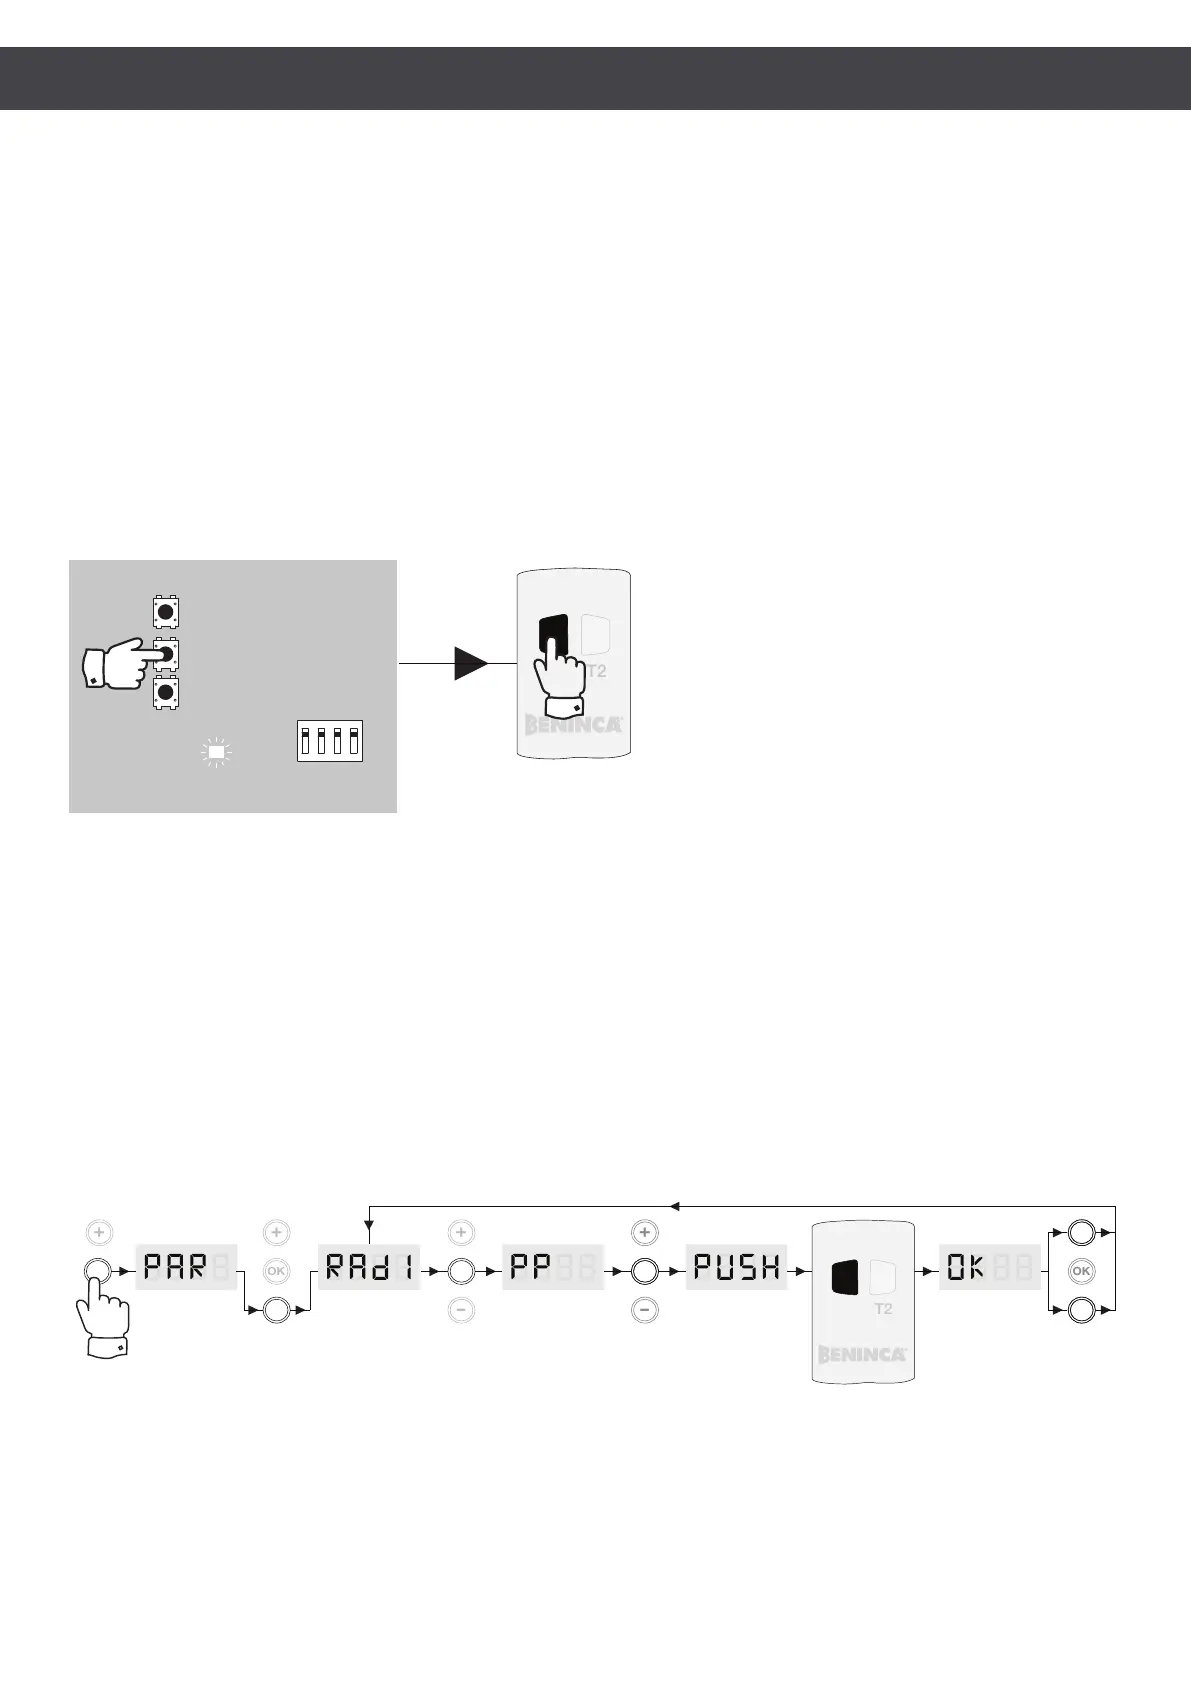
CONTROL UNITS WITH BUILT-IN RADIO CONTROL AND LCD DISPLAY
This type of controllers have a radio menu through which you can perform all the operations for programming the integrated receiver.
The control unit must be powered, the antenna must be connected to the relevant inputs using exclusively an RG58 cable.
Press the button <OK>, the LCD display switches on and opens the first menu available (usually “Parameters” PAR).
• Use the button <+> or <-> to navigate in the menu “RADI” (RADIO).
• Press the button <OK>, the display shows the first function available in the menu (usually the function PP).
• Select with the button <+> or <-> the “PP” function.
• Press the button <OK>, the display shows the message “PUSH” to indicate that a button is waiting and prompts you to push
the button of the transmitter that you want to associate.
• Upon completion, “OK” will appear on the display.
The radio menu also has other functions specific to the type of controller (pedestrian opening, second radio channel, separate
open/close); refer to the instructions included with the device
T1
DL1
1234
P.P
PGM
CL
ON
>
>
 Loading...