63
5.3 Module Assembly Key Point - Optical Engine
1. Light Pipe Module assembly and overfill alignment
1.1 Assembly LP Module to HSG DMD
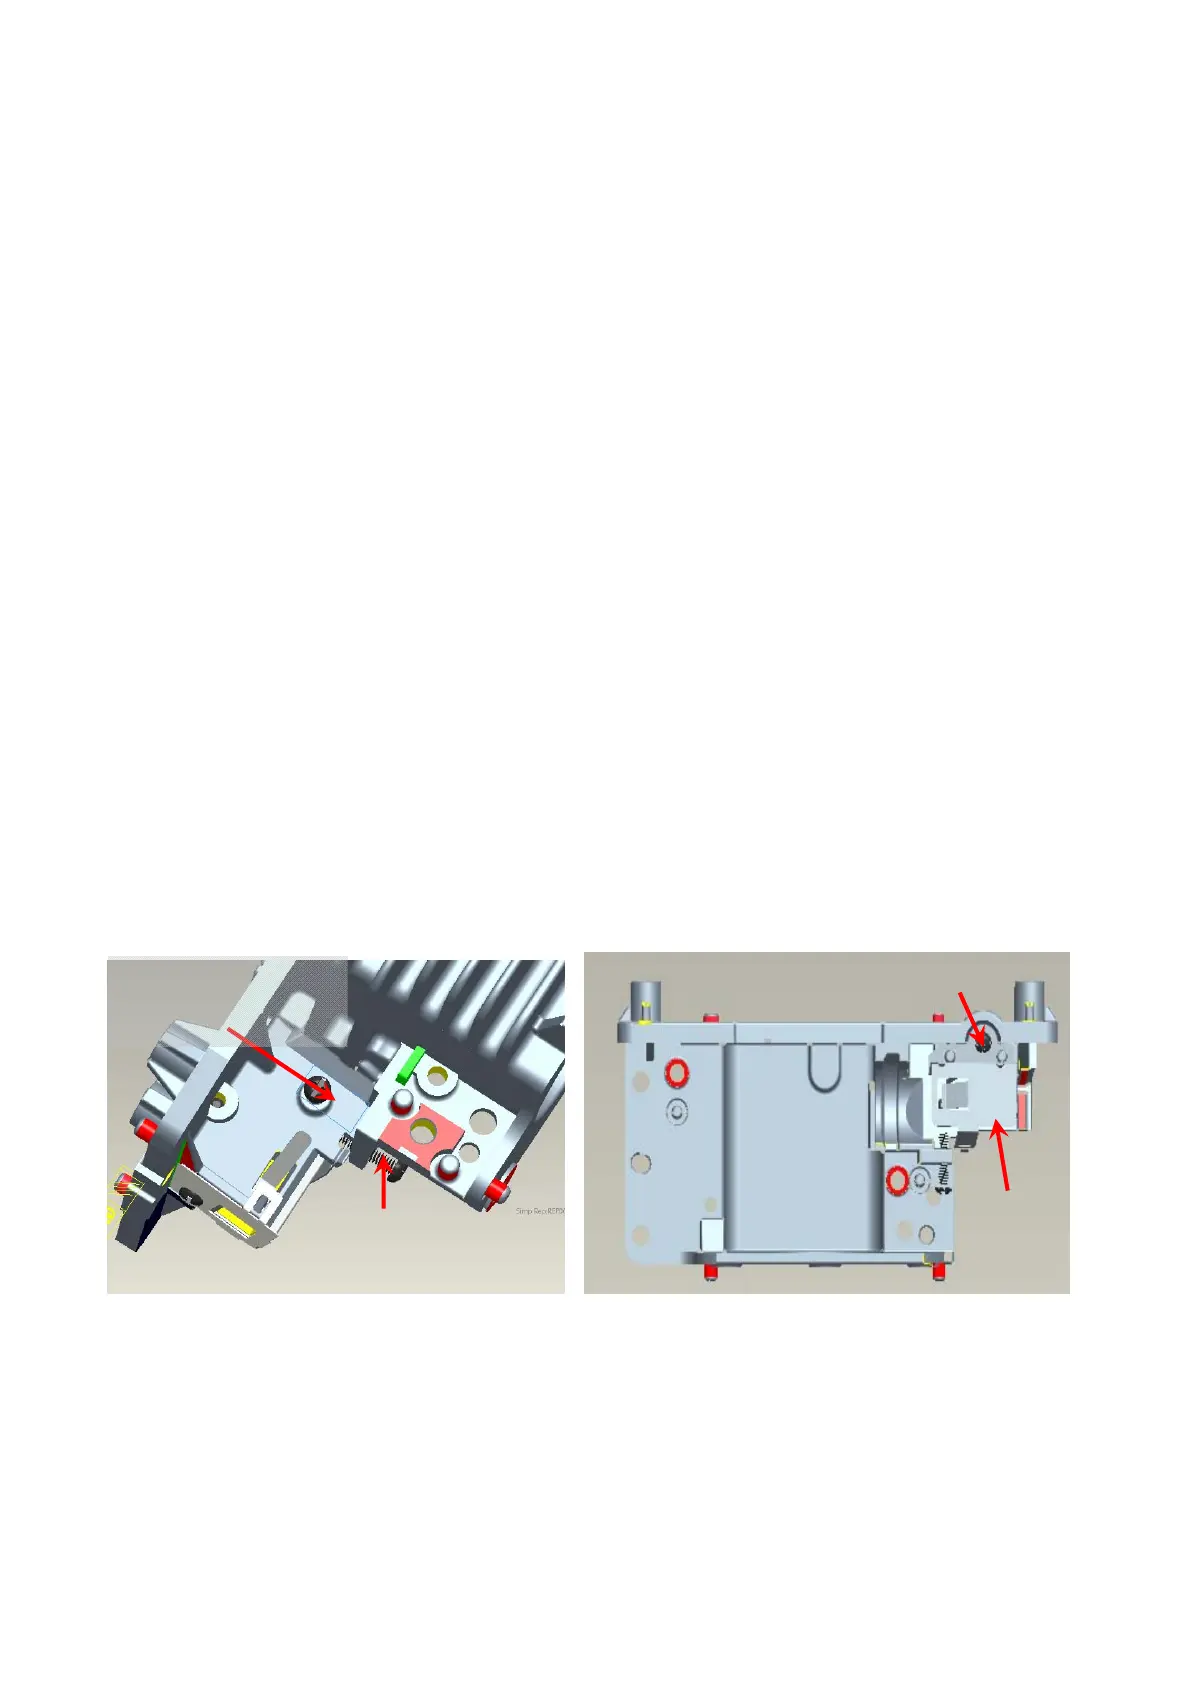
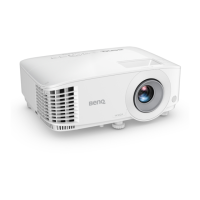
i. Assembly “Clip LP” and lock with screw well (Fig. 1-2).
ii. Press CLIP of RE_BKT_LP first, and then push it into the hole (Fig. 1-3).
iii. Placed LP Module on LP datum of “DMD HSG” and adjustment screw well, shown
(Fig. 1-4).
iv. Assembly “Baffle LP” first (Fig. 1-5) & push “Baffle LP” to hook DMD HSG(Fig. 1-6).
v. When Lock the screw of Baffle LP, the hand must push the left corner of Baffle LP before
(Fig. 1-7).
vi. Lock the screw of Baffle LP well then release the hand (Fig. 1-8).
vii. Assembly two Overfill adjustment screws (M2, 8L) to HSG DMD (Fig. 1-1).
** Adjustment criteria refer to below item 1.2
1.2 Overfill Adjustment @ LP Module
Overfill Adjustment Criteria:
i. Pre-assembly 2 adjusting screws.
ii. Alignment Sequence:
a. To adjust “Horizontal Adjustment Screw” firstly, and then “Vertical Adjustment
Screw”. (Based on production line condition, OE could change the sequence)
1.3 For Overfill Re-adjustment:
a. Loosen two adjustment screws
b. Follow adjustment steps shown in Item 1.2-ii.
Fig. 1-1 Fig. 1-2
Overfill Vertical
Adjustment Screw
M2, 8L
Overfill Horizontal
Adjustment Screw
M2, 8L
M2*3L screw
Clip LP



 To Next Page