11
Introduction
English
15. TIMER ON
Activates or displays an on-screen timer based on
your own timer setting. See "Setting the
presentation timer" on page 34 for dtails.
16. TIMER SET UP
Enters presentation timer setting directly. See
"Setting the presentation timer" on page 34 for
dtails.
17. AUTO
Automatically determines the best picture
timings for the displayed image. See"Auto-
adjusting the image" on page 28 for dtails.
18. Keystone/Arrow buttons ( / Up, /
Down)
Manually corrects distorted images resulting
from an angled projection. See "Correcting
keystone" on page 29 for dtails.
19. Right/
Locks the buttons on the projector. See "Locking
control keys" on page 37 for dtails.
When the On-Screen Display (OSD) menu is
activated, the #18, #9 and #19 buttons are used as
directional arrows to select the desired menu
items and to make adjustments. See "Using the
On-Screen Display (OSD) menus" on page 24 for
dtails.
20. SOURCE
Displays the source selection bar. See "Switching
input signal" on page 27 for dtails.
21. MUTE
Toggles projector audio between on and off. See
"Muting the sound" on page 38 for dtails.
22. MODE
Depending upon the input signal in use, selects
an available picture mode. See "Selecting a
picture mode" on page 31 for dtails.
Operating the LASER pointer
The Laser Pointer is a presentation aid for
professionals. It emits red colored light
when you press it and the indicator lights
up red.
The laser beam is visible. It is necessary to
press and hold LASER for continuous
output.
Do not look into the laser light
window or shine the laser light beam on yourself or
others. See the warning messages on the back of the
remote control prior to using it.
The laser pointer is not a toy. Parents should be mindful of
the dangers of laser energy and keep this remote control
out of the reach of children.
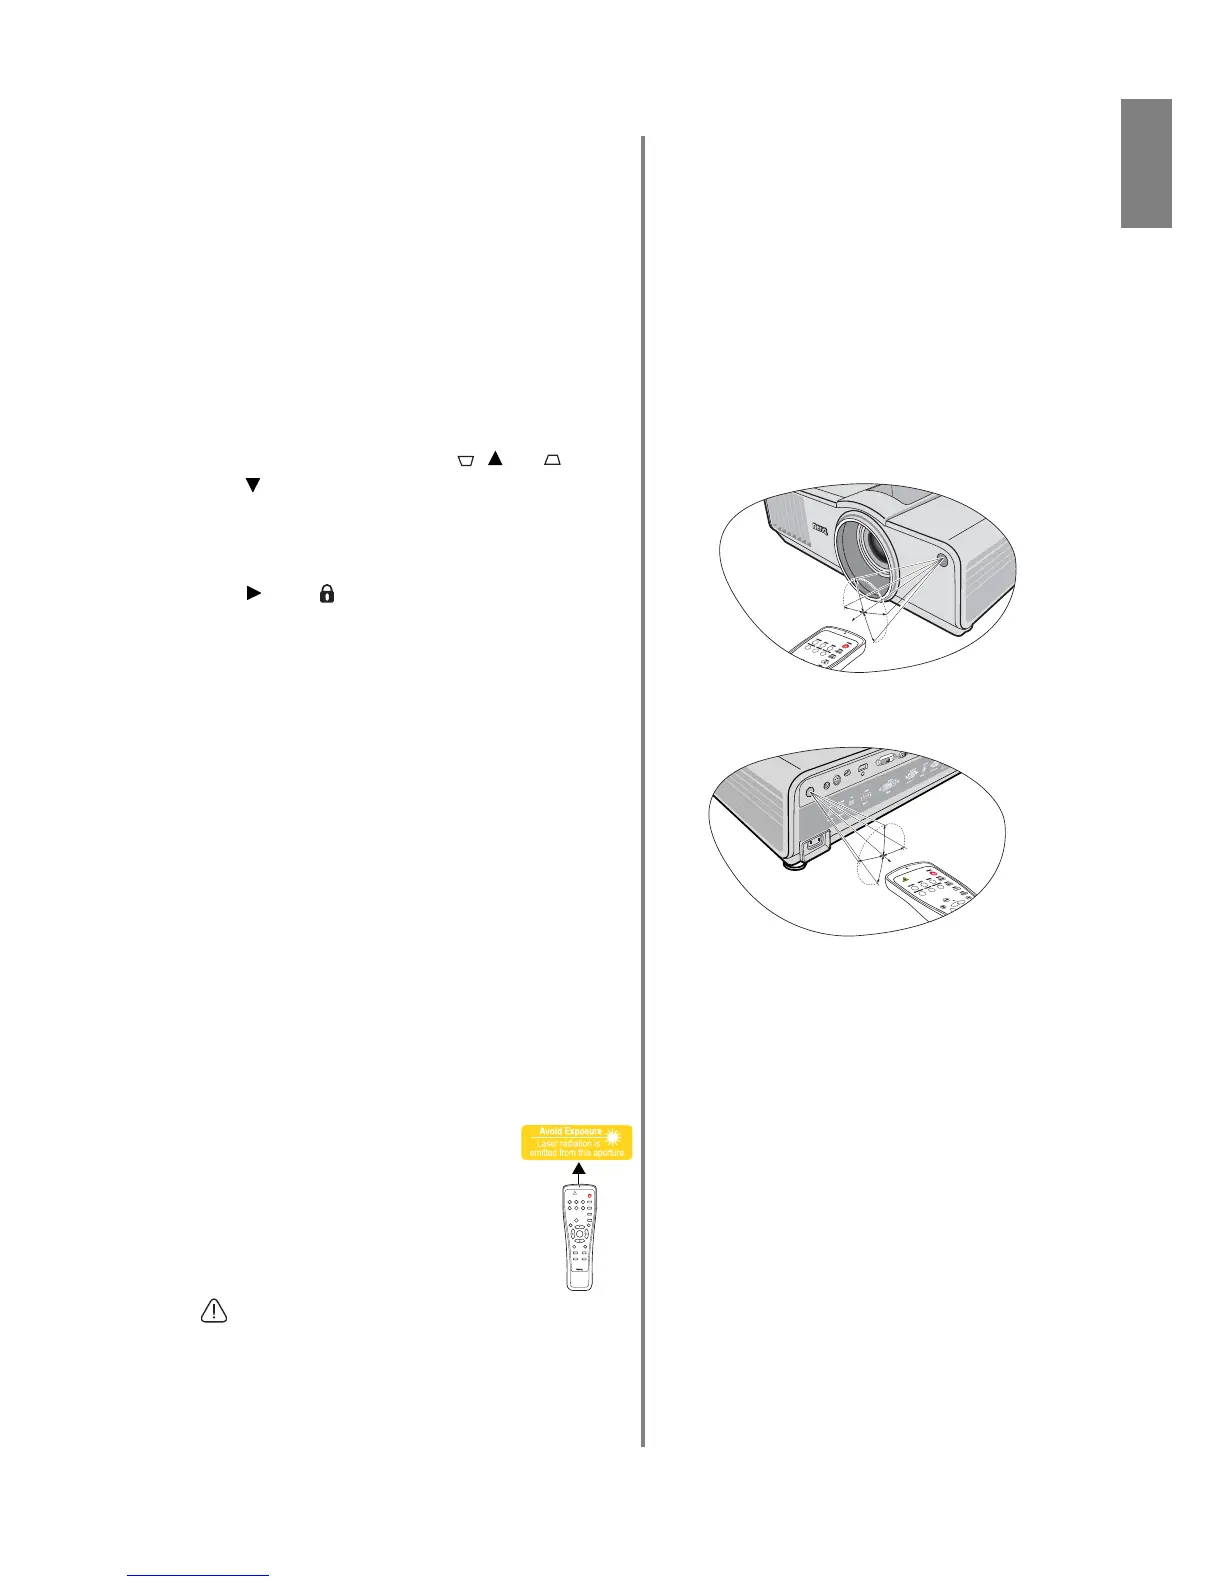
Remote control effective range
Infra-Red (IR) remote control sensors are located on
the front and the back of the projector. The remote
control must be held at an angle within 30 degrees
perpendicular to the projector's IR remote control
sensors to function correctly. The distance between the
remote control and the sensors should not exceed 8
meters (~ 26 feet).
Make sure that there are no obstacles between the
remote control and the IR sensors on the projector that
might obstruct the infra-red beam.