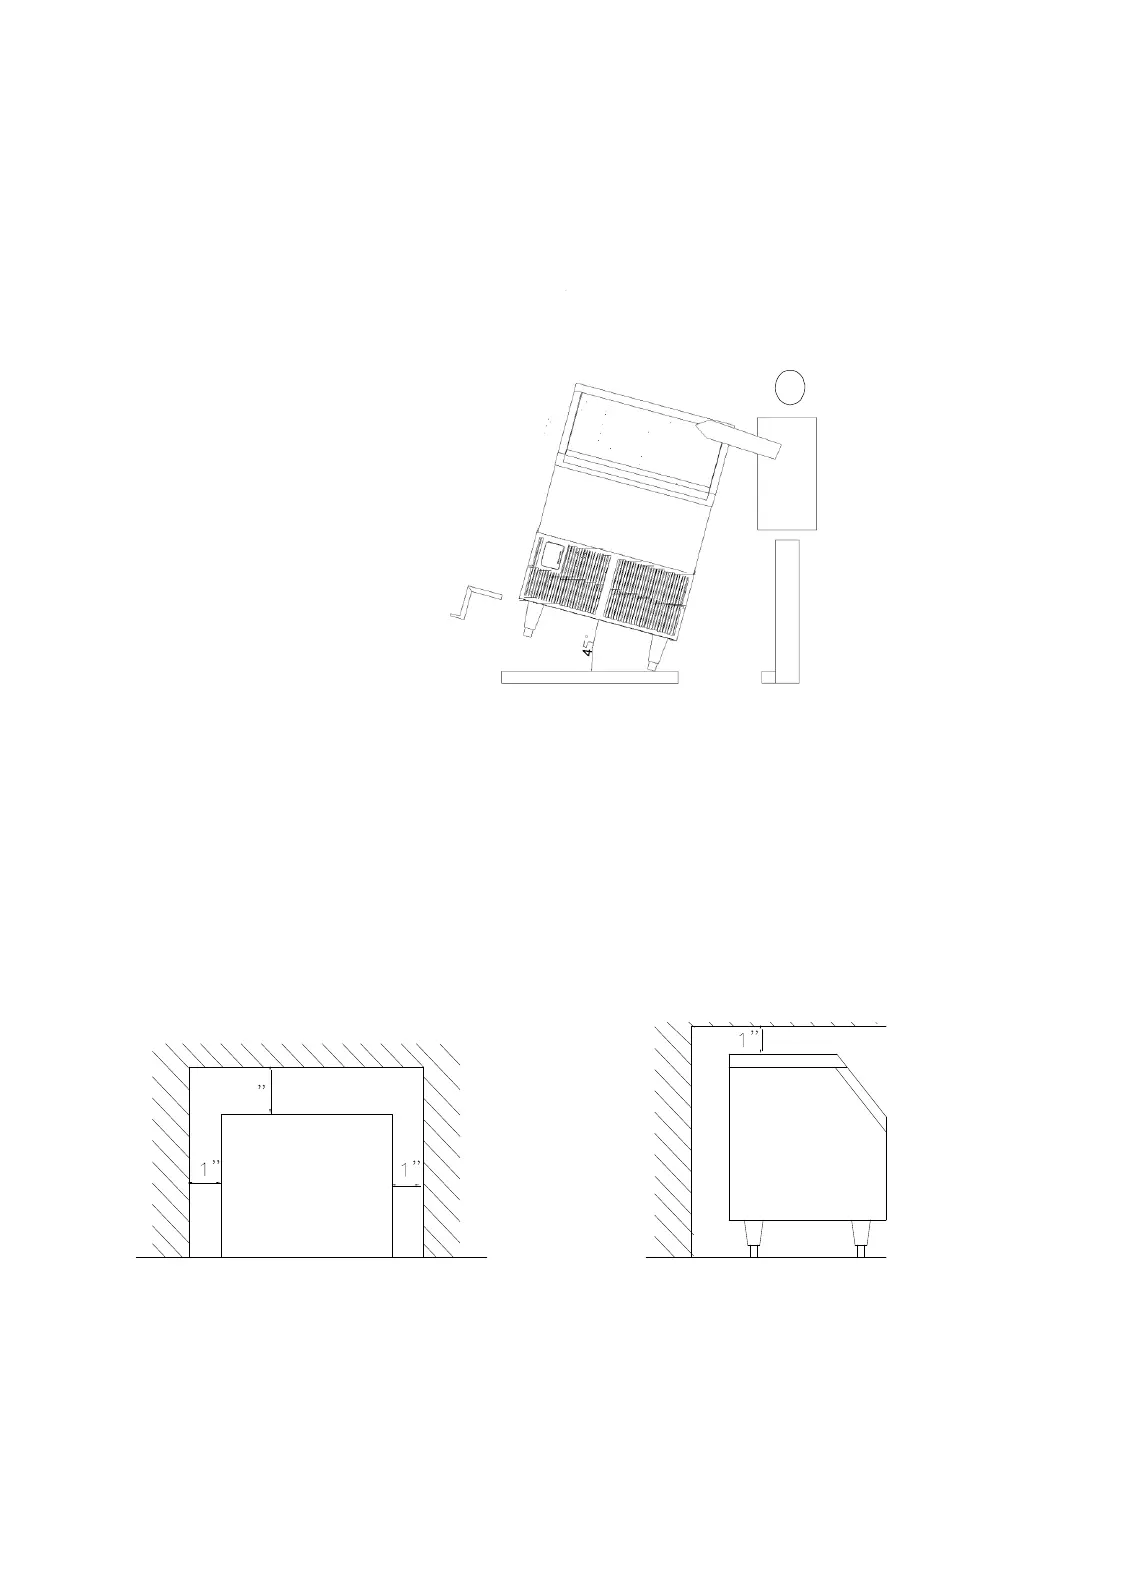
Installing the stability brackets
This operation requires at least two persons.
If you wish to install the ice maker in a free-standing mode rather than enclosed, it is
necessary to attach the two metallic stability brackets that can be found packed inside
the ice storage bin. Keeping the machine tilted to the right, but not more than 45˚, attach
one bracket to the center of the underside of the ice maker with two screws (supplied).
See illustration below. Set the unit back on its four feet, then tilt it forward in order to
screw in the second bracket on the underside of the unit opposite the first bracket. Level
the ice maker. This operation will stabilize it for free-standing operation.
Location Requirements
This ice maker should be installed by qualified personnel.
NOTICE:
1. Before setting the ice maker inside a cabinet, connect the water supply pipe correctly.
Untie the drain hose, insert it into the drain, and connect the power supply line.
2. Do not kink or pinch the power supply line between the ice maker and wall or cabinet.
Installation clearance
Top view Side view
To ensure proper ventilation for your ice maker, the front of the unit must be
completely unobstructed.
When installing the ice maker under a counter, follow the recommended spacing
dimensions shown. Allow at least 6” (150 mm) clearance at rear, and 1” (25 mm) at
the sides and at the top for proper air circulation. The installation should allow the ice
maker to be pulled forward for servicing if necessary.