Do you have a question about the Bestop TREKTOP NX GLIDE and is the answer not in the manual?
| Brand | Bestop |
|---|---|
| Model | TREKTOP NX GLIDE |
| Category | Automobile Accessories |
| Language | English |
Install at temperature above 72°F for easier fitting; fabric wrinkles disappear over time.
Includes warnings about product limitations and safe operation, plus eye protection.
Lists necessary tools including drill, screwdrivers, wrench, and safety glasses.
Details screws, nuts, and washers used in the installation process.
Includes bushings, tubes, and other small components for assembly.
Lists bow-mount brackets, pin-point brackets, and door rails for vehicle attachment.
Details knobs, top arch, and tailgate bar mounts for structural support.
Lists left/right side bows and the #2 bow assembly with stay-straps.
Includes rear bow assembly and cable pockets for the rear section.
Lists foam tape strips and foam seals for weatherproofing the header.
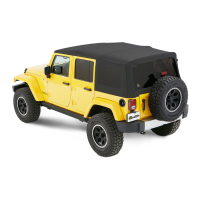
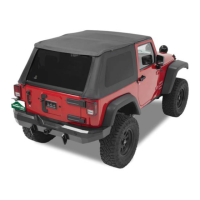
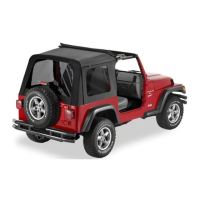
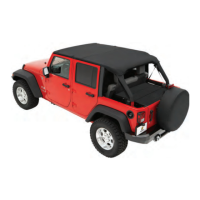
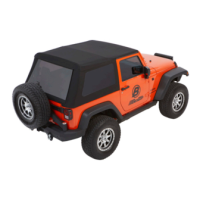
Details the tailgate bar and the main fabric top with windows.
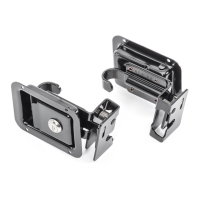
Secures left and right bow mount brackets to the sport bar downtubes using screws.
Fastens pin point brackets to the rear downtube with screws, washers, and nuts.
Attaches the left and right door rails to the vehicle's belt rail system.
Secures the door rails to the Jeep sport bar using M8 knobs.
Installs the top arch by inserting its ends into the slotted tabs on the door rails.
Removes protective peel-off strip from the top surface of the top arch.
Snaps the left and right tailgate bar mounts onto the Jeep belt rail.
Lays out header/fabric assembly, removes screws, and folds back protective flap.
Inserts and secures side bows into the header assembly using screws and washers.
Replaces protective flaps on both sides of the header after bow attachment.
Lifts and drapes the fabric/header/side bow assembly onto the Jeep windshield and hood.
Releases and slides spring-loaded catches to connect side bows to mount brackets.
Places the #2 bow assembly on side bows, aligning holes in the bow legs.
Fastens the #2 bow assembly to side bows using screws, bushings, and nuts.
Aligns header/fabric/bow assembly and engages locking pins with door rail levers.
Pulls top fabric back and positions long fabric bowflaps in front of the #2 bow.
Wraps and secures bowflaps under the #2 bow using hook and loop fasteners.
Attaches rubber bumpers to the underside of each rear leg of the rear bow assembly.
Attaches the rear bow assembly to the pin point bracket on the rear downtube.
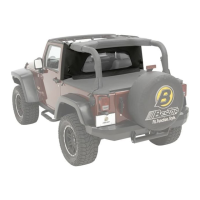
Drapes fabric over Jeep, opens Sunrider, and folds it back ensuring a double-fold.
Attaches stay straps to the rear bow assembly using screws, washers, and nuts.
Attaches long fabric flaps to the rear bow assembly using pan head washer screws.
Attaches small fabric flaps at rear corners to the rear bow assembly.
Threads cable springs through cable pockets and positions pockets out of the way.
Attaches cable springs to #2 bow corner brackets and crimps ends to prevent loosening.
Secures cable pockets to the #2 bow corner plate using screws, washers, and nuts.
Places foam seals onto the inside of the header after removing protective liners.
Applies foam tape strips to the inside of the header, following specified locations.
Inserts window plastic tubes into the top fabric channel and slides windows forward.
Pins the top corner of quarter windows into grommets on the #4 bow tabs.
Snaps window straps to snaps on the tailgate bar mounts.
Tucks plastic angle strips into the front vertical channel of the rear door rail.
Tucks plastic strips along bottom edges of windows under the Jeep belt rail.
Tucks plastic tabs at rear corners of windows under the Jeep belt rail.
Slides the tailgate bar onto the tubing attached to the bottom inside of the rear window.
Inserts the rear window's plastic tube into the channel along the lower edge of the top fabric.
Rolls the rear window's plastic tab into the channel on the inside edge of the quarter windows.
Snaps the front edge of the tailgate bar into the channels on the tailgate bar mounts.
Tucks the bottom corners of the rear window under the Jeep belt rail.
Flips Sunrider forward and positions header latches for engagement with windshield loops.
Pivots latch handles and hooks to engage windshield loops and close the latches.
Releases latches, folds header, and releases side bows before removing windows.
Lifts and swings the fabric/bow assembly back, rests it on the belt rail, and tucks fabric.
States the warranty applies to original purchaser, is non-transferable, and disclaims implied warranties.
Lists conditions like misuse, accidents, improper maintenance, and force majeure as exclusions.
Details the process for warranty claims, requiring email notification and proof of purchase.
Lists products covered under Bestop's limited lifetime warranty, including Trektop Pro and EZFold.
Details products covered for 5 years, such as Trektop NX Glide (non-Twill) and Sailcloth products.
Includes products like Pavement Ends Sprint Top and Powerboard/Trekstep with 3-year coverage.
Covers Trektop Classic Soft Top and Rough Rider storage for 2 years.
Covers all other Bestop and Pavement Ends products not otherwise specified.