Do you have a question about the BESV CF1 and is the answer not in the manual?
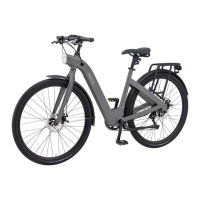
Visual identification of key e-bike parts including HMI, lights, sensors, motor, and battery.
Details the model, operating/storage temp, humidity, function, output power, voltage, and efficiency of the controller.
Provides specifications for the motor, including model, temperature, size, weight, ROHS, noise, RPM, torque, and voltage.
Details the model, resolution, weight, operating voltage, clockwise/counterclockwise direction, and RPM for the pedaling sensor.
Provides specifications for the HMI, including operating/storage temps, display type, lighting control, and I/O connectors.
Details the battery model, capacity, voltage, current limits, communication type, operating/storage temps, and power consumption.
Instructions for connecting the charger, charging time, and indicator lights for battery charging.
Provides crucial safety guidelines for using and charging the battery to prevent damage or hazards.
Explains HMI components, power button LED indicators for discharge and charge status.
Details the 3 assistance levels and their suggested riding conditions based on the HMI display.
Instructions for powering the system on/off and controlling front/rear lights with intensity adjustments.
How to adjust assistance levels and check HMI/controller firmware versions.
Explains how the status and assistance indicators display main and sub firmware versions.
Step-by-step guide to disassemble the EMS, including disconnecting cables and removing covers.
Instructions for removing wire covers and disconnecting the power button connector.
Steps to remove the bottom cover and disconnect motor, pedaling sensor, and rear light cables.
Instructions for loosening battery screws to prepare for removal.
Guide to carefully pulling out the power kit, checking for stuck cables.
Steps to disconnect the pedaling sensor cable and remove the crank for sensor access.
Steps to disconnect the motor cable and prepare for removal by removing caps and nuts.
Steps to bend the derailleur and remove the rear wheel as part of motor disassembly.
Instructions for removing wire covers, disconnecting the switch connector, and removing the switch.
Explains how alternating blue/red LEDs indicate errors or warnings and how to retrieve warning codes.
Details warning codes 1-3 and their corresponding meanings like sensor or battery communication failures.
Details error codes 1-3 and 7 for motor issues like stalling, driving hard, hall sensor errors, and HMI-controller connection failures.
Addresses system not turning on and battery indicator flashing issues, suggesting checks and distributor contact.
Troubleshoots inconsistent assistance, level resetting to 0, and lighting system problems.
Covers battery not charging due to connection or damage, and poor braking due to brake insertion or grease.
Addresses metallic noises during braking and worn brake shoes affecting performance and safety.
Detailed steps for technicians to diagnose battery unable to discharge, including voltage, temperature, and fuse checks.
Steps for technicians to diagnose battery unable to charge, involving connectors, temperature, and fuse checks.
Diagnostic steps for motor failure, checking connectors, pins, cable skin, hall sensor signal, and resistance.
Troubleshooting steps for missing speed information, focusing on speed sensor resistance.
Diagnoses abnormal motor vibration by checking connectors, pins, housing, bearings, axle, and hall sensor signals.
Troubleshooting steps for heavy motor resistance during rotation, checking cable shorts, inductance, and EMF.
Diagnoses lack of assistance by checking assist level, connectors, e-brake signal, hall sensors, and controller/motor.
Troubleshooting for HMI being on but inoperable, checking motor connectors, cables, and hall sensors.
Diagnoses assistance level resetting to 0 by checking motor connectors, cables, hall sensors, and controller/motor.
Troubleshooting for HMI turning off immediately, checking HMI and contacting manufacturer.
Diagnoses discontinuous assistance by checking firmware, pedal signals, controller, and pedaling sensor.
Troubleshooting steps for system not turning on, checking battery voltage, charging status, battery, and HMI.
Diagnoses power output issues during backward pedaling by checking pedal signal and controller.