19
Installation Guide
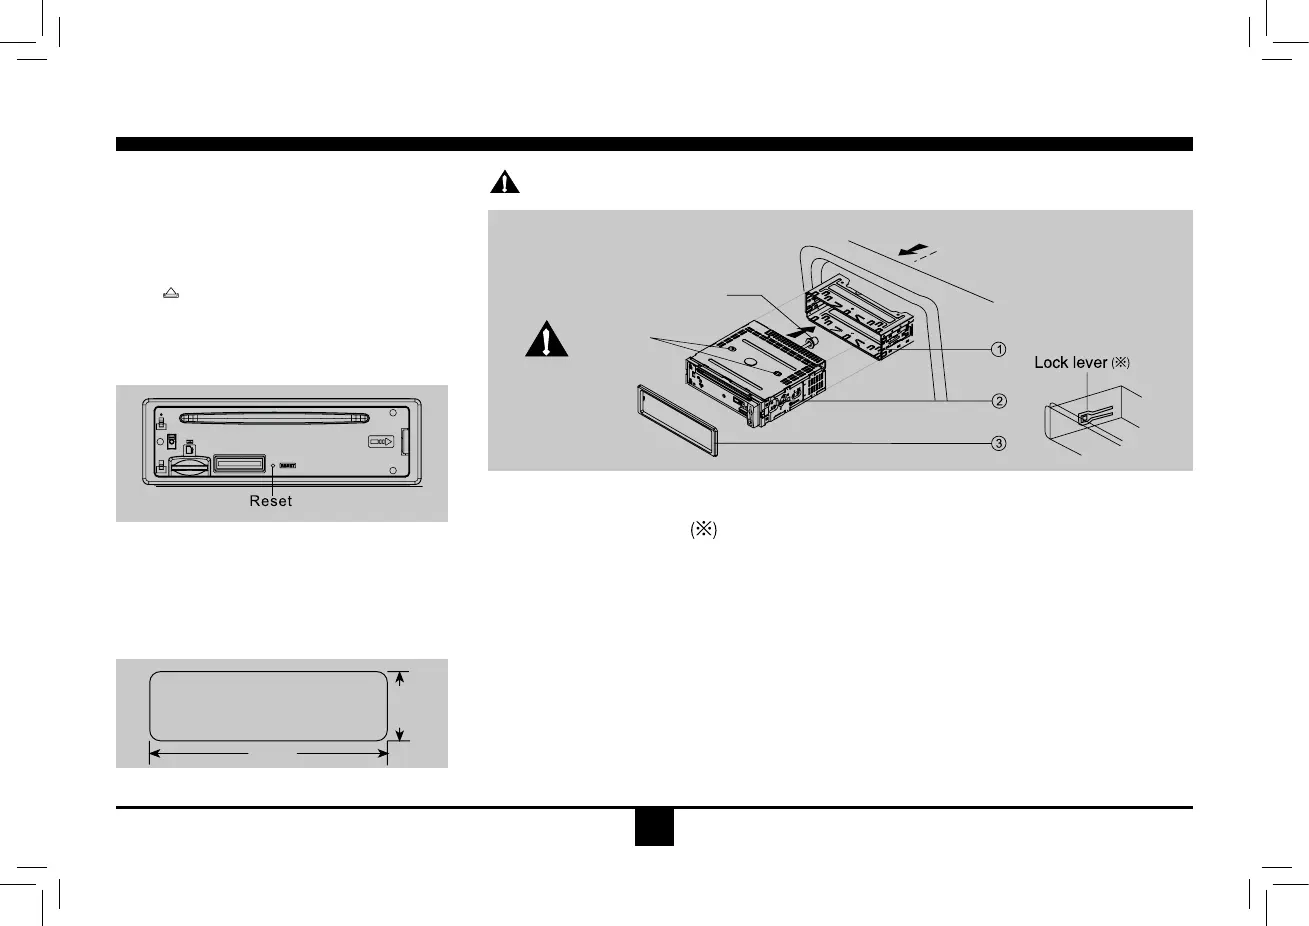
Important:Removethesetwoscrewsbeforeinstallation.Otherwise,theplayerwillnotwork.
1. Inset mounting collar into the dashboard, and bend the mounting tabs out with a screw-
driver.
Makesurethatlocklever
isushwiththemountingcollar(notprojectingoutward).
2. Secure the rear of the unit.
Afterxingmountingboltandpowerconnector,xtherearoftheunittothecarbodybyrubber
cushion.
3. Insert trim plate.
Installation Procedures
First completetheelectricalconnections,and
then check for correctness.
Reset
Press
buttonto flip downthe panel.Then
press the RESETbuttonwithapointedobject
to reset the unit to the original status.
Note:PresstheRESET buttonwillerasethe
clock and stored stations.
Installation Opening
This unit can be installed in any dashboard
havinganopeningasshownbelow.
The dashboard should be 4.75mm - 5.56mm
thick in order to be able to support the unit.
Mounting bolt
rubber cushion
Transport
screws
53mm
183mm