PCVR - Wireless AtH (bHaptics Player)
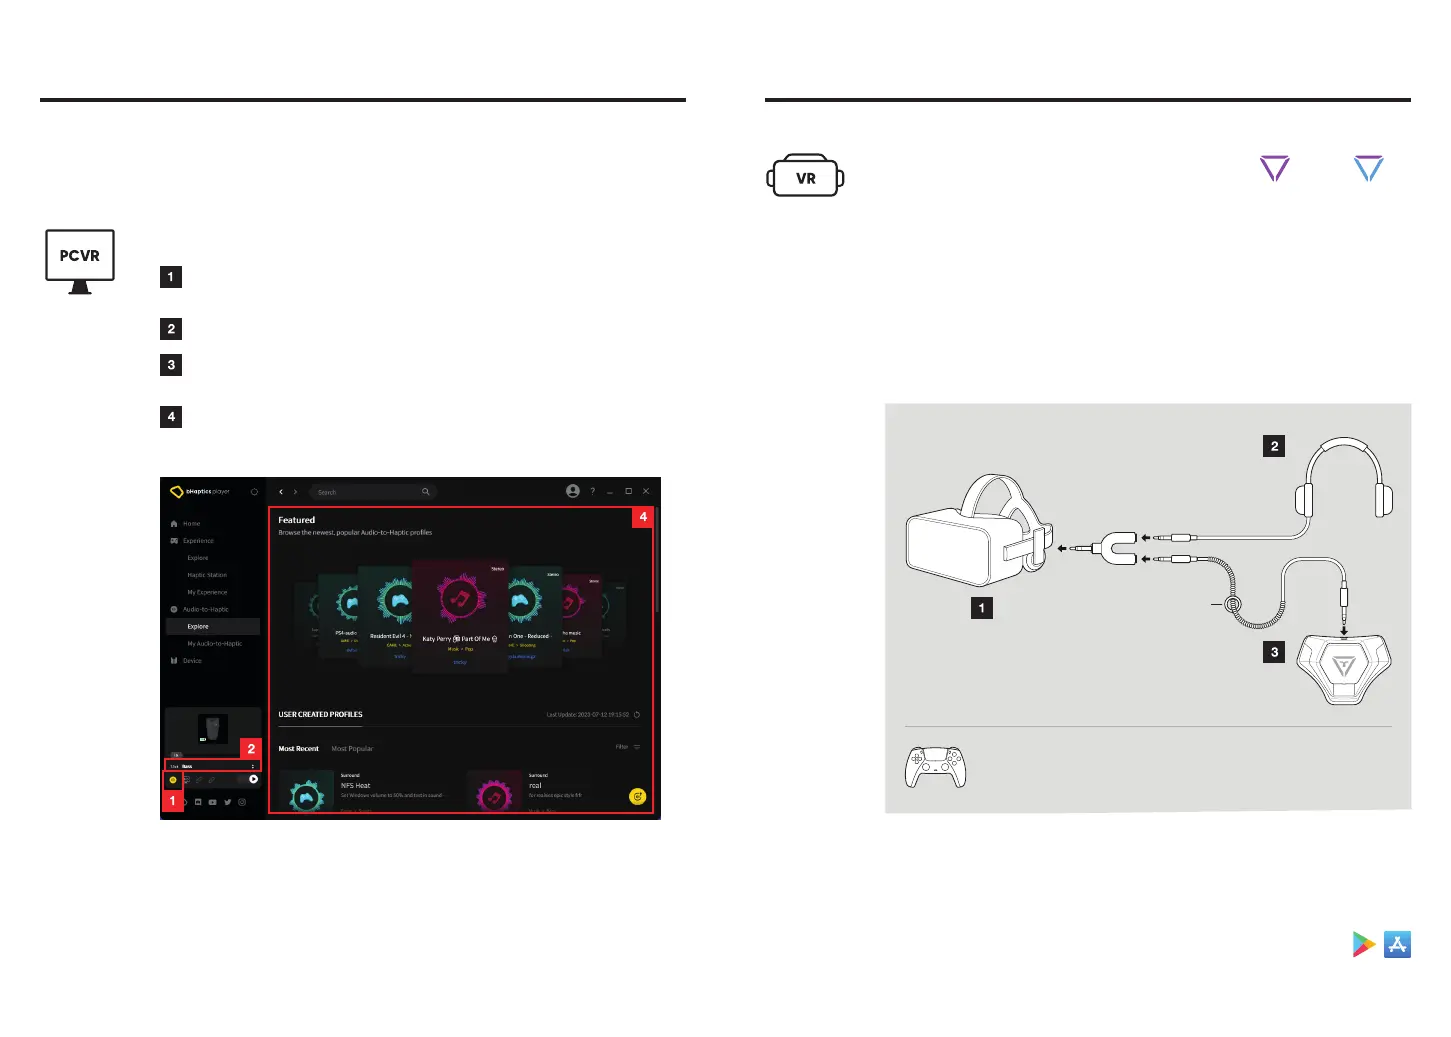
Open bHaptics Player and enable Audio-to-Haptic
in the Quick Control Panel.
Select the Audio-to-Haptic profile you want to apply.
Enjoy various media, including VR content, music,
and YouTube, with haptics.
You can also explore and add user-created Audio-to-Haptic profiles
that you wish to use.
You can still enjoy unsupported games, as well as videos, music, and other media,
with TactSuit by utilizing the Audio-to-Haptic feature, which converts audio signals
into real-time haptic feedback.
Audio-to-Haptic (AtH)
18
* You can also enjoy Wired AtH with a console device using
the same method.
Connect to
Headphones
/ Earphones
Y Jack
Insert Y Jack to
VR Headset
Connect to
TactSuit
Audio Cable Holder
1. Follow the instructions in the diagram below to connect TactSuit and
Standalone VR using the Audio Accessories.
2. Now, you can enjoy content with haptics that doesn't have native
support.
3. In the bHaptics Player Mobile App, you can select, create, and add
profiles to use with Wired AtH.
bHaptics Player App
Standalone VR - Wired AtH
With Standalone VR, you can enjoy AtH via
a wired connection using the provided
Audio Accessories.
19
Audio Cable In
& Paired
Audio Cable In
*
Due to safety concerns related to the use of wires, users are recommended
to use their TactSuit only via Bluetooth when using the product with
a Standalone VR (Meta Quest).
 Loading...