EasyManua.ls Logo

BIO RAD MyCycler - Fuse Installation and Power Cable Connection; 1.3.2 Fuse Installation and Power Cable Connection

BIO RAD MyCycler
44 pages
Print Icon
To Next Page IconTo Next Page
To Previous Page IconTo Previous Page
Loading...
Carefully
remove
the
contents
of
the
shipping
box.
To
remove
the
thermal
cycler,
lift
it
out
by
grasping
the
underside
of
the
unit.
Remove
the
plastic
bag
and
inspect
the
instrument
for
any
external
damage.
Check
off
all
parts
against
the
supplied
packing
list.
Your
MyCycler
was
carefully
tested
at
the
factory
and
was
shipped
in
good
working
order.
If
any
part
is
missing
or
damaged,
contact
Bio-Rad
Laboratories
immediately.
1.3.2
Fuse
Installation
and
Power
Cable
Connection
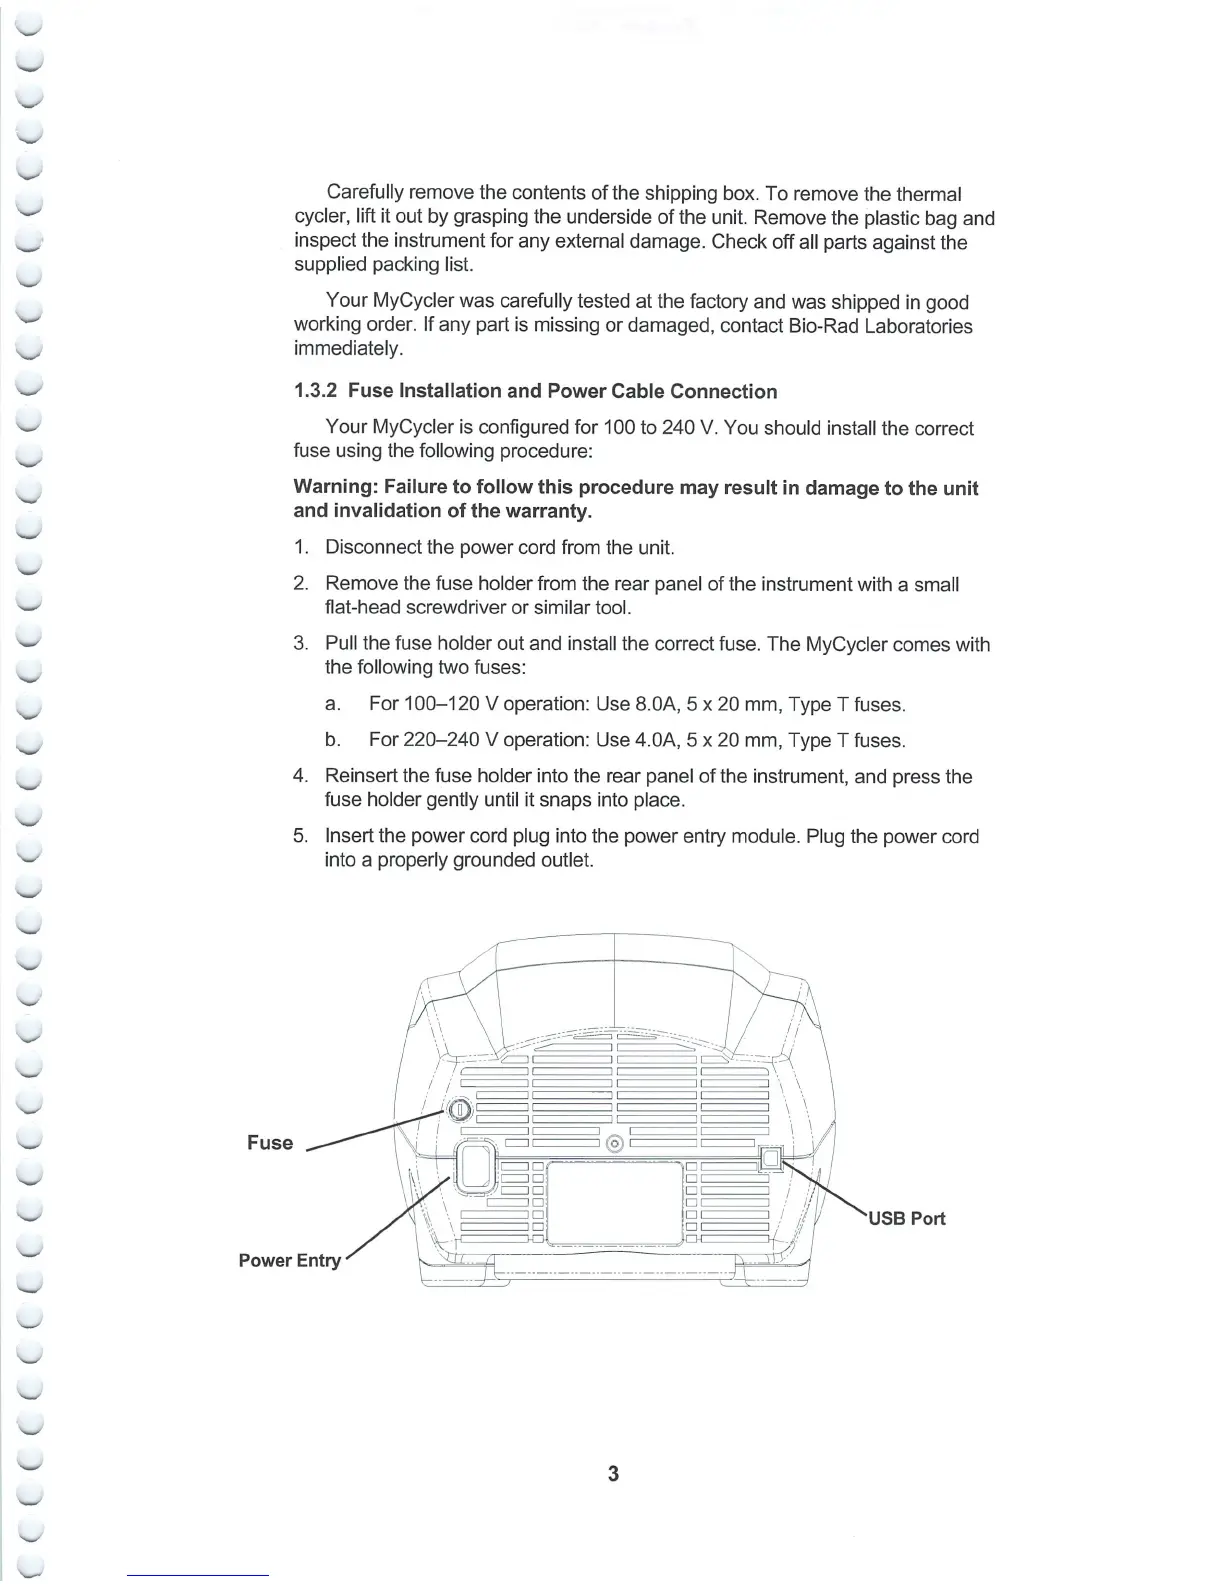
Your
MyCycler
is
configured
for
100
to
240
V.
You
should
install
the
correct
fuse
using
the
following
procedure:
Warning:
Failure
to
follow
this
procedure
may
result
in
damage
to
the
unit
and
invalidation
of
the
warranty.
1.
Disconnect
the
power
cord
from
the
unit.
2.
Remove
the
fuse
holder
from
the
rear
panel
of
the
instrument
with
a
small
flat-head
screwdriver
or
similar
tool.
3.
Pull
the
fuse
holder
out
and
install
the
correct
fuse.
The
MyCycler
comes
with
the
following
two
fuses:
a.
For
100-120
V
operation:
Use
8.0A,
5 x
20
mm,
Type
T
fuses.
b.
For
220-240
V
operation:
Use
4.0A,
5
x
20
mm,
Type
T
fuses.
4.
Reinsert
the
fuse
holder
into
the
rear
panel
of
the
instrument,
and
press
the
fuse
holder
gently
until
it
snaps
into
place.
5.
Insert
the
power
cord
plug
into
the
power
entry
module.
Plug
the
power
cord
into
a
properly
grounded
outlet.
Fuse
Power
Entry
USB
Port

Table of Contents