22
Installing the rear wheel
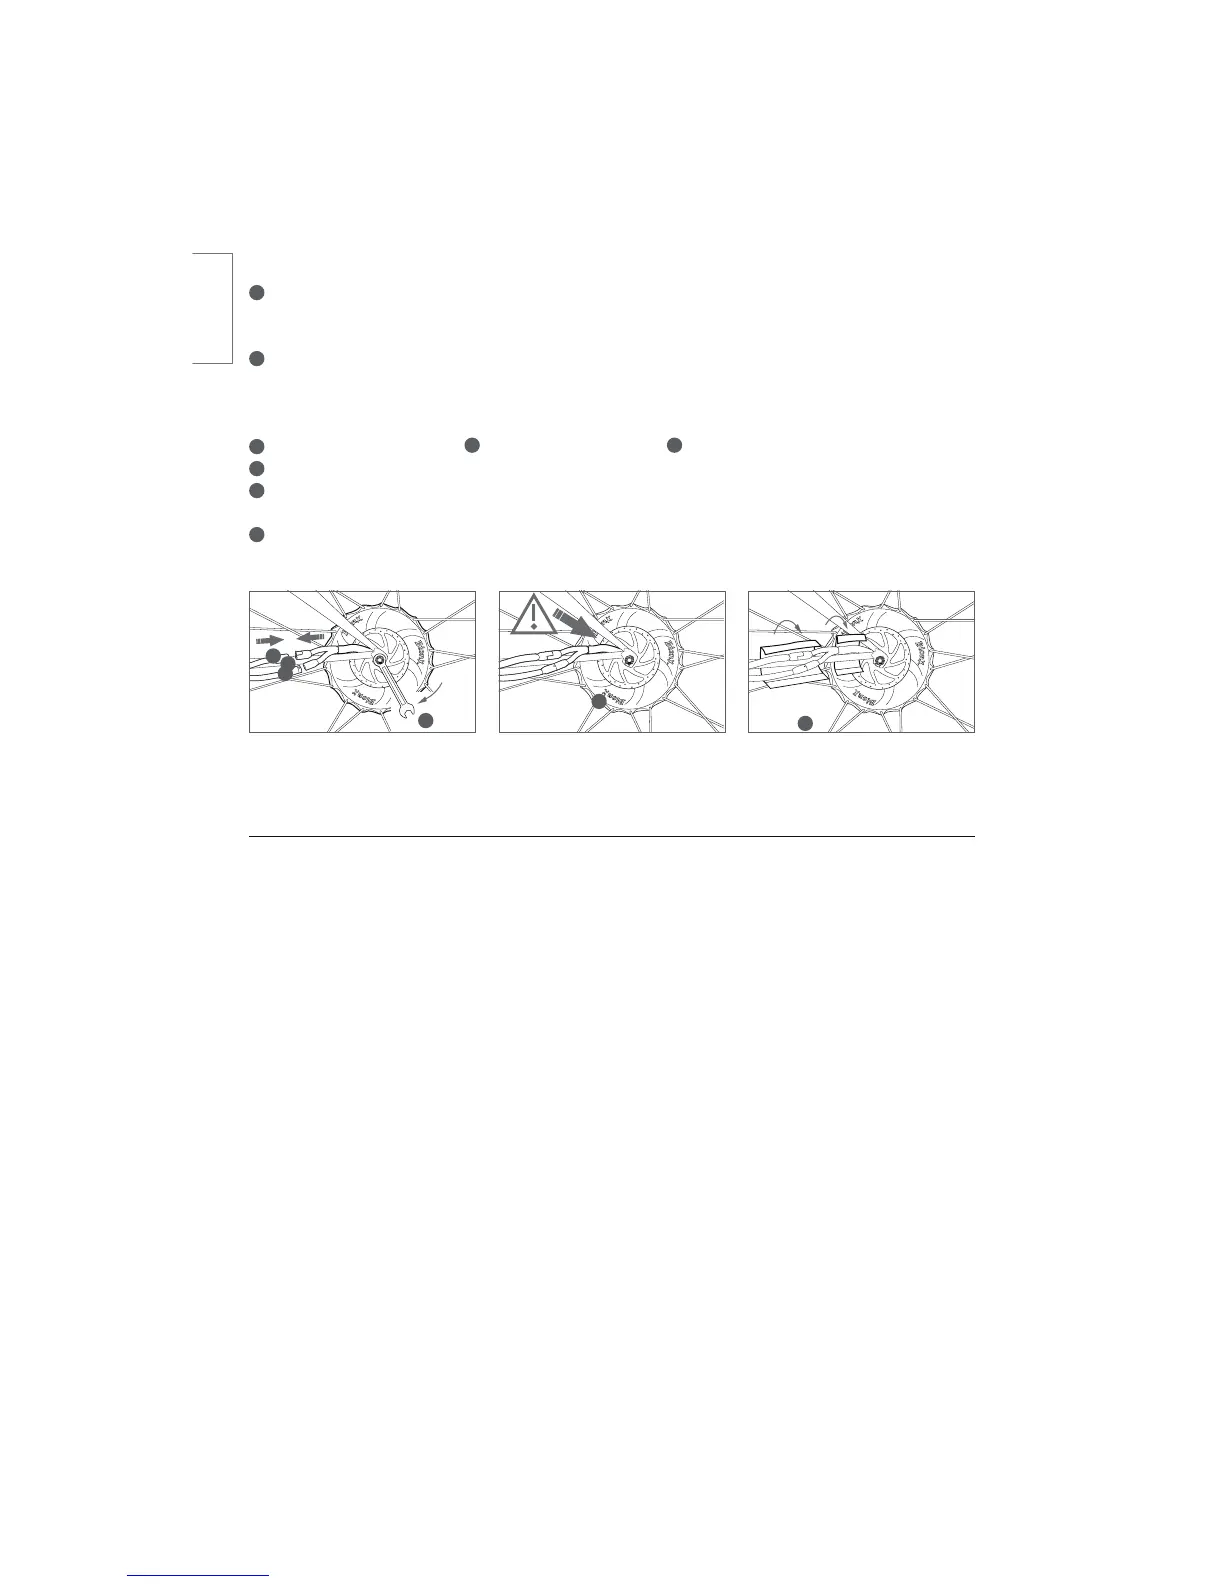
1
(VJEFUIFSFBSXIFFMBYMFJOUPUIFESPQPVUTBOEFOTVSFUIBUUIFCSBLFEJTDPONPEFMTXJUIEJTD
CSBLFTJTJOTFSUFECFUXFFOUIFCSBLFQBET&OTVSFUIBUUIFUPSRVFSFBDUJPODPMMBSJTBMJHOFETPUIBUJU
mUTJOUPUIFMFGUESPQPVUOPJMMVTUSBUJPO.BLFTVSFUIFBYMFJTJOTFSUFEBMMUIFXBZJOUPUIFESPQPVUT
2
5JHIUFOUIFBYMFOVUTUP/NMCGU7&3:5*()55IJTUPSRVFJTFTTFOUJBMGPSUIFDPSSFDUGVOD-
tion of the propulsion system. If you do not have a torque wrench, use a normal wrench, and then
IBWFZPVSEFBMFSDIFDLUIFUPSRVFPGUIFBYMFOVUTBTTPPOBTQPTTJCMF6TFPOMZUIFPSJHJOBMBYMFOVUT
otherwise you run the risk of damaging the axle threads
3
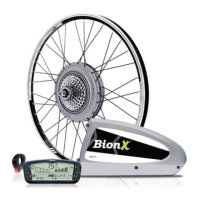
$POOFDUUIFDBCMFT108&3
A
CFGPSF$0..6/*$"5*0/
B
4
,FFQUIFNPUPSDBCMFTDMFBSPGUIFCSBLFEJTDPONPEFMTXJUIEJTDCSBLFTBOEUIFNPUPSDBTJOH
5
3FJOTUBMMUIFDBCMFPGUIFSFBSXIFFMCSBLFSJNCSBLFTPOMZBOEDPSSFDUMZBEKVTUUIFSFBSXIFFMCSBLF
OPJMMVTUSBUJPO
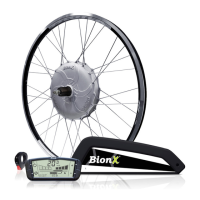
6
Place the larger neoprene cover over the plug-in connections, and the smaller neoprene cover closer to
UIFEJTDNPUPSUPQSFWFOUUIFDBCMFTGSPNDPOUBDUJOHBOZNPWJOHQPSUJPOTPGUIFNPUPS
Maintenance and Care
We recommend to have the spoke tension of the rear wheel and the torque of all screws checked by a
RVBMJmFEEFBMFSBGUFSUIFmSTULNNJMFT
In order to ensure extended use of the propulsion system, all plug-in contacts of the system should be
checked every two to three months and cleaned with a soft and dry brush, if necessary. It must be ensured
that no dirt or humidity penetrates the battery docking station when the battery is removed. The BionX
motor does not require maintenance.
15mm
40Nm